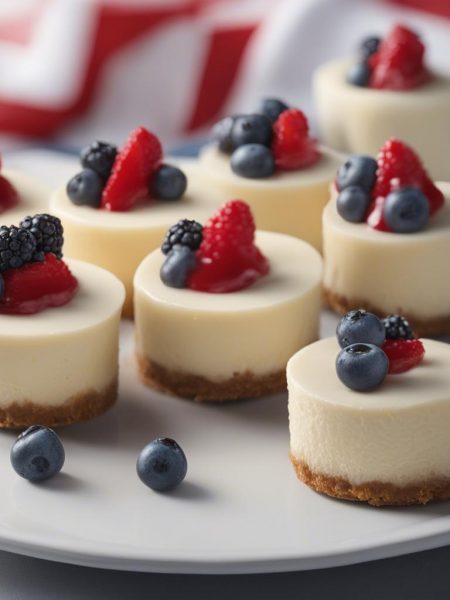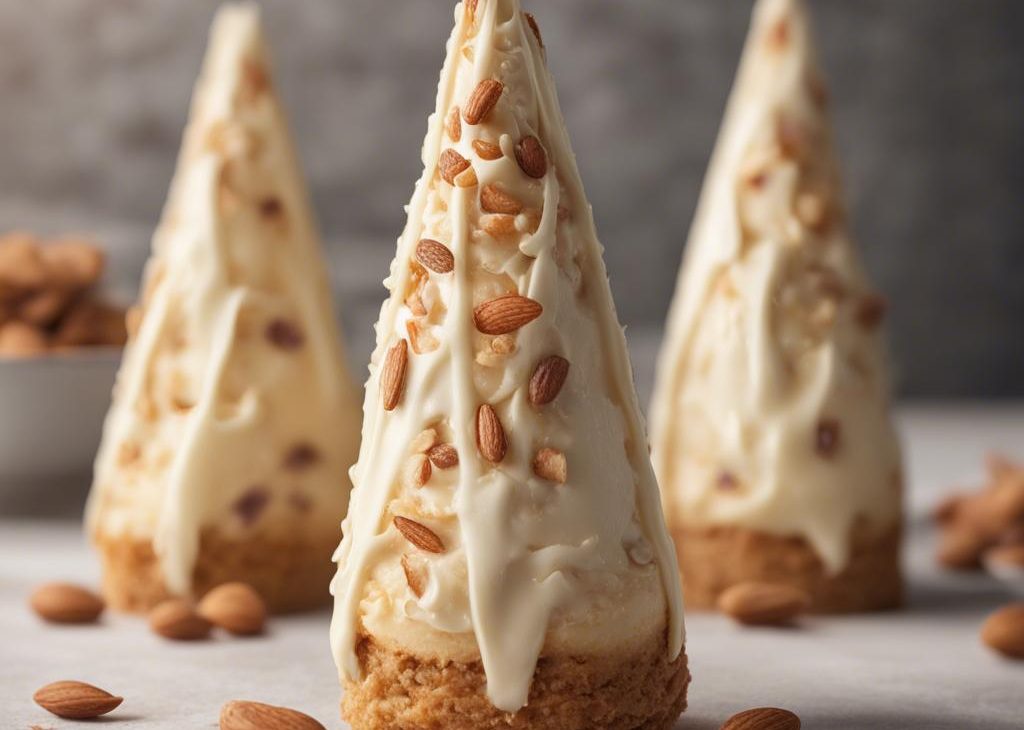

I make Cheesecake almond cones when I want a bite-size dessert that looks more complicated than it feels. The cone batter cooks in a waffle iron, then the cream cheese filling gets piped in after the shells cool.
The first batch taught me to work quickly. Warm almond cones bend; cool ones snap. I keep a small spatula and a cone form ready before the batter touches the iron.
These are sweet, creamy, and a little nutty. I like them for dessert trays because people can pick one up without needing a fork.
Why I keep coming back to this
- It respects the source. I keep the listed amounts and times close, then focus on clean prep and better pacing.
- The flavor has a clear direction. Cheesecake almond cones tastes best when the main ingredient is not buried under random extras.
- I can prep in stages. Measuring, chopping, chilling, or cooling ahead makes the final cooking feel calm.
- The texture is easy to read. I watch for bubbling, crisp edges, a set center, or glossy dressing instead of trusting the clock blindly.
- It scales with care. If I make more, I use a wider pan or extra bowl rather than piling everything deeper.
- Leftovers are manageable. I know how to store it without ruining the best part of the dish.
What you need and why it matters
- 1/3 cup light corn syrup.
- 1/3 cup sugar.
- 1/3 cup softened butter.
- 1/2 cup all-purpose flour. This gives structure, so I keep the amount steady and do not overwork it.
- 8 oz cream cheese (softened). This brings richness and salt; I keep the temperature gentle so it melts or blends smoothly.
- 2 tablespoons salted butter (softened).
- 1/2 tablespoon vanilla extract. This makes the dish taste finished rather than flat, even though the amount is small.
- 3/4 cup powdered sugar.
How I make it
Step 1 — Preheat the oven
I preheat the waffle iron to medium, then mix 1/3 cup light corn syrup, 1/3 cup sugar, 1/3 cup sliced almonds, and 1/3 cup softened butter. I take a minute here to clear the counter because rushing the first step usually costs me time later.
Step 2 — Stir the flour
I stir in 1/2 cup flour until the dough is soft and cohesive.
Step 3 — Build the flavor
I grease the waffle iron, cook tablespoon-size portions for 2-3 minutes, and shape each warm piece into a cone before it firms.
Step 4 — Beat until smooth
I beat 8 oz cream cheese with 2 tablespoons salted butter and 1/2 tablespoon vanilla until fluffy, then beat in 3/4 cup powdered sugar.
Step 5 — Serve
I pipe the cheesecake filling into the cooled cones and serve them soon after filling so the shells stay crisp. I do the last visual check before serving, because that is when small fixes are easiest.
Tips from my kitchen
- Shape each cone while it is still warm; waiting even 30 seconds can make it crack.
- I cool the shells completely before filling so the cream cheese does not slump.
- A small piping bag gives cleaner cones than a spoon.
- If the first shell is pale, I cook the next one 30 seconds longer instead of raising the heat hard.
Variations I have actually tried
- Dip: the cone rims in melted chocolate and let them set before filling.
- Add: 1/4 teaspoon almond extract to the filling for a stronger almond note.
- Fold: mini chocolate chips into the cheesecake filling.
- Dust: the filled cones with cocoa powder instead of extra sugar.
- Use: orange zest in the filling for a brighter finish.
Storing and reheating
I store empty cones airtight at room temperature for 1 day and the filling covered in the refrigerator. Once filled, they are best within a few hours because the shells soften.
If the dish has a crisp top or crust, I reheat it uncovered in the oven or air fryer. If it is creamy, saucy, or chilled, I use gentle heat and stop as soon as it loosens. That small choice keeps leftovers from tasting like a different recipe.
What I serve with it
I set these in small glasses or a cone stand so the filling stays upright. Coffee, berries, and a few salted nuts balance the sweetness.
Small checks that make the difference
I do not treat the printed time as the only signal. I look at color, thickness, steam, and how the food moves when I nudge it. That habit has saved me from pale fried food, loose cheesecake filling, watery salad, and sauce that needed one more minute. The recipe still stays simple; I just give myself permission to observe before calling it done.
I also check the serving dish before the final step. Warm foods go onto a warm plate when I can manage it, cold salads go into a chilled bowl, and fried pieces get a rack or paper towel instead of a flat plate that traps steam. None of that changes the ingredient list, but it changes how the first bite lands.
If something tastes muted, I do not automatically add more of everything. I ask whether it needs salt, acid, heat, or rest. Salt sharpens, acid wakes up richness, heat should stay in the background unless the dish is meant to be spicy, and rest lets dairy, crumbs, or dressing settle. That little pause is usually enough.
I keep a clean spoon or small fork nearby for tasting, even with simple recipes. It sounds obvious, but it stops me from seasoning by habit. Some cheeses are saltier, some dressings are sweeter, and some cocoa powders taste darker than others. A quick taste keeps the recipe grounded in the actual ingredients on my counter.
When I write the recipe down for myself, I note the pan, bowl, or skillet that worked best. Size matters more than it gets credit for. Crowding traps moisture, shallow pans brown faster, and tall pans need patience. Remembering that detail helps me repeat the same result the next time.
I would rather slow down for two minutes than fix a rushed mistake for twenty. That is especially true with dairy, chocolate, fried coatings, and salads. Gentle heat, dry greens, chilled centers, and a rested cake all come from paying attention before the recipe looks finished.
I keep that habit even on busy nights, because a calm finish makes the dish taste more deliberate, more useful, and easier to repeat later.
Frequently asked questions
Can I make it ahead?
Yes. I prep the parts that can sit without losing texture, then finish the hot, crisp, or dressed step close to serving.
Can I change the seasoning?
Yes, but I change one direction at a time. I add heat, herbs, or extra garlic separately so the main flavor still comes through.
How do I keep the texture right?
I follow the visual cues more than the clock. If the center is loose, the coating is pale, or the sauce is thin, I give it more time.
What should I do with leftovers?
I cool leftovers quickly and cover them tightly. Crisp foods go back in the oven; creamy foods get gentle heat and a stir.
Can I double the recipe?
Usually, yes. I use a wider pan or two pans instead of making one deep pan, because extra depth changes cooking time.
If you make Cheesecake almond cones, tell me what you changed or what you served with it; I always like hearing the practical kitchen notes.
Cheesecake almond cones
Description
I make cheesecake almond cones when I want a bite-size dessert that looks more complicated than it feels. The cone batter cooks in a waffle iron, then the cream cheese filling gets piped in after the shells cool. I keep the method practical, preserve the source quantities, and point out the texture cues I use at home.
Ingredients You’ll Need
Instructions
- I preheat the waffle iron to medium, then mix 1/3 cup light corn syrup, 1/3 cup sugar, 1/3 cup sliced almonds, and 1/3 cup softened butter.
- I stir in 1/2 cup flour until the dough is soft and cohesive.
- I grease the waffle iron, cook tablespoon-size portions for 2-3 minutes, and shape each warm piece into a cone before it firms.
- I beat 8 oz cream cheese with 2 tablespoons salted butter and 1/2 tablespoon vanilla until fluffy, then beat in 3/4 cup powdered sugar.
- I pipe the cheesecake filling into the cooled cones and serve them soon after filling so the shells stay crisp.
Note
Shape each cone while it is still warm; waiting even 30 seconds can make it crack.
I cool the shells completely before filling so the cream cheese does not slump.
A small piping bag gives cleaner cones than a spoon.
If the first shell is pale, I cook the next one 30 seconds longer instead of raising the heat hard.
Frequently Asked Questions
Yes. I prep the parts that can sit without losing texture, then finish the hot, crisp, or dressed step close to serving.
Yes, but I change one direction at a time. I add heat, herbs, or extra garlic separately so the main flavor still comes through.
I follow the visual cues more than the clock. If the center is loose, the coating is pale, or the sauce is thin, I give it more time.
I cool leftovers quickly and cover them tightly. Crisp foods go back in the oven; creamy foods get gentle heat and a stir.
Usually, yes. I use a wider pan or two pans instead of making one deep pan, because extra depth changes cooking time.
You may also like...