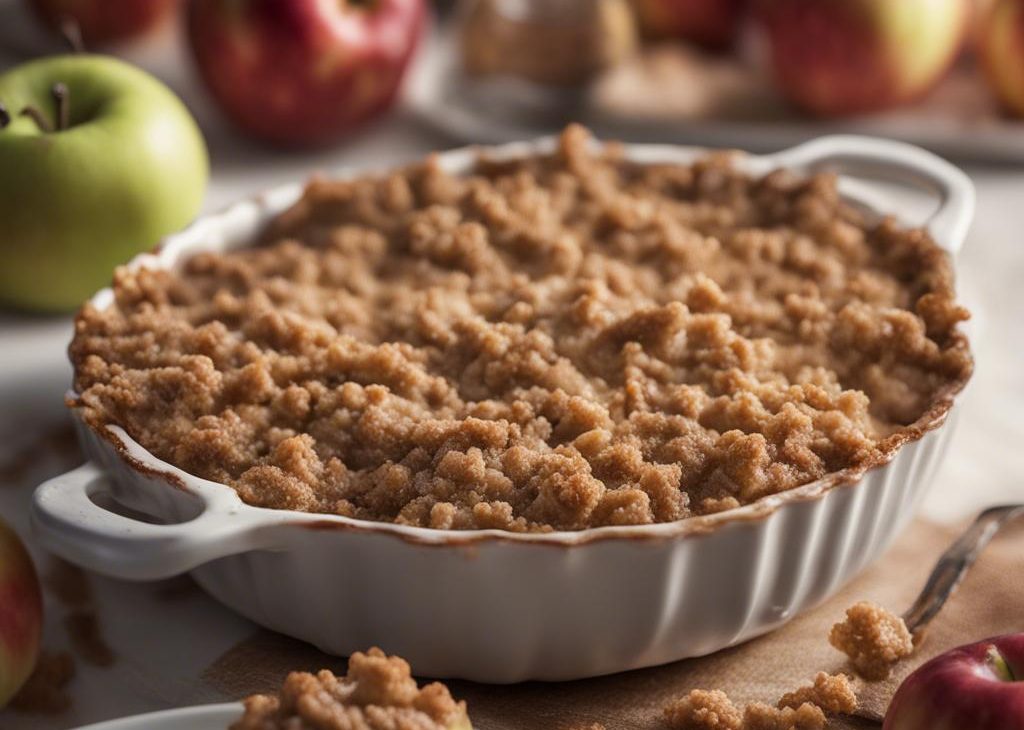

I make Classic apple crisp when I want apple pie flavor without rolling dough. The apples go straight into a 9×13-inch pan, the topping gets mixed in a bowl, and the oven does the work.
The best bite has soft apples, bubbling juices, and a rough oat crumb that stays a little craggy. I like it warm, but I have also eaten it cold from the refrigerator with no regrets.
I have written the method with the exact temperatures, pan sizes, and timing cues I rely on. I would rather tell you where a recipe can get awkward than pretend every bowl behaves the same.
Why I keep coming back to this
- It gives me the main flavor I want from Classic apple crisp without adding unnecessary steps.
- The ingredient list is practical, and I can set everything out before I preheat or start the pan.
- The texture has clear doneness cues, which makes the recipe easier to repeat.
- Leftovers are useful instead of sad, especially when I store them the right way.
- The recipe takes well to small changes, but the base version is reliable.
- It feels homemade in a way that is specific, not fussy.
What you need (and what each one is doing)
- 8 medium peeled apples, cut into 1-inch chunks that are 1/4-1/2 inch thick. about 10 cups or 1200g chunks. so the mixing goes smoothly.
- 1/2 cup granulated sugar. 100g. so the mixing goes smoothly.
- 1/4 cup all-purpose flour. 31g; for filling. so the mixing goes smoothly.
- 1 teaspoon pure vanilla extract. so the mixing goes smoothly. It rounds out the sweetness so the recipe does not taste one-dimensional.
- 1 teaspoon ground cinnamon. for filling. so the mixing goes smoothly.
- 1/2 teaspoon ground nutmeg. so the mixing goes smoothly. I toast them briefly in a dry skillet to deepen their flavor before adding.
- 1/4 teaspoon salt. so the mixing goes smoothly.
- 3/4 cup all-purpose flour. 94g; for topping. so the mixing goes smoothly.
- 3/4 cup packed brown sugar. 150g. so the mixing goes smoothly.
- 1 teaspoon ground cinnamon. for topping. so the mixing goes smoothly.
- 1/2 cup unsalted butter, cold and cubed. 8 Tbsp; 113g. so the mixing goes smoothly.
- 1 cup old-fashioned rolled oats. 85g. so the mixing goes smoothly. Whole rolled oats give the best chew; quick oats turn soft too fast.
- salted caramel and vanilla ice cream. optional, for serving. so the mixing goes smoothly.
How I make it
Step 1 — Prepare the pan
I preheat the oven to 350°F (177°C). Lightly grease a 9×13-inch baking pan or any 3.5-4-quart baking dish.
Step 2 — Mix the apples granulated
I mix apples, granulated sugar, 1/4 cup flour, vanilla, 1 teaspoon cinnamon, nutmeg, and salt in a large bowl.
Step 3 — Spread the filling
I spread the apple filling evenly into the prepared baking pan.
Step 4 — Whisk together
I whisk 3/4 cup flour, brown sugar, and 1 teaspoon cinnamon in a medium bowl.
Step 5 — Cut in the butter
I cut in the cold butter with a pastry cutter or fork until the mixture is crumbly, then stir in the oats.
Step 6 — Bake
I sprinkle the topping over the apples and bake for 45 minutes, until the topping is golden and juices bubble at the edges.
Step 7 — Serve
I cool on a wire rack for at least 5 minutes, then serve warm, room temperature, or cold with caramel or vanilla ice cream if desired.
Timing and texture cues I watch for
I do not rely only on the timer. I watch the color, the smell, and the way the center responds because ovens and pans are never as identical as recipes pretend. If something looks done a few minutes early, I check it; if it still looks loose, I give it the extra time it needs.
Before I start, I read through the full method and pull out the pan, bowls, measuring cups, and cooling rack. That sounds basic, but it prevents the kind of scrambling that leads to missed salt, overheated chocolate, overworked batter, or noodles that sit too long. I would rather spend two quiet minutes setting up than fix a rushed mistake later.
I also try to respect the cooling or resting time even when the kitchen smells good. Warm food is tempting, but many recipes finish setting after the heat turns off. Slices cut cleaner, frosting stays put, crumbs settle, and broths taste rounder when I give them the pause written into the method.
If I am cooking for company, I make the recipe once exactly as written before changing it. After that, I know which parts can bend and which parts should stay alone. It is the easiest way I have found to keep a reliable base recipe while still making room for my own pantry and taste.
The other cue I trust is how the recipe behaves the next time I make it. If a batter feels thicker than usual, if a dough warms too fast, or if a pot reduces harder than expected, I slow down and adjust gently instead of forcing the clock. A familiar recipe still deserves attention, and that attention is what makes the repeat batches better.
I write those observations down when a recipe earns a repeat spot. A short note about pan color, chill time, or salt level saves me from relearning the same lesson months later.
Tips from my kitchen
- I cut apples fairly evenly so the thin pieces do not collapse while thick pieces stay firm.
- Cold butter makes a better crumb topping than melted butter here.
- I wait for bubbling around the edges; color on top alone does not tell me the apples are tender.
- A mix of tart and sweet apples gives the filling more depth than one variety.
Variations I have actually tried
- Pear apple crisp: replace 2 apples with firm pears.
- Cranberry apple: add 1 cup fresh cranberries to the filling.
- Nut topping: stir 1/2 cup chopped pecans into the oat mixture.
- Maple finish: drizzle maple syrup over warm servings.
- Extra spice: add a pinch of cardamom to the filling.
Storing and reheating
I cover leftovers and refrigerate them for up to 5 days. To reheat, I use a 325°F (163°C) oven until warm, or the microwave when I care more about speed than crisp topping.
What I serve with it
Warm apple crisp with vanilla ice cream is the obvious route. I also like it with plain Greek yogurt the next morning, which makes breakfast feel slightly mischievous.
Frequently asked questions
Which apples should I use?
I like a mix of Granny Smith and Honeycrisp because tart and sweet apples balance each other. Any firm baking apple works.
Can I leave the peels on?
Yes, though the texture is more rustic. I peel them when I want a softer filling and leave some peel on when I am short on time.
Can I make it ahead?
I assemble the filling and topping separately, then add the topping right before baking so it stays crumbly.
Why is my filling watery?
It may need a few more minutes in the oven, or the apples were very juicy. Letting the crisp rest helps the juices thicken.
How long do leftovers keep?
Covered leftovers keep in the refrigerator for up to 5 days. I reheat servings uncovered so the topping wakes up a little.
If you make this Classic apple crisp, I would love to hear what variation you tried and what you served with it.
Classic apple crisp
Description
Classic apple crisp is the way I make this recipe at home, with the source amounts preserved and the method rewritten in my own kitchen voice. I include the cues I watch for so the texture, timing, and storage are easy to manage.
Ingredients You’ll Need
Instructions
- Preheat the oven to 350°F (177°C). Lightly grease a 9x13-inch baking pan or any 3.5-4-quart baking dish.
- Mix apples, granulated sugar, 1/4 cup flour, vanilla, 1 teaspoon cinnamon, nutmeg, and salt in a large bowl.
- Spread the apple filling evenly into the prepared baking pan.
- Whisk 3/4 cup flour, brown sugar, and 1 teaspoon cinnamon in a medium bowl.
- Cut in the cold butter with a pastry cutter or fork until the mixture is crumbly, then stir in the oats.
- Sprinkle the topping over the apples and bake for 45 minutes, until the topping is golden and juices bubble at the edges.
- Cool on a wire rack for at least 5 minutes, then serve warm, room temperature, or cold with caramel or vanilla ice cream if desired.
Nutrition Facts
Servings 8
- Amount Per Serving
- Calories 284kcal
- % Daily Value *
- Total Fat 12g19%
- Saturated Fat 7g35%
- Trans Fat 0.5g
- Cholesterol 31mg11%
- Sodium 62mg3%
- Potassium 53mg2%
- Total Carbohydrate 43g15%
- Dietary Fiber 2g8%
- Sugars 32g
- Protein 2g4%
- Calcium 17 mg
- Iron 0.7 mg
* Percent Daily Values are based on a 2,000 calorie diet. Your daily value may be higher or lower depending on your calorie needs.
Note
I cut apples fairly evenly so the thin pieces do not collapse while thick pieces stay firm..
Cold butter makes a better crumb topping than melted butter here..
I wait for bubbling around the edges; color on top alone does not tell me the apples are tender..
A mix of tart and sweet apples gives the filling more depth than one variety..
Frequently Asked Questions
I like a mix of Granny Smith and Honeycrisp because tart and sweet apples balance each other. Any firm baking apple works.
Yes, though the texture is more rustic. I peel them when I want a softer filling and leave some peel on when I am short on time.
I assemble the filling and topping separately, then add the topping right before baking so it stays crumbly.
It may need a few more minutes in the oven, or the apples were very juicy. Letting the crisp rest helps the juices thicken.
Covered leftovers keep in the refrigerator for up to 5 days. I reheat servings uncovered so the topping wakes up a little.
You may also like...