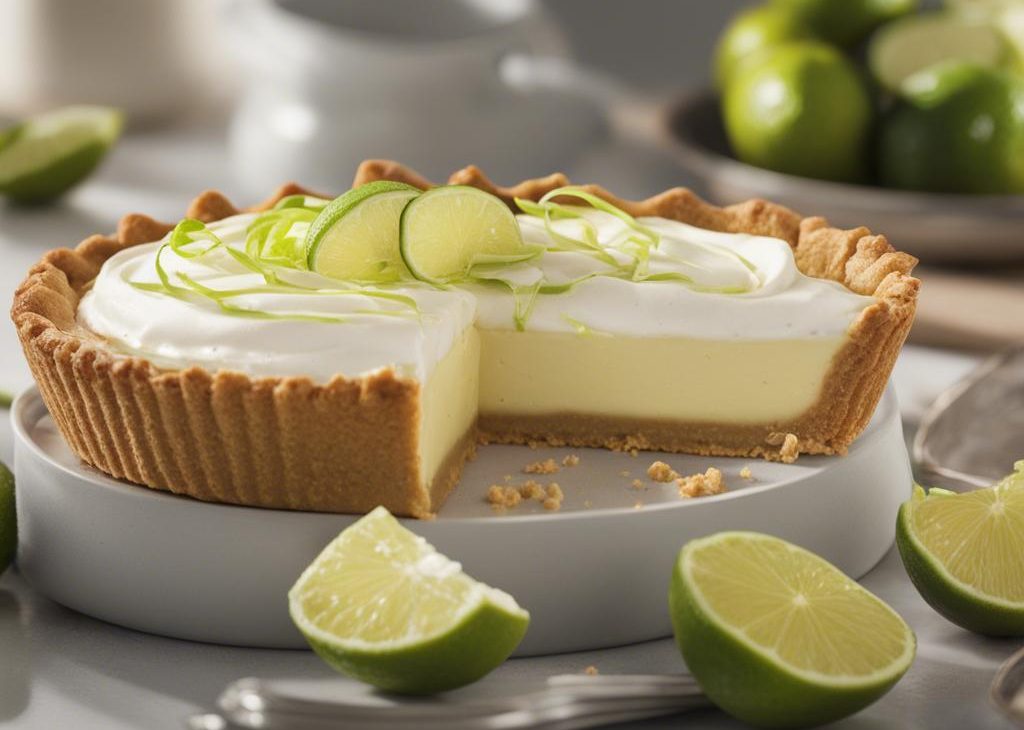
Craving a slice of summer? Look no further than the Costco Key Lime Pie recipe! This dessert is a refreshing blend of tart and sweet flavors, reminiscent of warm breezy days at the beach. What was once a beloved secret available only to Costco members has now become a recipe you can replicate in your kitchen.
This recipe captures the essence of the iconic Costco Key Lime Pie, with its creamy filling, crumbly graham cracker crust, and zesty lime flavor. Whether you’re hosting a summer barbecue or just need a quick dessert fix, this pie is sure to hit the spot. Let’s dive into how you can create this heavenly dessert at home.
What is Costco’s key lime pie?
Costco Key Lime Pie is a classic dessert that has delighted customers for years. The creamy filling, made with sweetened condensed milk and egg yolks, is nestled in a graham cracker crust and topped with a zesty lime topping. This tart yet sweet treat has become an iconic staple of the Costco bakery section.
Why You’ll Love this Costco key lime pie?
This copycat recipe for Costco Key Lime Pie is sure to please your taste buds. The tart yet sweet flavor of the lime filling pairs perfectly with the crunchy graham cracker crust, and the zesty topping adds a delightful finishing touch. You’ll love the creamy texture of the custard-like filling, and how it complements the buttery graham cracker crust.
Plus, this recipe comes together quickly and easily. You don’t need any special equipment or skills to make it – just a few simple ingredients and a little bit of patience. So if you’re after an impressive dessert that tastes like summer in a slice, this recipe is for you.
Ingredients
Directions
Step 1: Preheat the Oven and Prepare the Pie Pan
- Preheat your oven to 350°F (175°C) to ensure it’s ready for baking.
- Grease a 9-inch (23 cm) pie pan with a generous amount of butter to prevent sticking. Set the prepared pan aside for later use.
Step 2: Create the Graham Cracker Crust
- Begin by crafting the delectable graham cracker crust.
- In a mixing bowl, combine graham cracker crumbs, sugar, melted butter, and freshly grated lime zest.
- Thoroughly blend these ingredients until they form a cohesive mixture.
Step 3: Press the Crust into the Pie Pan
- With your well-prepared crust mixture in hand, press it evenly into the bottom and up the sides of the greased pie pan.
- This creates the foundation for your key lime pie.
Step 4: Bake the Crust to Golden Perfection
- Place the pie pan with the crust in the preheated oven and bake for approximately 10 minutes.
- Keep a close eye on it until the crust achieves a lightly golden brown hue.
- After baking, allow the crust to cool down to room temperature before proceeding.
Step 5: Prepare the Creamy Filling
- Transition your focus to crafting the luscious filling for your key lime pie.
- In a separate bowl, combine sweetened condensed milk, sour cream, freshly squeezed key lime juice, and more grated lime zest.
- Using a whisk, diligently blend these ingredients until they meld together, creating a creamy, tangy mixture.
Step 6: Pour and Bake the Filling
- With the filling mixture ready, pour it gently into the cooled crust, evenly distributing it.
- Return the pie pan to the oven and bake for approximately 15 minutes. Monitor the pie closely until the center is no longer jiggly, indicating that it has set to perfection.
Step 7: Cool and Chill for Optimal Flavor
- Once your key lime pie has finished baking, remove it from the oven and allow it to cool down to room temperature.
- Afterward, transfer the pie to the refrigerator, where it should chill for a minimum of 4 hours. This cooling period allows the flavors to meld and the pie to achieve its deliciously creamy consistency.
Notes and Tips
- You can use regular limes instead of key limes if needed. The flavor will be slightly different, but still delicious.
- If you don’t have graham crackers on hand, you can also use crushed digestive biscuits or vanilla wafers for the crust.
- To make sure your pie is perfectly tart and sweet, make sure to adjust the sugar and lime juice amounts if needed.
Storage Tips
This Costco Key Lime Pie will last in the refrigerator for up to three days. To extend its shelf life, store it in an air-tight container or wrap it tightly with plastic wrap. The pie also freezes well for up to 3 months. Wrap each slice tightly before storing it in the freezer and let thaw overnight before serving.
Nutrition Information
Serving Suggestions
This Costco Key Lime Pie is the perfect summertime dessert. Serve it with a dollop of freshly whipped cream and a sprinkle of lime zest for an extra special touch. You can also add a scoop of vanilla ice cream or top it with some toasted coconut flakes for a tropical twist. Add a splash of tequila or rum to the mix if you’re feeling extra adventurous. No matter how you serve it, this pie is sure to be the star of the show!
What other substitute can I use in Costco key lime pie?
- If key limes are unavailable or not your preference, various lime alternatives can be used.
- The most common substitute is regular Persian limes, which work perfectly in this recipe.
- For a unique twist, consider using Meyer lemons, calamansi limes, or even oranges as substitutes.
- When substituting, adjust the quantity of sugar and juice in the recipe to achieve your desired balance of sweetness and tartness.
Conclusion
There you have it, a delicious homemade version of the iconic Costco Key Lime Pie. With just a few simple ingredients and steps, you can recreate this classic summertime dessert in your kitchen. Whether you’re hosting a party or need an everyday sweet fix, your friends and family are sure to love this tart and tangy treat. So go ahead and whip up a batch of this dreamy dessert and savor the flavor of summer!
Also, please let us know in the comments if you have any questions or suggestions for other recipes. We’d love to hear from you!

Costco Key Lime Pie Recipe
Description
Craving a slice of summer? Look no further than the Costco Key Lime Pie recipe! This dessert is a refreshing blend of tart and sweet flavors, reminiscent of warm breezy days at the beach.
Ingredients You’ll Need
Instructions
- Preheat oven to 350°F (175°C).
- Mix crumbs, sugar, and melted butter; press into a 9-inch pie plate.
- Bake crust for 10 mins; let it cool.
- Combine sweetened condensed milk, sour cream, lime juice, and zest.
- Pour the lime mixture into the crust.
- Bake for 5-8 mins; avoid browning.
- Chill before serving. Optionally, garnish with cream and lime slices.
Frequently Asked Questions
Yes, you can make a healthier version of Key Lime Pie by using alternative ingredients. For instance, you can use a low-fat or dairy-free substitute for sweetened condensed milk and opt for a lighter whipped topping. You can also reduce the amount of added sugar or use natural sweeteners like honey or maple syrup.
To boost the nutritional value of your Key Lime Pie, consider adding fresh fruit, such as berries or kiwi, as a topping. This will add vitamins, minerals, and dietary fiber to the dessert.
Key Lime Pie can be adapted to accommodate certain dietary restrictions. For example, you can make it gluten-free by using a gluten-free graham cracker crust, and you can make it dairy-free by using non-dairy alternatives for sweetened condensed milk and whipped cream.

