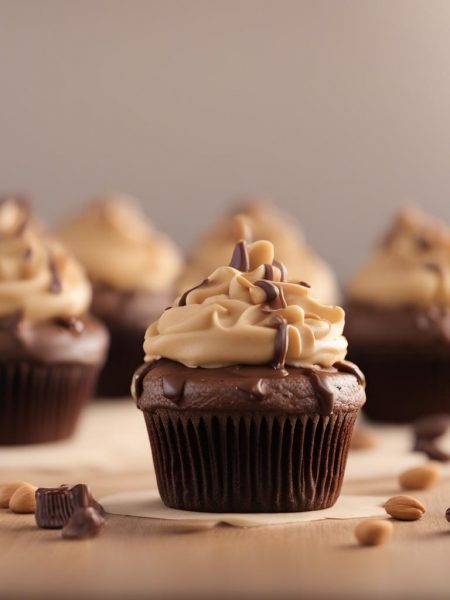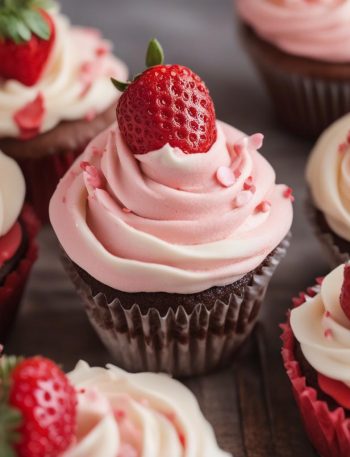

I make Death by Chocolate Cupcakes when I want something that feels homemade without pretending the little details do not matter.
What keeps me coming back is how semi-sweet baking chocolate, unsweetened cocoa powder, all-purpose flour carry the flavor. I measure first, clear space, and then work through the steps without trying to rush the part that needs patience.
Why I keep coming back to this
- I can taste the main ingredients clearly.
- The steps give me visual checkpoints instead of guesswork.
- The leftovers still feel like something I meant to make.
- I can measure everything before I start and then work calmly.
- Small swaps work without changing the whole personality of the recipe.
- The smell while it cooks is the nudge that brings people into the kitchen.
What you need (and what each one is doing)
- 1/2 cup unsalted butter (8 Tbsp; 113g).
- 2 ounces semi-sweet baking chocolate.
- 1/2 cup unsweetened cocoa powder (41g).
- 3/4 cup all-purpose flour (94g).
- 1/2 teaspoon baking soda.
- 3/4 teaspoon baking powder.
- 1/4 teaspoon salt.
- 2 large eggs, at room temperature.
- 1/2 cup granulated sugar (100g).
- 1/4 cup packed brown sugar (50g).
- 1 teaspoon pure vanilla extract.
- 1/2 cup buttermilk (120ml).
- 2 3/4 cups confectioners sugar (330g).
- 2/3 cup unsweetened cocoa powder (55g).
- 6 Tablespoons unsalted butter, softened (85g).
- 6 Tablespoons heavy cream (95ml).
- 1 teaspoon pure vanilla extract.
- 1/3 cup semi-sweet chocolate chips (60g; optional topping).
How I make it
Step 1 — Set up the pan and oven
Preheat the oven to 350°F (177°C). Line a 12-count cupcake pan with cupcake liners. Set aside.
Step 2 — Microwave
Melt the butter and chocolate together in the microwave. Microwave in 30 second increments, stirring between each time. You may also melt the butter and chocolate over low heat on the stovetop. Stir until smooth and set aside to slightly cool.
Step 3 — Whisk together
In a medium sized bowl, toss the cocoa powder, flour, baking soda, baking powder, and salt together until thoroughly combined. Set aside. In a large bowl, whisk the eggs, sugar, brown sugar, and vanilla together until smooth. Add the cooled butter/chocolate and whisk until smooth. Add half of the flour mixture, then half of the buttermilk. Repeat until everything is added. Stir until *just* combined; do not overmix. The batter will be very thick like pudding.
Step 4 — Bake
Fill the cupcake liners 2/3 of the way full with batter. Bake for 18 minutes, or until a toothpick inserted in the center comes out clean. Allow to cool completely before frosting.
Step 5 — Whisk the dry ingredients
Sift together the confectioners’ sugar and cocoa powder to assure there are no lumps. Set aside. With a handheld or stand mixer fitted with a paddle attachment, beat the butter on medium speed until creamy—about 2 minutes. Gradually add the sifted sugar/cocoa powder alternately with the heavy cream and vanilla. Beat on low speed after each addition. Once all added, beat on high speed until creamy and combined for at least 2 minutes. Add a pinch of salt if frosting is too sweet.
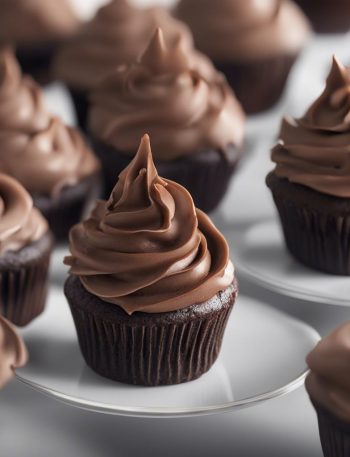
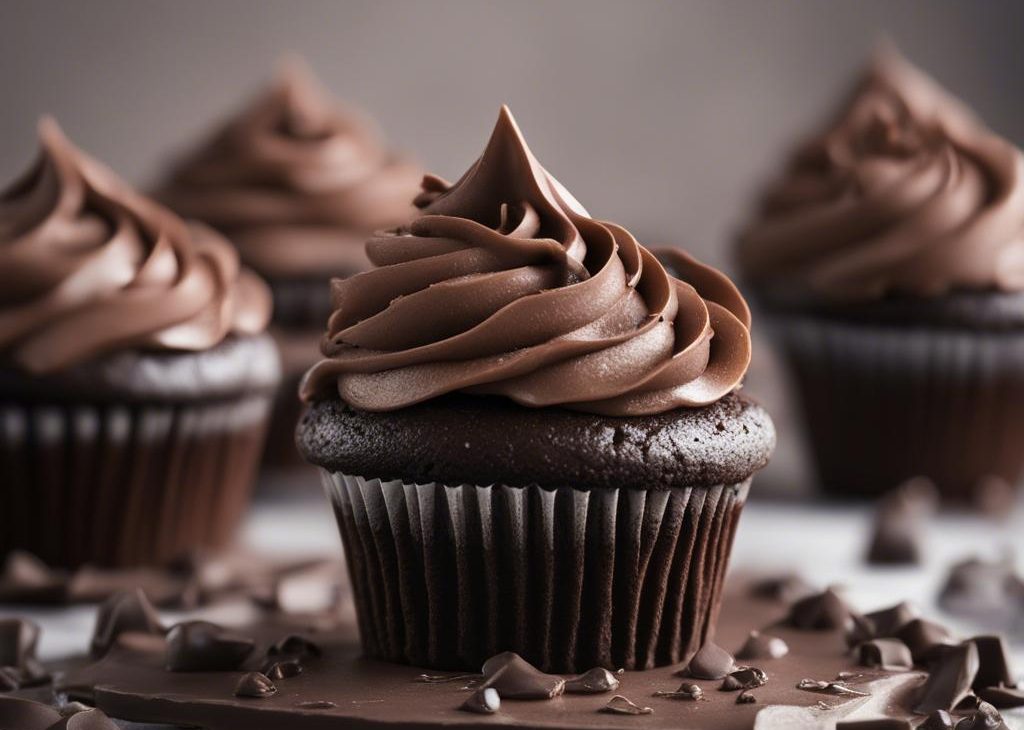
Step 6 — Frost the cake
Frost cooled cupcakes and top with chocolate chips as desired. Cupcakes stay fresh at room temperature in an airtight container for up to 4 days. Store covered in the refrigerator is desired for up to 1 week.
Tips from my kitchen
- Measure flour carefully. Packed flour makes the finished batch heavy.
- Use parchment when you can. I would rather lift cleanly than pry at corners.
- Cool before judging. Many baked goods finish setting after they leave the oven.
- Watch the edges. My oven shows doneness there before the center looks dramatic.
Variations I have actually tried
- Change only the garnish for the easiest variation.
- Use dark chocolate where semi-sweet is listed.
- Add citrus zest when vanilla is already in the batter.
- Swap similar nuts in the same amount.
- Serve rich pieces with barely sweetened cream or yogurt.
Storing and reheating
I cool Death by Chocolate Cupcakes completely before covering it because trapped steam softens the top. Frosted, creamy, or mousse-filled pieces go in the refrigerator; plainer bakes can usually sit airtight at room temperature. For longer storage, I wrap individual portions so I can thaw only what I need.
What I serve it with
I keep the plate simple and let the main texture do the talking.
Frequently asked questions
Can I make this ahead?
Yes. I prep the parts the recipe allows ahead, then finish the final cook or garnish close to serving.
How do I know it is done?
I use the listed cook time of 18 minutes as a guide, then trust the visual cues in the steps.
Can I change the main ingredient?
Usually, but I change one thing at a time so I know what affected the texture.
Why did mine turn out too soft?
Most often it needed more time, more cooling, or a little less crowding in the pan.
Can I freeze leftovers?
Most baked items freeze well wrapped tightly. Crisp or sauced dishes are better refrigerated and reheated uncovered.
If you make this Death by Chocolate Cupcakes, leave a comment with what you changed or what you served with it — I like hearing the practical kitchen notes.
Death by Chocolate Cupcakes
Description
Death by Chocolate Cupcakes made with semi-sweet baking chocolate, unsweetened cocoa powder, all-purpose flour. I kept the source measurements and rewrote the method with practical notes for timing, storage, and variations.
Ingredients You’ll Need
Instructions
- Preheat the oven to 350°F (177°C). Line a 12-count cupcake pan with cupcake liners. Set aside.
- Melt the butter and chocolate together in the microwave. Microwave in 30 second increments, stirring between each time. You may also melt the butter and chocolate over low heat on the stovetop. Stir until smooth and set aside to slightly cool.
- In a medium sized bowl, toss the cocoa powder, flour, baking soda, baking powder, and salt together until thoroughly combined. Set aside. In a large bowl, whisk the eggs, sugar, brown sugar, and vanilla together until smooth. Add the cooled butter/chocolate and whisk until smooth. Add half of the flour mixture, then half of the buttermilk. Repeat until everything is added. Stir until *just* combined; do not overmix. The batter will be very thick like pudding.
- Fill the cupcake liners 2/3 of the way full with batter. Bake for 18 minutes, or until a toothpick inserted in the center comes out clean. Allow to cool completely before frosting.
- Sift together the confectioners' sugar and cocoa powder to assure there are no lumps. Set aside. With a handheld or stand mixer fitted with a paddle attachment, beat the butter on medium speed until creamy—about 2 minutes. Gradually add the sifted sugar/cocoa powder alternately with the heavy cream and vanilla. Beat on low speed after each addition. Once all added, beat on high speed until creamy and combined for at least 2 minutes. Add a pinch of salt if frosting is too sweet.
- Frost cooled cupcakes and top with chocolate chips as desired. Cupcakes stay fresh at room temperature in an airtight container for up to 4 days. Store covered in the refrigerator is desired for up to 1 week.
Nutrition Facts
Servings 12
- Amount Per Serving
- Calories 434kcal
- % Daily Value *
- Total Fat 18g28%
- Saturated Fat 11g56%
- Trans Fat 0.6g
- Cholesterol 44mg15%
- Sodium 149mg7%
- Potassium 117mg4%
- Total Carbohydrate 70g24%
- Dietary Fiber 2g8%
- Sugars 62g
- Protein 2g4%
- Calcium 47 mg
- Iron 1.2 mg
* Percent Daily Values are based on a 2,000 calorie diet. Your daily value may be higher or lower depending on your calorie needs.
Note
Measure flour carefully. Packed flour makes the finished batch heavy.
Use parchment when you can. I would rather lift cleanly than pry at corners.
Cool before judging. Many baked goods finish setting after they leave the oven.
Watch the edges. My oven shows doneness there before the center looks dramatic.
Frequently Asked Questions
Yes. I prep the parts the recipe allows ahead, then finish the final cook or garnish close to serving.
I use the listed cook time of 18 minutes as a guide, then trust the visual cues in the steps.
Usually, but I change one thing at a time so I know what affected the texture.
Most often it needed more time, more cooling, or a little less crowding in the pan.
Most baked items freeze well wrapped tightly. Crisp or sauced dishes are better refrigerated and reheated uncovered.
You may also like...