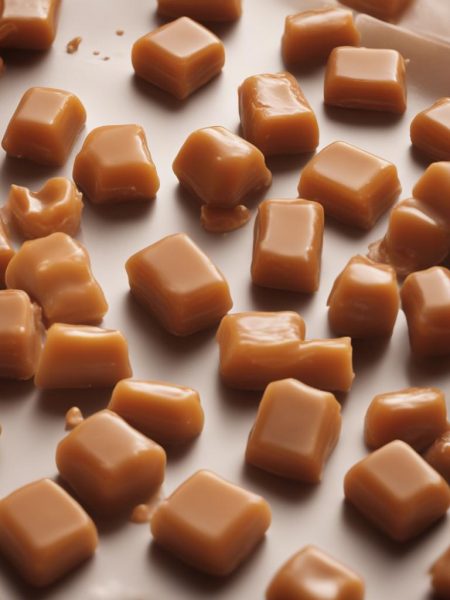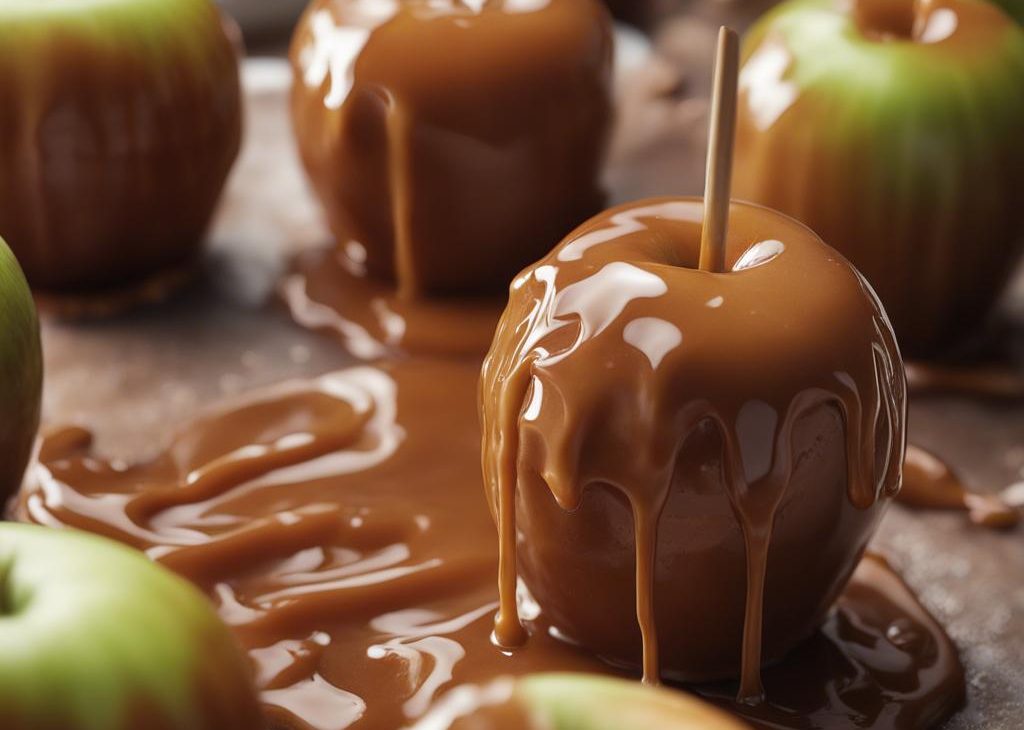

. This from-scratch caramel is buttery, sweet, and if cooked a little longer, is also excellent for soft caramel candies. This festive fall dessert is always fun to make, decorate, serve, and eat!
Fall is in full swing and what better way to celebrate than with a traditional county fair inspired treat?! Besides with a slice apple pie or pumpkin pie, of course.
Real Homemade Caramel Apples
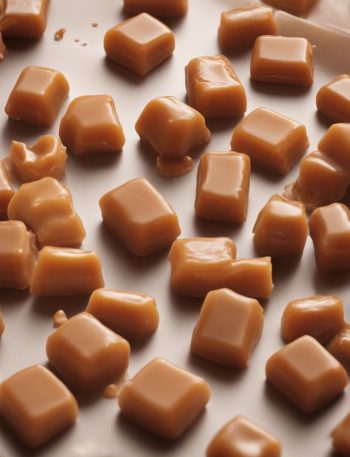
Apple cupcakes with salted caramel frosting are certainly a favorite, but today we’re making real homemade caramel apples with caramel cooked completely from scratch on the stove. No store-bought caramel candies or coatings because you can truly taste the difference between that and homemade. If cooked a little longer, this real caramel can be made into soft caramel candies like these soft caramel candies..
What Does the Caramel Taste Like?
My salted caramel is perfect for garnishing desserts, filling cakes, and as a dip for apple slices. However, it’s not suitable for coating apples because it’s too thin and won’t set properly—it’s missing corn syrup and the proper sugar to fat ratio.
The homemade caramel we’ll use for caramel apples is soft, chewy, buttery, a little taffy-like, and adheres to the apple easily. If applied lightly, the caramel won’t pool down at the bottom of the apple. Let’s break down the ingredients you need for homemade caramel coating and why each are imperative to the taste and texture. Cooking candy is actual chemistry, so there’s no room for substitutions.
Ingredients in Real Homemade Caramel
How to Make Homemade Caramel Apples
Now that you have your ingredients, let’s make caramel apples. First, rinse and dry the apples. Apples have a waxy coating that will prevent the caramel from sticking, so it’s important to wash and dry it off. Make sure the apples are cold, which helps prevent the caramel from slipping off.
Pull out the apple’s stem and insert a caramel apple stick.
For the caramel, cook the first 5 ingredients on the stove until the candy reaches 235°F (113°C), known as the Soft Ball Stage in candy cooking terms. Reaching 235°F (113°C) should take about 15 – 20 minutes, though don’t use the time as your stopping point because it really depends on your stove—electric stoves may take a little longer than gas stoves. But you won’t mind waiting because this caramel smells INCREDIBLE as it cooks. Some readers have been cooking to 240°F (116°C) and saying the caramel sticks much better to the apples that way. Stick with anywhere between 235°F – 240°F.
Remove caramel from heat, then stir in the vanilla. Allow caramel to cool for a few minutes, then dip your apples. Let the excess caramel drip off, then place on a nonstick surface such as a silicone baking mat lined baking sheet.
Enjoy immediately or let the caramel set, about 45 minutes. Once set, you can wrap the caramel apples in cellophane for travel or gifting. Stand the apples in these adorable cellophane bags, then wrap the cellophane around the stick with a cute ribbon. Sweetest homemade gift around.
Slow Cooker to Keep Warm
Caramel must be prepared on the stove as instructed. However, after the caramel has cooked, you can keep it warm in a slow cooker on the low setting. Give it a gentle stir every 10 minutes to ensure the butter doesn’t separate. This is a great idea if you want to have a party where everyone can coat their own caramel apples!
Best Apples for Caramel Apples
You can use any variety of apple you enjoy such as Granny Smith, Fuji, or Honeycrisp. Granny Smith are a popular choice for caramel apples because they’re tart, which pairs perfectly with sweet buttery caramel. Whichever variety you use, look for:
- small to medium size
- as perfectly round as you can find
- firm with no soft spots
Let’s talk tools. We need the same items used for pumpkin spice toffee. In fact, most candy recipes require the same exact tools. And did you know that most homemade candy is gluten free? You don’t need flour to make caramel, toffee, chocolate truffles, or fudge.
Tools You Need for Caramel Apples
Caramel Apple Garnishes
The caramel apples are obviously fantastic plain, but it’s fun to play dress up every now and then. Immediately after coating in caramel and before the caramel sets, roll the caramel dipped apples in finely chopped nuts, toffee pieces, mini M&Ms, sprinkles, or coconut. You can even drizzle with melted chocolate and top with sprinkles, as shown below.
Used this fun Starfetti sprinkle mix!
See Your Homemade Caramel Apples
Homemade Caramel Apples Recipe
Description
Learn how to make real homemade caramel apples with this from-scratch recipe..
Ingredients You’ll Need
Instructions
- Rinse the apples with water, then wipe completely dry. Removing the slippery waxy coating will help the caramel seal to the apple. Remove the apple stem and insert a caramel apple stick about 3/4 down into the apple.
- Line a large baking sheet with a silicone baking mat (preferred) or grease the pan with butter. Caramel usually sticks to parchment or wax paper.
- Combine the heavy cream, corn syrup, brown sugar, butter, and salt in a 3-quart heavy-duty saucepan over medium heat. Do not turn the temperature up or down—keep at medium the entire time the caramel cooks. Stir constantly with a wooden spoon until the butter is melted. Once melted, brush down the sides of the pan with a water-moistened pastry brush and attach a candy thermometer to the pan, making sure the bulb is not touching the bottom of the pan (as you’ll get an inaccurate reading).
- Without stirring, let the mixture cook and bubble until it reaches 235°F (113°C). Some readers have been cooking to 240°F (116°C) and saying the caramel sticks much better to the apples that way. Stick with anywhere between 235°F – 240°F. Reaching this temperature should take about 15 – 20 minutes, though don’t use time as your guide because it depends on your stove. Don’t be alarmed if your caramel is taking longer, just use the candy thermometer as your guide. The temperature will heat up slowly, then move quickly, so keep your eye on the pot. Once at 235°F – 240°F, remove caramel from heat and stir in the vanilla. Avoid over-stirring which can create air bubbles in the caramel (and then on the apple). Allow caramel to cool for 10-15 minutes until slightly thickened. If caramel is too thin to coat apples, let it cool and thicken for 5-10 minutes longer.
- Holding the caramel apple stick, dip the apple into the warm caramel, tilting the pot as needed to coat all sides of the apple. Lift the apple up and swirl it around or gently tap it against the side of the pot to let excess caramel drip off. Place coated apple on prepared pan. Repeat with remaining apples. Enjoy immediately or allow caramel to set, about 45-60 minutes. If you want to wrap the caramel apples in cellophane treat bags for travel/gifting, wait until the caramel has completely set.
- If desired, you can add toppings. Immediately after coating in caramel and before the caramel sets, roll the caramel dipped apples in finely chopped nuts, toffee pieces, mini M&Ms, sprinkles, or coconut. You can even drizzle with melted chocolate or white chocolate, too.
- For displaying or serving, I recommend placing on wax paper or another nonstick surface. Even when the caramel has completely set, caramel apples may slightly stick to a serving dish. To eat a caramel apple, you can bite right into it or sit it upright on a cutting board and cut slices around the stick. (Or pull out the stick and slice.) These are great for sharing!
- Loosely cover and store the leftover dipped apples in the refrigerator for up to 1 week.
You may also like...