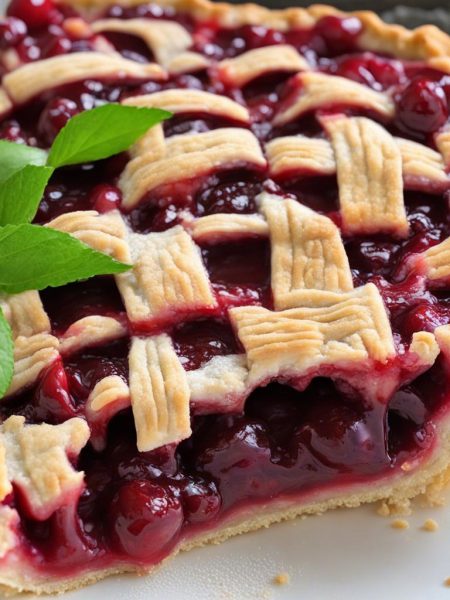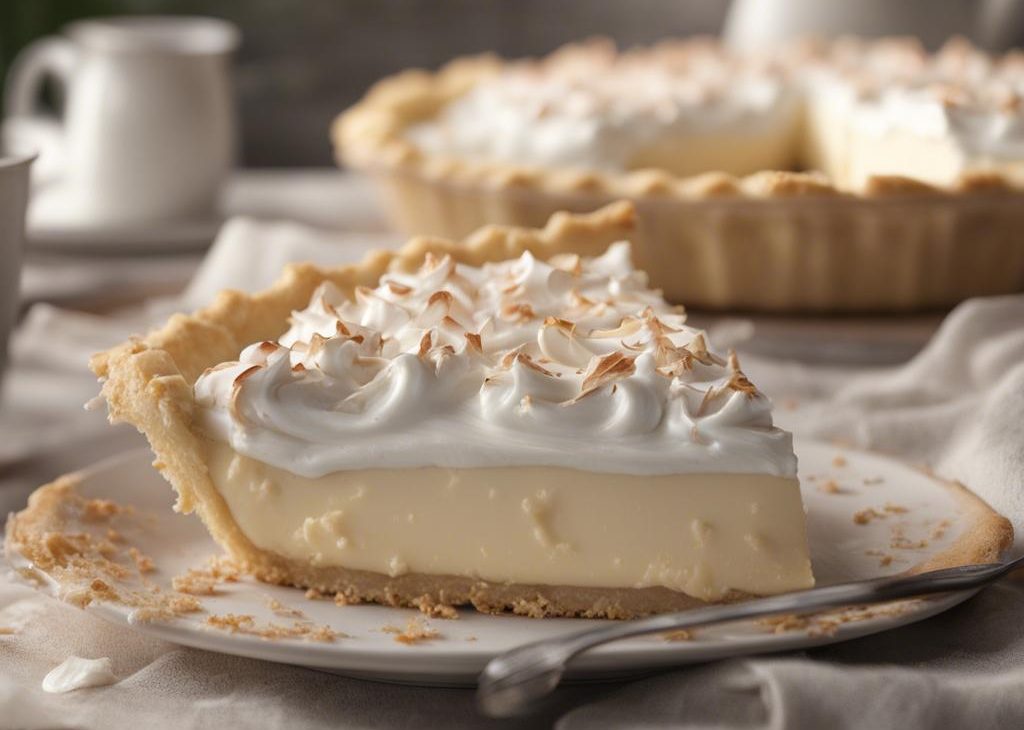

I make homemade coconut cream pie when I want something homemade that feels worth the dishes but still fits into a normal day. The first time I worked through this one, I learned that the quiet details matter: the temperature of the ingredients, the way the mixture looks before it cooks, and the patience to let it cool before I start cutting or tasting.
What keeps me coming back is the contrast: the filling sets enough to slice but still tastes juicy. It is not a fussy recipe, but it does ask me to pay attention for a few minutes at the right moments. I like that kind of cooking because it feels calm instead of showy.
I kept the original timing and amounts here, including the 6 minute prep time and the 35 minute cook time when the source gives one. My job in the kitchen is to make those numbers work by setting up the pan, bowl, or mixer before I begin.
Why I keep coming back to this
- It tastes homemade in a specific way: the filling sets enough to slice but still tastes juicy.
- The ingredient list is straightforward, so I can shop for it without visiting three stores.
- Most of the work happens in stages, which gives me time to clean as I go.
- The recipe gives clear visual cues, and I trust those cues when my oven or kitchen temperature has other ideas.
- Leftovers hold up well when I store them with a little care.
- It is the kind of recipe I can repeat, tweak, and still recognize when it lands on the table.
What I use and why it matters
- 1 unbaked flaky Pie Crust (what I used).
- 4 large egg yolks.it helps the recipe set and gives richness.
- 1/4 cup cornstarch (30g).it does the structural work, so I do not guess at this measurement.
- 1 can full-fat coconut milk (14 ounce).
- 1 cup half-and-half (240ml).
- 2/3 cup granulated sugar (130g).
- 1/4 teaspoon salt.
- 1 cup sweetened shredded coconut (80g).
- 2 Tablespoons unsalted butter (28g).it carries flavor and tenderness; I keep it at the temperature the method asks for.
- 1 teaspoon pure vanilla extract.
- 1/2 optional: teaspoon coconut extract.
- 1 1/2 cups heavy cream (360ml).
- 3 Tablespoons confectioners sugar (20g).
- 3/4 teaspoon pure vanilla extract.
- optional for garnish: unsweetened coconut shavings, coconut chips, or sweetened shredded coconut*.
I measure everything before I start, especially when butter, chocolate, yeast, or a cooked filling is involved. That small bit of order saves me from digging through a cabinet with sticky hands halfway through the recipe.
How I make it
Step 1 — Prep the base
I handle this stage deliberately: I like to make sure my pie dough is prepared before I begin making coconut cream pie. Make pie dough the night before because it needs to chill in the refrigerator for at least 2 hours before rolling out and blind baking (next step).
Step 2 — Mix with care
I handle this stage deliberately: Preheat oven to 375anddeg;F (190anddeg;C). Fully blind bake the pie crust. (Follow how to blind bake pie crust instructions through step 9. I skip the optional dough strip trick in step 4, though that trick guarantees thick pie crust edges. Crimp or flute the pie crust edges before baking.) Cool pie crust completely. You can.
Step 3 — Shape or assemble
I handle this stage deliberately: Whisk the egg yolks and cornstarch together. Set aside. Whisk the coconut milk, half-and-half, granulated sugar, and salt together in a medium saucepan over medium heat. Whisking occasionally, bring to a boil. Boil for 2 minutes, then reduce temperature to medium-low heat. Once boiling, remove about 1/2 cup of the mixture and, in a slow.
Step 4 — Cook until the cues show
I handle this stage deliberately: The pudding will immediately begin to bubble and thicken. Stand back and use caution as the bubbles may burst. Whisk and cook for 1 minute and 30 seconds. Remove from heat and stir in the coconut, butter, vanilla, and coconut extract (if using).
Step 5 — Cool before finishing
I handle this stage deliberately: Pour warm filling into cooled pie crust. Cover tightly with plastic wrap directly on the surface of the pudding (to prevent a skin from forming) and refrigerate for at least 3 hours or overnight until chilled and thickened. Pie may be refrigerated for up to 1 day.
Step 6 — Finish without rushing
For the final stretch, I keep the same rhythm: Using a hand mixer or a stand mixer fitted with a whisk attachment, whip the heavy cream, sugar, and vanilla extract on medium-high speed until medium peaks form, about 3-4 minutes. Medium peaks are between soft/loose peaks and stiff peaks and are worth making consistency for topping and piping on desserts. Pipe or spread the whipped cream on top. I used Ateco 849 piping tip to pipe. Garnish with extra. This is usually where patience pays off, because hot fillings, soft dough, and just-baked pieces all behave better after a short rest.
Tips from my kitchen
- I trust texture first.Timers help, but I trust the visual cue more than the timer alone.
- I set up the pan early.Once the mixture is ready, I do not want to stop and hunt for parchment, spray, or a rack.
- I scrape the bowl.A lot of uneven batches come from butter, sugar, or flour hiding on the bottom edge.
- I cool before judging.Many homemade bakes and sauces firm up as they sit, so I do not call them done or ruined while they are still steaming.
Variations I have actually tried
- 1.Use darker chocolate or cocoa when I want a deeper flavor.
- 2.Add a tiny pinch more salt to balance sweetness.
- 3.Chill individual portions for cleaner slicing or dipping.
- 4.Finish with toasted nuts, coconut, sprinkles, or cookie crumbs when the flavor fits.
- 5.Make smaller portions for parties, knowing the timing may need a closer eye.
Storing and reheating
I store it in the refrigerator because the creamy parts need the chill. Covered portions taste best within a few days. I do not rush the chill time; cold filling slices, scoops, or pipes more neatly.
I label leftovers when I freeze them because future me never remembers what is wrapped in foil. For anything crisp, I avoid sealing it while warm; trapped steam steals the texture faster than time does.
What I serve with it
I serve it after a simple meal, often with coffee or cold milk. Rich sweets taste better to me when the plate is not crowded, so I keep the garnish small and useful.
Frequently asked questions
Can I make homemade coconut cream pie ahead of time?
Yes. I usually make at least one component ahead when the recipe has chilling, rising, or cooling time. I store it covered and finish the freshest step close to serving.
What is the biggest mistake to avoid?
Rushing the rest or cool time causes the most trouble in my kitchen. Warm dough tears, hot filling runs, and just-baked pieces can taste underdone before they settle.
Why did my filling or sauce turn loose?
It usually needed more cooking, more chilling, or more patient stirring. I follow the temperature or visual cue and let it cool fully before judging.
Can I reduce the sugar?
I am cautious with that. Sugar affects texture, browning, and set, so I only reduce it slightly the first time and take notes.
How should I store leftovers?
I cool them first, then store according to the texture I want to keep: airtight for soft items, loosely covered at first for crisp ones, and chilled for anything creamy.
If I make homemade coconut cream pie again this week, I will probably tweak one small thing and write it on the margin of my printed copy. Tell me what you changed if you try it.
Homemade Coconut Cream Pie
Description
I make homemade coconut cream pie with the original amounts and a practical, kitchen-tested rhythm. The steps keep the focus on texture, timing, and the little visual cues that make a homemade batch taste cared for.
Ingredients You’ll Need
Instructions
- I like to make sure my pie dough is prepared before I begin making coconut cream pie. Make pie dough the night before because it needs to chill in the refrigerator for at least 2 hours before rolling out and blind baking (next step).
- I preheat oven to 375anddeg;F (190anddeg;C). Fully blind bake the pie crust. (Follow how to blind bake pie crust instructions through step 9. I skip the optional dough strip trick in step 4, though that trick guarantees thick pie crust edges. Crimp or flute the pie crust edges before baking.) Cool pie crust completely. You can.
- I whisk the egg yolks and cornstarch together. Set aside. Whisk the coconut milk, half-and-half, granulated sugar, and salt together in a medium saucepan over medium heat. Whisking occasionally, bring to a boil. Boil for 2 minutes, then reduce temperature to medium-low heat. Once boiling, remove about 1/2 cup of the mixture and, in a slow.
- I the pudding will immediately begin to bubble and thicken. Stand back and use caution as the bubbles may burst. Whisk and cook for 1 minute and 30 seconds. Remove from heat and stir in the coconut, butter, vanilla, and coconut extract (if using).
- I pour warm filling into cooled pie crust. Cover tightly with plastic wrap directly on the surface of the pudding (to prevent a skin from forming) and refrigerate for at least 3 hours or overnight until chilled and thickened. Pie may be refrigerated for up to 1 day.
- Using a hand mixer or a stand mixer fitted with a whisk attachment, whip the heavy cream, sugar, and vanilla extract on medium-high speed until medium peaks form, about 3-4 minutes. Medium peaks are between soft/loose peaks and stiff peaks and are worth making consistency for topping and piping on desserts.
- I pipe or spread the whipped cream on top. I used Ateco 849 piping tip to pipe. Garnish with extra coconut, if desired. Chill the pie uncovered up to a few hours or you can serve it immediately.
- I cover leftovers and store in the refrigerator for up to 5 days.
Nutrition Facts
Servings 9
- Amount Per Serving
- Calories 229kcal
- % Daily Value *
- Total Fat 17g27%
- Saturated Fat 11g56%
- Trans Fat 0.5g
- Cholesterol 52mg18%
- Sodium 69mg3%
- Potassium 40mg2%
- Total Carbohydrate 19g7%
- Sugars 16g
- Protein 1g2%
- Calcium 27 mg
- Iron 0.0 mg
* Percent Daily Values are based on a 2,000 calorie diet. Your daily value may be higher or lower depending on your calorie needs.
Note
Measure first. I set out every ingredient before starting so I do not miss a small but important amount.
Watch the texture. I use the time as a guide, then trust the visual cue in the method.
Cool with patience. The flavor and structure settle as the recipe rests.
Write down changes. If I adjust a spice, topping, or chill time, I note it before I forget.
Frequently Asked Questions
Yes. I usually make at least one component ahead when the recipe has chilling, rising, or cooling time. I store it covered and finish the freshest step close to serving.
Rushing the rest or cool time causes the most trouble in my kitchen. Warm dough tears, hot filling runs, and just-baked pieces can taste underdone before they settle.
It usually needed more cooking, more chilling, or more patient stirring. I follow the temperature or visual cue and let it cool fully before judging.
I am cautious with that. Sugar affects texture, browning, and set, so I only reduce it slightly the first time and take notes.
I cool them first, then store according to the texture I want to keep: airtight for soft items, loosely covered at first for crisp ones, and chilled for anything creamy.
You may also like...