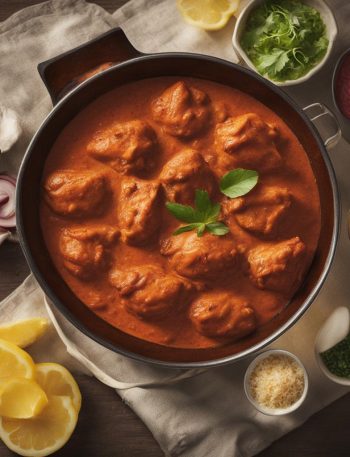

This Jimboys Tacos is the kind of food I make when I want dinner to feel lively without turning the kitchen upside down. I get everything chopped before the heat goes on, because once a skillet or grill is hot, the recipe moves quickly.
I have learned to watch the small cues: onions losing their raw bite, sauce thickening at the edge of the pan, meat resting before I slice or serve it. Those cues are more helpful than staring at the clock alone.
Nothing fancy, just a clear path to a plate of Jimboys Tacos that tastes like someone paid attention.
Why I keep coming back to this
- I can prep most of the Jimboys Tacos before the busy part of cooking starts.
- The ingredient list is short enough that I can see what each item is doing.
- It gives me room to taste and adjust without changing the basic recipe.
- The leftovers, when there are any, are easy to use the next day.
- The method is forgiving as long as I do not rush the mixing or resting step.
- It feels homemade without asking for restaurant equipment or hard-to-find tools.
What I use and why
- I mince it fine so it distributes evenly through the dish.
- It builds the savory base that everything else sits on top of.
- 1/2 pound ground beef. This is the main structure of the recipe, so freshness and handling matter here.
- 1/2 tablespoon vegetable oil.
- I grate it fresh from a block so it melts evenly without clumping.
- 1/2 teaspoon chili powder.
- 1/4 teaspoon cumin.
- Sour cream.
- Salt and pepper.
- 4 taco shells. This gives the recipe its shape, and I try not to overwork it once liquid is added.
- 1/4 teaspoon paprika.
- I drain off excess liquid so the recipe does not end up watery.
How I make it
Step 1 — Cook the mixture
I use a medium skillet over medium-high heat, cook the ground beef until it is cooked through and no longer pink.
Step 2 — Add the onion
I add in the onion and garlic, and cook until the onion is softened and fragrant. Season with chili powder, paprika, cumin, salt, and pepper.
Step 3 — Stir the vegetable oil
I stir in the vegetable oil to prevent sticking. Cook for 5 minutes until everything is combined.
Step 4 — Cook
I heat the taco shells according to the package directions.
Step 5 — Garnish and finish
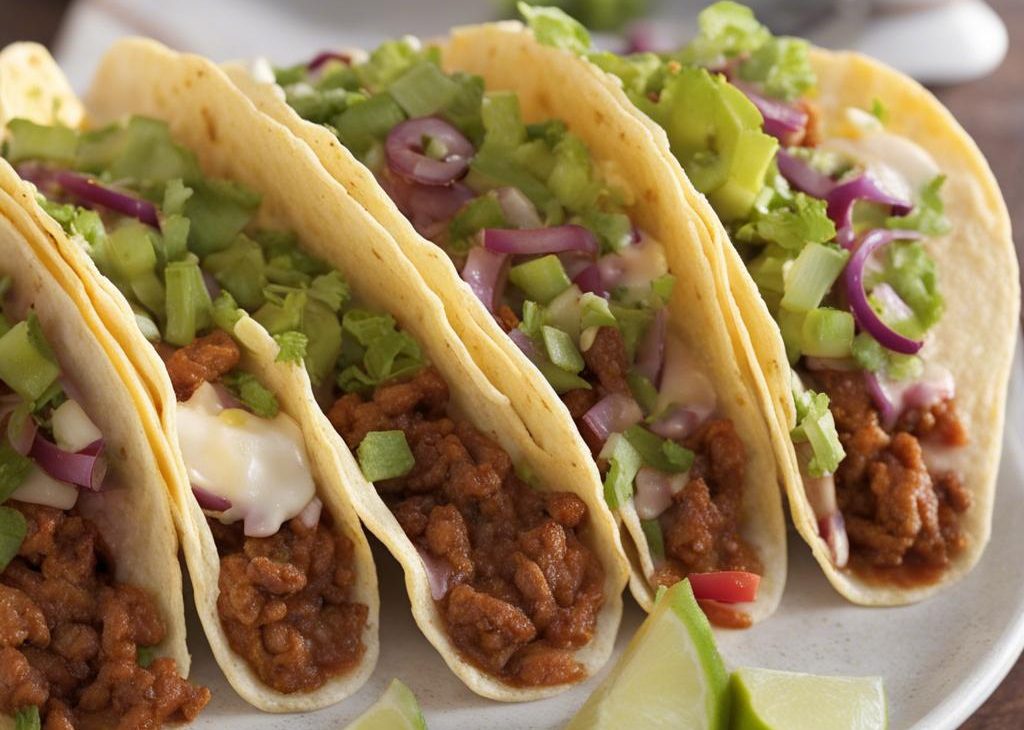
I fill each shell with some of the beef mixture and top with lettuce, tomatoes, cheese, black olives (optional), jalapenos (optional), and sour cream (optional).
Step 6 — Serve
I serve warm and enjoy.
Tips from my kitchen
- Set everything out first. I make fewer mistakes when the measured ingredients are lined up before I start.
- Taste at the point where tasting makes sense. For raw meat or batter I check seasoning by smell and balance; for sauces, salads, and drinks I taste directly.
- Watch texture, not just time/li>
- Give it a short rest when possible. Five to thirty minutes can help juices settle, crumbs firm, or flavors blend.
- Write down the tiny change. If I add extra pepper or use a different pan, I note it so the next batch is easier.
Variations I have actually tried
- More heat: I add jalapeno, cayenne, or hot sauce in small amounts and taste before adding more.
- Milder: I hold back the spicy ingredients and let people add heat at the table.
- Extra vegetables: Bell peppers, onions, lettuce, tomato, or spinach can stretch the serving without making it heavy.
- Cheesier: I add cheese at the end so it melts instead of disappearing into the pan.
- Bowl version: I serve the filling over rice, greens, or pasta when I do not want bread or shells.
Storing and reheating
I cool leftovers quickly, then pack them in shallow containers so they do not steam themselves soft. Most savory leftovers taste best within 3-4 days.
For reheating, I use a skillet when I want browned edges and the microwave when I am in a hurry. If the dish has sauce, I add a spoonful of water or broth so it warms without drying out.
How I like to serve it
I serve Jimboys Tacos hot and keep toppings or sides nearby. Warm tortillas, crisp lettuce, rice, bread, or a simple salad can turn the same base into a different meal.
Frequently asked questions
Can I make Jimboys Tacos ahead?
Yes, with a little planning. I prep the parts that hold well and wait on anything crisp, fizzy, or freshly blended until close to serving.
How do I know when it is seasoned enough?
I taste after the main mixing or cooking step, then adjust in small amounts. Salt, acid, and sweetness show up differently after resting, so I do not make one big adjustment all at once.
Can I double the recipe?
Usually yes. I double the ingredients evenly, use a larger bowl or pan, and give myself extra mixing room. Baked recipes may need a few more minutes if the pan is crowded.
What should I do if the texture seems off?
A splash of liquid for thickness, a short chill for looseness, or a few extra minutes of cooking for a wet center. Big fixes tend to make a second problem.
How long do leftovers keep?
I keep leftovers covered in the refrigerator and use my eyes and nose before reheating or serving. Most cooked dishes are best within 3-4 days; creamy cold mixtures are best within 2-3 days.
If you make this Jimboys Tacos, I would love to hear what tiny adjustment made it work best in your kitchen.
Jimboys Tacos
Description
I rewrote this jimboys tacos with clear steps, practical timing notes, and the small kitchen cues I rely on when I make it. The goal is a recipe that feels usable at the counter, not just readable on a screen.
Ingredients You’ll Need
Instructions
- I use a medium skillet over medium-high heat, cook the ground beef until it is cooked through and no longer pink.
- I add in the onion and garlic, and cook until the onion is softened and fragrant. Season with chili powder, paprika, cumin, salt, and pepper.
- I stir in the vegetable oil to prevent sticking. Cook for 5 minutes until everything is combined.
- I heat the taco shells according to the package directions.
- I fill each shell with some of the beef mixture and top with lettuce, tomatoes, cheese, black olives (optional), jalapenos (optional), and sour cream (optional).
Nutrition Facts
Servings 2
- Amount Per Serving
- Calories 321kcal
- % Daily Value *
- Total Fat 21g33%
- Saturated Fat 7g35%
- Trans Fat 0.8g
- Cholesterol 85mg29%
- Sodium 122mg6%
- Potassium 409mg12%
- Total Carbohydrate 1g1%
- Dietary Fiber 1g4%
- Protein 30g60%
- Calcium 32 mg
- Iron 3.7 mg
* Percent Daily Values are based on a 2,000 calorie diet. Your daily value may be higher or lower depending on your calorie needs.
Note
Set everything out first. I make fewer mistakes when the measured ingredients are lined up before I start.
Taste at the point where tasting makes sense. For raw meat or batter I check seasoning by smell and balance; for sauces, salads, and drinks I taste directly.
Watch texture, not just time. A thick sauce, a set center, or a cold blended drink tells me more than the timer alone.
Give it a short rest when possible. Five to thirty minutes can help juices settle, crumbs firm, or flavors blend.
Frequently Asked Questions
Yes, with a little planning. I prep the parts that hold well and wait on anything crisp, fizzy, or freshly blended until close to serving.
I taste after the main mixing or cooking step, then adjust in small amounts. Salt, acid, and sweetness show up differently after resting, so I do not make one big adjustment all at once.
Usually yes. I double the ingredients evenly, use a larger bowl or pan, and give myself extra mixing room. Baked recipes may need a few more minutes if the pan is crowded.
A splash of liquid for thickness, a short chill for looseness, or a few extra minutes of cooking for a wet center. Big fixes tend to make a second problem.
I keep leftovers covered in the refrigerator and use my eyes and nose before reheating or serving. Most cooked dishes are best within 3-4 days; creamy cold mixtures are best within 2-3 days.