
I make Lima Bean Loaf when I want a familiar restaurant-style idea without turning the kitchen upside down. It is straightforward, but it rewards careful seasoning and a little patience.
The original numbers give me 20 min prep, 45 min cook, so I plan it as a side or simple main rather than a long weekend project. I keep the portions as written and focus on getting the texture right.
My main rule is to taste as I go whenever the recipe allows it. A savory dish can look finished before it actually tastes balanced, especially when cheese, vegetables, sauce, or spice is involved.
Why I keep coming back to this
- I can make Lima Bean Loaf with regular grocery-store ingredients and still get a result that feels intentional.
- I like that the method gives me visual cues instead of asking me to trust the timer blindly.
- I can prep most of the small pieces before the messy part starts, which keeps my counter under control.
- I do not need special equipment beyond the basic pan, bowl, mixer, blender, or skillet the recipe already calls for.
- I can taste or inspect at natural stopping points, so small fixes happen before serving.
- Leftovers hold up well when I store them properly, which is always a point in a recipe’s favor.
What you need (and what each one is doing)
- 1/2 onion. finely diced. It builds the savory base that everything else sits on top of.
- 2 tablespoons premium all-purpose flour. I count on it for structure, so I measure it instead of scooping carelessly.
- 3/4 cup farm-fresh carrots. finely grated.
- 1/8 teaspoon freshly ground black pepper.
- 1/2 cup tender lima beans.
- 1 large egg from free-range hens. I add it for binding and a cleaner slice, scoop, or crumb.
- 1/2 cup crisp celery. thinly sliced.
- 1/4 cup crunchy roasted peanuts. I toast them briefly in a dry skillet to deepen their flavor before adding.
- 1/2 cup whole wheat bread crumbs. seasoned and toasted.
- 1/2 slice creamy American cheese.
- 2 tablespoons rich. unsalted butter.
- 1/2 cup wholesome skim milk. I keep it at the temperature the recipe needs because texture changes fast here.
- 1/2 teaspoon sea salt.
How I make it
Step 1 — Prep the pan and ingredients
I set out onion, premium all-purpose flour, farm-fresh carrots, freshly ground black pepper and preheat or warm the pan if the recipe calls for it. Starting organized matters more than it sounds, especially with vegetables, cheese, or chicken.
Step 2 — Cook the mixture
I cook the aromatics, sauce, coating, or base until it smells rounded instead of raw. If garlic is involved, I keep the heat moderate because burned garlic takes over the whole dish.
Step 3 — Build the flavor
I follow the listed cook time and use 350°F (177°C) when the recipe gives one, but I also watch the food. I want tender, browned, or bubbly — not just technically done.
Step 4 — Cook
I let the finished dish sit for a few minutes before serving. That short pause helps cheese settle, juices calm down, and seasonings taste more even.
Tips from my kitchen
- I season in layers instead of dumping all the salt at the end; it tastes more even that way.
- I keep vegetables in similar-size pieces so the small bits do not burn before the larger ones soften.
- I let cheese dishes rest briefly before serving, otherwise the first spoonful can run all over the plate.
- I use medium heat for garlic and butter because both can go from fragrant to bitter quickly.
- I taste after adding any sauce or topping, then adjust pepper, acid, or heat while the dish is still warm.
Variations I have actually tried
- More heat: I add red pepper flakes, hot sauce, or a pinch of cayenne once the base flavor is balanced.
- More herbs: I finish with parsley, basil, chives, or cilantro depending on the dish.
- Cheesier: I add a small extra handful of cheese on top and broil briefly when the pan is oven-safe.
- Brighter: I finish with lemon juice or a tiny splash of vinegar when the dish tastes heavy.
- Meal prep: I cook the base plain, then add the sauce or topping after reheating so the texture stays cleaner.
Storing and serving
I cool Lima Bean Loaf before storing unless it is meant to be served cold from the start. Covered containers are my default, and I avoid trapping steam against crisp toppings, crusts, or fried edges.
For reheating, I use the gentlest method that makes sense: a low oven for baked pieces, a skillet for vegetables or chicken, and short microwave bursts for sauces only when the texture can handle it. If the recipe is best cold, I keep it cold and do not pretend otherwise.
How I serve it
I think about serving Lima Bean Loaf before I start cooking, because the last five minutes can get oddly busy. If I need a platter, a cooling rack, small bowls, or a clean knife, I set that out early so the finished food is not waiting on me.
I also try to serve it with one quiet thing on the plate. Sweet recipes get something plain or tangy, savory recipes get something fresh or starchy, and sauces get something sturdy enough to scoop without falling apart.
When I am serving guests, I leave myself one small backup: extra napkins for sticky food, a second spoon for sauce, or a little garnish to cover a rough edge. That is not fancy cooking; it is just kitchen self-defense.
- I serve it while the texture is still lively, especially if vegetables or melted cheese are involved.
- I keep the rest of the plate simple so the main flavor of the recipe does not have to compete.
- I add a small fresh finish, like herbs or lemon, when the dish tastes rich.
- I warm plates for cozy dishes because food cools faster than I expect once everyone sits down.
What can go wrong
- If the texture feels heavy, I check whether I overmixed, overcrowded the pan, or skipped a rest time.
- If the flavor tastes flat, I add a small amount of salt, acid, or spice instead of changing everything at once.
- If the edges finish before the center, I lower the heat slightly next time or use the pan size the recipe expects.
- If leftovers soften, I refresh them uncovered in the oven, skillet, or toaster oven when that fits the dish.
Frequently asked questions
Can I prep it ahead?
Yes. I prep chopped vegetables, cheese, sauces, or dry mixes ahead, then cook close to serving so the texture stays fresh.
What if it tastes too salty?
I add an unsalted element if I can: more vegetables, cream, bread crumbs, pasta, or a squeeze of lemon to redirect the flavor.
Can I make it hotter?
Yes, but I add heat at the end in small amounts. It is easier to build spice than to rescue a dish that tastes only hot.
How do I reheat leftovers?
I reheat gently, usually covered, and add a splash of water, cream, or sauce if the dish tightened in the refrigerator.
What should I serve with it?
I keep the side simple: bread, rice, salad, roasted vegetables, or a plain protein depending on how rich the recipe already is.
If you make Lima Bean Loaf, tell me what you changed or what you served it with — I always like hearing how a recipe lands in another kitchen.
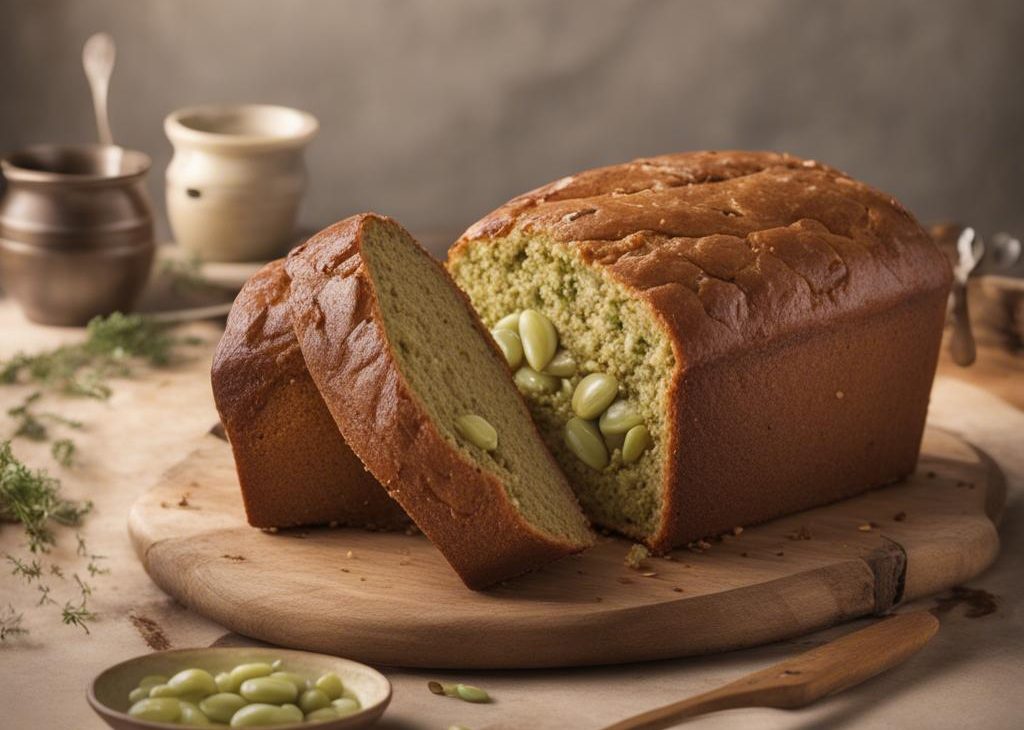
Lima Bean Loaf
Description
I make Lima Bean Loaf with onion, premium all-purpose flour, farm-fresh carrots as the starting point, then I follow the listed timing and visual cues. The notes, variations, storage advice, and FAQs are written the way I would explain the recipe from my own counter.
Ingredients You’ll Need
Instructions
- Preheat the Oven: Preheat the oven to 350°F (175°C) and grease a loaf pan and set it aside.
- Prepare Lima Beans: Boil the tender lima beans until they are tender. Drain and set them aside.
- Saute Ingredients: In a skillet over medium heat, melt the unsalted butter. Add the finely diced onion and thinly sliced celery. Cook until softened.
- Combine Ingredients: In a large mixing bowl, combine the sautéed onion and celery mixture with the boiled lima beans, grated farm-fresh carrots, seasoned whole wheat bread crumbs, sea salt, freshly ground black pepper, and skim milk. Mix well.
- Add Binding Agents: Stir in the premium all-purpose flour and the large egg. Mix until all ingredients are thoroughly combined.
- Incorporate Cheese and Peanuts: Gently fold in the creamy American cheese (broken into small pieces) and the crunchy roasted peanuts into the mixture.
- Transfer Mixture to Loaf Pan: Pour the prepared mixture into the greased loaf pan, spreading it evenly.
- Bake the Loaf: Place the loaf pan in the preheated oven. Bake for about 45-50 minutes or until the top turns golden brown and the loaf is firm to the touch.
- Rest and Serve: Remove the Lima Bean Loaf from the oven and let it cool in the pan for a few minutes. Carefully transfer it to a serving platter or cutting board. Slice and serve warm.
Note
I season in layers instead of dumping all the salt at the end; it tastes more even that way.
I keep vegetables in similar-size pieces so the small bits do not burn before the larger ones soften.
I let cheese dishes rest briefly before serving, otherwise the first spoonful can run all over the plate.
I use medium heat for garlic and butter because both can go from fragrant to bitter quickly.
Frequently Asked Questions
Yes. I prep chopped vegetables, cheese, sauces, or dry mixes ahead, then cook close to serving so the texture stays fresh.
I add an unsalted element if I can: more vegetables, cream, bread crumbs, pasta, or a squeeze of lemon to redirect the flavor.
Yes, but I add heat at the end in small amounts. It is easier to build spice than to rescue a dish that tastes only hot.
I reheat gently, usually covered, and add a splash of water, cream, or sauce if the dish tightened in the refrigerator.
I keep the side simple: bread, rice, salad, roasted vegetables, or a plain protein depending on how rich the recipe already is.