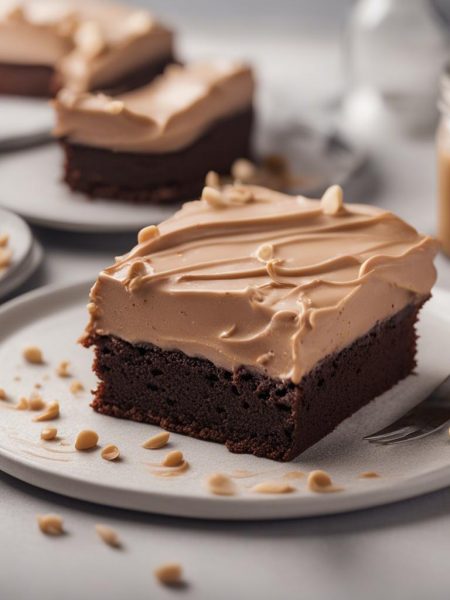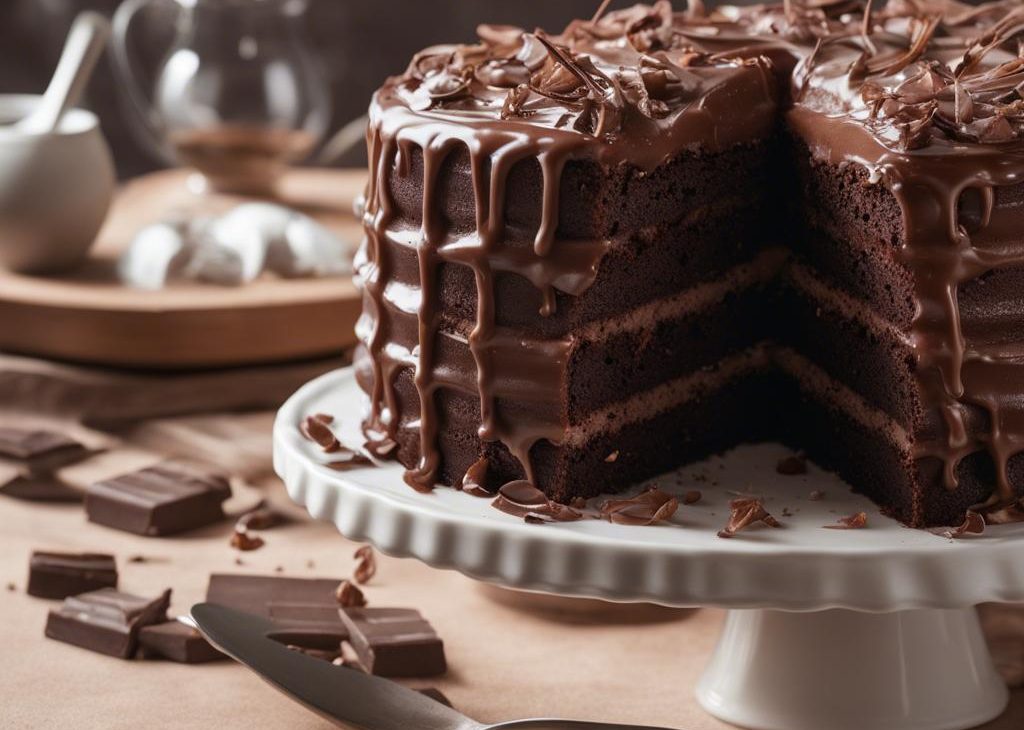

I make Lisbon Chocolate Cake when I want something that feels special without needing a fussy mood. The recipe has enough detail to be reliable, but it still leaves room for the small judgment calls I use in my own kitchen.
The timing is 30 min prep, 30 min cook, and I keep those numbers unless the food itself asks for a few extra minutes. Ovens, pans, and ingredient temperature can all nudge the finish line a little.
What matters most to me is texture. I want the center set but not tired, the edges flavorful without tasting scorched, and the finish clean enough that I would serve it without apologizing.
Why I keep coming back to this
- I can make Lisbon Chocolate Cake with regular grocery-store ingredients and still get a result that feels intentional.
- I like that the method gives me visual cues instead of asking me to trust the timer blindly.
- I can prep most of the small pieces before the messy part starts, which keeps my counter under control.
- I do not need special equipment beyond the basic pan, bowl, mixer, blender, or skillet the recipe already calls for.
- I can taste or inspect at natural stopping points, so small fixes happen before serving.
- The batch size is practical: enough to share, but not so much that I need a second refrigerator shelf.
What you need (and what each one is doing)
- 1/4 cup unsalted butter. 57.5g; 1/2 stick.
- 1/4 cup granulated sugar. 50g. I use it for sweetness and also for browning, not just for a sugary bite.
- 1/8 teaspoon fine sea salt. I use it to keep the flavor from tasting flat.
- 1/8 teaspoon baking powder. It provides the lift that keeps things from turning dense.
- 2 eggs. I add it for binding and a cleaner slice, scoop, or crumb.
- 2 tablespoons unsweetened cocoa powder.
- 2.5 ounces semisweet or bittersweet chocolate, coarsely chopped. 70g; for the cake.
- 3/4 tablespoon cornstarch. It thickens without adding flavor, so the other ingredients stay in focus.
- 3 ounces semisweet or bittersweet chocolate. 85g; for ganache.
- 7/8 cup heavy cream. 210ml.
- 1.5 tablespoons unsweetened cocoa powder. for dusting.
How I make it
Step 1 — Set up the pan
I preheat to 350°F (177°C) when baking is involved, line or grease the pan, and set out the ingredients. A prepared pan keeps the batter, dough, or filling from waiting around.
Step 2 — Mix the base
I start with unsalted butter, granulated sugar, fine sea salt, baking powder, then add the remaining ingredients in the order that keeps the texture smooth. If butter or eggs are involved, I pay attention to temperature because cold pockets never mix nicely.
Step 3 — Build the flavor
I move the mixture into the pan, baking sheet, crust, or cups and even it out with my hands or a spatula. This is where I check thickness so the batch cooks at the same pace.
Step 4 — Bake and check
I bake for the listed cook time, then check the visual cues before pulling it out. The edges should look set, the center should not wobble loosely, and the top should match the color the recipe promises.
Step 5 — Cool and finish
I cool the batch before adding semisweet or bittersweet chocolate, heavy cream, unsweetened cocoa powder or slicing. Warm desserts are tempting, but a short rest keeps the pieces cleaner and gives the flavor time to settle.
Tips from my kitchen
- I measure flour with a scale when grams are given; packed flour is the fastest route to dry cookies, bars, cakes, and muffins.
- I stop mixing as soon as the batter or dough looks combined unless the recipe specifically asks for creaming or kneading.
- I rotate pans only if my oven has a hot spot. Opening the door too often does more harm than good.
- I cool before glazing or slicing. I have rushed this and watched icing slide straight off the top.
- I use the visual cues first and the timer second, because my oven runs a few minutes slow when it is crowded.
Variations I have actually tried
- Citrus swap: I use orange or lime zest in place of lemon when the rest of the flavors can handle it.
- Nutty batch: I add toasted pecans, walnuts, or almonds when I want more crunch.
- Chocolate version: I fold in mini chips or drizzle melted chocolate after cooling.
- Smaller pieces: I cut bars, cookies, or slices smaller for a dessert tray and shorten the bake only when the thickness changes.
- Less sweet: I reduce only the topping or glaze first, because cutting sugar from the base can change texture.
Storing and serving
I cool Lisbon Chocolate Cake before storing unless it is meant to be served cold from the start. Covered containers are my default, and I avoid trapping steam against crisp toppings, crusts, or fried edges.
For reheating, I use the gentlest method that makes sense: a low oven for baked pieces, a skillet for vegetables or chicken, and short microwave bursts for sauces only when the texture can handle it. If the recipe is best cold, I keep it cold and do not pretend otherwise.
How I serve it
I think about serving Lisbon Chocolate Cake before I start cooking, because the last five minutes can get oddly busy. If I need a platter, a cooling rack, small bowls, or a clean knife, I set that out early so the finished food is not waiting on me.
I also try to serve it with one quiet thing on the plate. Sweet recipes get something plain or tangy, savory recipes get something fresh or starchy, and sauces get something sturdy enough to scoop without falling apart.
When I am serving guests, I leave myself one small backup: extra napkins for sticky food, a second spoon for sauce, or a little garnish to cover a rough edge. That is not fancy cooking; it is just kitchen self-defense.
- I cut the first piece only after the batch has cooled enough to hold its shape.
- I serve rich pieces with coffee, tea, milk, or plain yogurt so the sweetness has a little balance.
- I keep the glaze or topping modest when the base already has plenty going on.
- I save the neatest pieces for sharing and the corner bits for the cook, which feels fair to me.
What can go wrong
- If the texture feels heavy, I check whether I overmixed, overcrowded the pan, or skipped a rest time.
- If the flavor tastes flat, I add a small amount of salt, acid, or spice instead of changing everything at once.
- If the edges finish before the center, I lower the heat slightly next time or use the pan size the recipe expects.
- If leftovers soften, I refresh them uncovered in the oven, skillet, or toaster oven when that fits the dish.
Frequently asked questions
Can I make it ahead?
Yes. I usually bake it a day ahead and store it covered once fully cool. Glazes and toppings look best when added after cooling.
Why did mine turn dry?
Most often it was over-baked or the flour was packed too firmly. I check early and use the gram weights when the recipe gives them.
Can I freeze it?
Usually, yes. I freeze cooled portions in a single layer first, then move them to a freezer bag so they do not stick together.
Can I cut the sugar?
I reduce toppings or icing before touching the main batter or dough. Sugar affects moisture, browning, and spread, so big cuts can change the recipe.
How do I know it is done?
I look for set edges, the right color, and a center that is no longer loose. A toothpick helps for cakes and muffins, but cookies and bars need visual judgment too.
If you make Lisbon Chocolate Cake, tell me what you changed or what you served it with — I always like hearing how a recipe lands in another kitchen.
Lisbon Chocolate Cake
Description
I make Lisbon Chocolate Cake with unsalted butter, granulated sugar, fine sea salt as the starting point, then I follow the listed timing and visual cues. The notes, variations, storage advice, and FAQs are written the way I would explain the recipe from my own counter.
Ingredients You’ll Need
Instructions
- Grease a 9-inch round cake pan with butter, then dust it with cocoa powder. This will not only prevent the cake from sticking to the pan but also add an extra layer of chocolate flavor for a truly experience. Preheat the oven to 350°F/175°C.
- In a large bowl, utilize an electric mixer to cream together the butter and sugar until they reach a light and fluffy consistency. Once achieved, introduce the salt and baking powder into the mix and stir until fully combined.
- Take your time adding each egg one by one, ensuring that each egg is fully incorporated into the batter before adding the next. This technique results in a smoother and more consistent texture for the cake. Gradually mix in the cocoa powder until it becomes one with the butter mixture.
- In a small saucepan, melt your choice of chocolate over low heat, stirring constantly until it reaches a smooth and velvety consistency with no lumps. Allow the chocolate to cool slightly before adding it to the batter and mixing until fully incorporated.
- Slowly mix in the cornstarch, taking care to incorporate it evenly throughout the batter. Once fully integrated, pour the batter into your prepared pan and use a spatula to smooth out the top for an even layer.
- Bake the cake for 20-25 minutes, or until a toothpick inserted in the center comes out clean. Once done, remove it from the oven and let it cool completely before removing it from the pan.
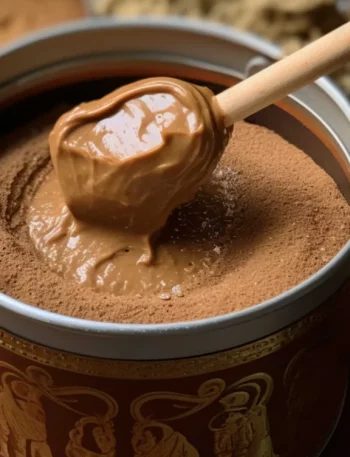
- To make the ganache, place finely chopped chocolate in a heatproof bowl. In a small saucepan, heat heavy cream until it reaches a gentle simmer. Pour the hot cream over the chocolate and let it sit for 1 minute before stirring until it becomes smooth and glossy.
- Spread the ganache over the cooled cake, using a spatula to create an even layer. Allow the ganache to cool and set for 15-20 minutes before dusting the top with cocoa powder. Slice, serve, and serve the rich and decadent flavors of Lisbon chocolate cake.
Nutrition Facts
Servings 5
- Amount Per Serving
- Calories 300kcal
- % Daily Value *
- Total Fat 26g40%
- Saturated Fat 16g80%
- Trans Fat 0.8g
- Cholesterol 146mg49%
- Sodium 107mg5%
- Potassium 102mg3%
- Total Carbohydrate 14g5%
- Dietary Fiber 1g4%
- Sugars 11g
- Protein 4g8%
- Calcium 51 mg
- Iron 0.7 mg
* Percent Daily Values are based on a 2,000 calorie diet. Your daily value may be higher or lower depending on your calorie needs.
Note
I measure flour with a scale when grams are given; packed flour is the fastest route to dry cookies, bars, cakes, and muffins.
I stop mixing as soon as the batter or dough looks combined unless the recipe specifically asks for creaming or kneading.
I rotate pans only if my oven has a hot spot. Opening the door too often does more harm than good.
I cool before glazing or slicing. I have rushed this and watched icing slide straight off the top.
Frequently Asked Questions
Yes. I usually bake it a day ahead and store it covered once fully cool. Glazes and toppings look best when added after cooling.
Most often it was over-baked or the flour was packed too firmly. I check early and use the gram weights when the recipe gives them.
Usually, yes. I freeze cooled portions in a single layer first, then move them to a freezer bag so they do not stick together.
I reduce toppings or icing before touching the main batter or dough. Sugar affects moisture, browning, and spread, so big cuts can change the recipe.
I look for set edges, the right color, and a center that is no longer loose. A toothpick helps for cakes and muffins, but cookies and bars need visual judgment too.
You may also like...