
Milk Toast is the kind of recipe I make when I want something familiar, but I still want it to taste like I paid attention. I do the measuring first, keep the bowl close, and try not to wander off during the one part that can overcook.
I have learned that Milk Toast rewards the small things: the right pan, a clean spatula, and a minute of patience before serving. Nothing about it needs to feel fussy, but I do not rush the texture checks.
My kitchen notes below are the things I pay attention to in real time: what I look for, where I slow down, and which shortcuts I trust. I would rather give a practical cue than pretend every stove, oven, and mixing bowl behaves the same.
Why I keep this method grounded
- The ingredient list is straightforward. so I can see what each item is doing.
- Most of the work happens before the cooking starts. which keeps the stove or oven time calmer.
- It scales nicely for a small table or a busier day when I need leftovers. It scales nicely for a small table or a busier day when I need leftovers.
- The texture gives clear cues. so I am not guessing only from the timer.
- I can adjust the finish without changing the backbone of the recipe. I can adjust the finish without changing the backbone of the recipe.
- It uses regular kitchen tools instead of specialty gear. It uses regular kitchen tools instead of specialty gear.
What I use and what each part does
- 6 cups milk / almond milk. This brings moisture and richness; I measure it instead of guessing.
- 3 tablespoons pure vanilla extract.
- 2/3 cup white sugar or brown sugar. I count on it for sweetness, but also for browning and body.
- 6 pinches ground cinnamon.
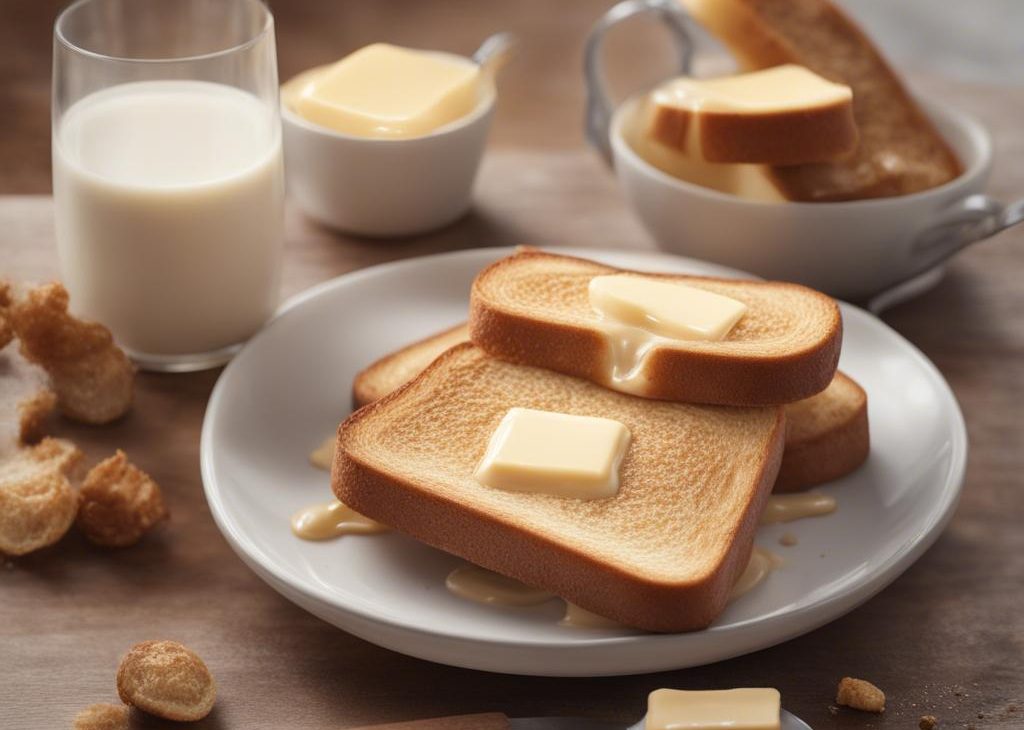
- 12 slices white toasted bread. It plays a supporting role, and I notice it most when it is missing.
How I make it
Step 1 — Prep the ingredients
The Bread I pause here and check that the texture, temperature, or consistency matches the recipe before I move on.
Step 2 — Combine the base
Next I the white bread slices until they are golden brown and have a slightly crispy texture. You can use a toaster or toast them in a skillet with a little butter I pause here and check that the texture, temperature, or consistency matches the recipe before I move on.
Step 3 — Build the flavor
Then I milk Mixture I pause here and check that the texture, temperature, or consistency matches the recipe before I move on.
Step 4 — Combine the ingredients
After that I saucepan, combine the milk, white sugar, and vanilla extract. Heat the mixture over medium heat, stirring occasionally, until it’s warmed through. Do not boil I pause here and check that the texture, temperature, or consistency matches the recipe before I move on.
Step 5 — Finish toasted bread
Toasted Bread I pause here and check that the texture, temperature, or consistency matches the recipe before I move on.
Step 6 — Storage toasted bread slices serving
For storage I the toasted bread slices on serving plates or in individual bowls
Step 7 — Storage milk mixture
For storage I milk Mixture
Step 8 — Serve
For storage I the warm milk mixture over the toasted bread slices. Ensure that each slice is well-soaked but not overly saturated
Step 9 — Storage sweeten taste
For storage I sweeten to Taste
Step 10 — Storage desired more sugar sweeten
For storage If desired, you can add more sugar to sweeten the milk mixture to your liking. Stir gently to dissolve the sugar
Step 11 — Storage with cinnamon
For storage I with Cinnamon
Step 12 — Step 12
For storage I ground cinnamon over each slice of milk-soaked bread. Adjust the amount according to your taste preferences
Step 13 — Chill
I finish the remaining small tasks in order, then cool, cut, chill, or serve according to the recipe cues. At this point I am careful with storage because the texture changes quickly if it sits uncovered.
Tips from my kitchen
- Read the whole method first. I catch pan sizes, chill times, and small timing notes before my hands are messy.
- Keep the heat honest. If my oven or burner runs hot, I check early instead of blaming the recipe later.
- Season or sweeten at the end. The final taste is clearer after the mixture has cooked, chilled, or rested.
- Use the stated rest time. A short rest often makes the difference between sloppy and sliceable.
Variations I have actually tried
- Add a little fresh lemon to wake up the finished dish.
- Use a sharper cheese or extra herbs when I want a stronger savory edge.
- Serve it over greens, bread, or rice depending on what is already in the kitchen.
- Make smaller portions for parties and shorten the final cooking time as needed.
- Add heat slowly with pepper flakes or hot sauce instead of dumping it in at once.
What I serve it with
I serve Milk Toast with something crisp or fresh on the side so the plate does not feel one-note. If the dish is rich, I add pickles, greens, citrus, or a simple salad.
Storing and reheating
I cool leftovers before covering, then refrigerate them if they contain meat, dairy, eggs, or cooked vegetables. Reheating is gentle and brief; I would rather warm twice than dry it out once.
Frequently asked questions
Can I make it ahead?
Yes. I usually make it ahead when the schedule is tight, then store it as directed and refresh the texture gently before serving.
Can I double it?
Usually, yes. I keep the same ratios, use a larger bowl or pan, and add time only as needed instead of assuming it will be exactly double.
What if I am missing one ingredient?
I look at what that ingredient is doing first. If it adds structure, I avoid swapping casually; if it adds flavor, I use the closest pantry match.
How do I know it is done?
I trust the visual cues more than the clock: set edges, the right thickness, and a smell that changes from raw ingredients to cooked food.
How long do leftovers keep?
Most batches keep several days when covered and chilled if the recipe needs refrigeration. I label the container because I forget by day three.
If you make this, leave a comment with the small change that worked in your kitchen; I always read those notes before I make the next batch.
Milk Toast
Description
This Milk Toast uses 6 cups milk / almond milk, 3 tablespoons pure vanilla extract, 2/3 cup white sugar or brown sugar with clear cues I can follow in a real kitchen. I included tips, variations, storage notes, and FAQs for the questions that usually come up.
Ingredients You’ll Need
Instructions
- Next I the white bread slices until they are golden brown and have a slightly crispy texture. You can use a toaster or toast them in a skillet with a little butter.
- After that I saucepan, combine the milk, white sugar, and vanilla extract. Heat the mixture over medium heat, stirring occasionally, until it’s warmed through. Do not boil.
- For storage I the toasted bread slices on serving plates or in individual bowls.
- For storage I the warm milk mixture over the toasted bread slices. Ensure that each slice is well-soaked but not overly saturated.
- For storage I sweeten to Taste.
- For storage If desired, you can add more sugar to sweeten the milk mixture to your liking. Stir gently to dissolve the sugar.
- For storage I ground cinnamon over each slice of milk-soaked bread. Adjust the amount according to your taste preferences.
- For storage I the milk toast while it’s still warm, allowing the flavors to meld.
- For storage I optional: Broil for a Crispy Top (Optional).
- For storage I if you like, you can place the milk-soaked bread under the broiler for a minute or two to create a slightly crispy top. Watch closely to prevent burning.
- For storage.
- For storage, in this comforting and simple milk toast. The warm milk, sweetened with sugar and enhanced with vanilla, makes for a cozy and satisfying breakfast or snack.
Nutrition Facts
Servings 6
- Amount Per Serving
- Calories 251kcal
- % Daily Value *
- Total Fat 8g13%
- Saturated Fat 5g25%
- Trans Fat 0.2g
- Cholesterol 24mg8%
- Sodium 104mg5%
- Potassium 327mg10%
- Total Carbohydrate 35g12%
- Sugars 35g
- Protein 8g16%
- Calcium 272 mg
- Iron 0.0 mg
* Percent Daily Values are based on a 2,000 calorie diet. Your daily value may be higher or lower depending on your calorie needs.
Note
Prep first. I chop and measure before the heat goes on.
Season in layers. A little salt early and a little at the end tastes better than one big dump.
Use the pan cues. Color, smell, and texture tell me when to move on.
Rest before serving. A few minutes off the heat makes the texture steadier.
Frequently Asked Questions
Yes. I usually make it ahead when the schedule is tight, then store it as directed and refresh the texture gently before serving.
Usually, yes. I keep the same ratios, use a larger bowl or pan, and add time only as needed instead of assuming it will be exactly double.
I look at what that ingredient is doing first. If it adds structure, I avoid swapping casually; if it adds flavor, I use the closest pantry match.
I trust the visual cues more than the clock: set edges, the right thickness, and a smell that changes from raw ingredients to cooked food.
Most batches keep several days when covered and chilled if the recipe needs refrigeration. I label the container because I forget by day three.
You may also like...