
Mini Conchas is the kind of recipe I make when I want something familiar, but I still want it to taste like I paid attention. I do the measuring first, keep the bowl close, and try not to wander off during the one part that can overcook.
I have learned that Mini Conchas rewards the small things: the right pan, a clean spatula, and a minute of patience before serving. Nothing about it needs to feel fussy, but I do not rush the texture checks.
My kitchen notes below are the things I pay attention to in real time: what I look for, where I slow down, and which shortcuts I trust. I would rather give a practical cue than pretend every stove, oven, and mixing bowl behaves the same.
Why I keep this method grounded
- The ingredient list is straightforward. so I can see what each item is doing.
- Most of the work happens before the cooking starts. which keeps the stove or oven time calmer.
- It scales nicely for a small table or a busier day when I need leftovers. It scales nicely for a small table or a busier day when I need leftovers.
- The texture gives clear cues. so I am not guessing only from the timer.
- I can adjust the finish without changing the backbone of the recipe. I can adjust the finish without changing the backbone of the recipe.
- It uses regular kitchen tools instead of specialty gear. It uses regular kitchen tools instead of specialty gear.
What I use and what each part does
- 2 tablespoon Dry yeast.
- 1/2 cup butter. Melted.
- 4 tablespoon Warm water.
- 1/4 cup evaporated milk.
- 1/3 cup granulated sugar.
- 1/2 tablespoon Salt. It keeps the flavor from tasting flat, so I do not skip it even when the amount looks small.
- 2 tablespoon Ground cinnamon.
- 2 tablespoon pure vanilla.
- 1 large egg. It binds the mixture and helps the center set cleanly.
- 4 cup all-purpose flour. This gives the mixture structure and helps the finished texture hold together.
- 2/3 cup Vegetable shortening.
- 1 cup Powdered sugar.
- 1 cup Unsweetened Cocoa Powder. It gives the bite its character and makes the batch feel finished.
How I make it
Step 1 — Let it rest
A medium bowl and incorporate the yeast with warm water. Let it rest for 5 minutes until you observe bubbles forming on the surface I pause here and check that the texture, temperature, or consistency matches the recipe before I move on.
Step 2 — Whisk together
Next I melted butter, sugar, evaporated milk, salt, cinnamon, vanilla and eggs into the mixture of yeast. Utilizing a whisk, blend all ingredients together until they are completely unified I pause here and check that the texture, temperature, or consistency matches the recipe before I move on.
Step 3 — Knead the dough
Then I gradually add the flour and blend until a soft dough is formed. Depending on the kitchen’s humidity, you may need to include extra water or flour for texture adjustment. Knead the dough for 8-10 minutes till it turns out smooth and flexible I pause here and check that the texture, temperature, or consistency matches the recipe before I move on.
Step 4 — Cook
After that I the dough with a moist towel and let it be stationary for 15 minutes I pause here and check that the texture, temperature, or consistency matches the recipe before I move on.
Step 5 — Finish whilst waiting preheat oven
Whilst waiting, preheat the oven to 350°F (175°C). Grease a baking sheet with a generous amount of vegetable shortening as preparation I pause here and check that the texture, temperature, or consistency matches the recipe before I move on.
Step 6 — Storage after dough ready roll
For storage After the dough is ready, roll it out on a slightly floured surface at 1/2 inch thickness. Cut into 2 inch circles and use your thumb to press in the center of each circle. Arrange them onto the preheated baking sheet.
Step 7 — Storage whilst still warm powdered
For storage I whilst still warm, mix powdered sugar with cocoa powder to create a delightful glaze. Let them cool down entirely before serving
Tips from my kitchen
- Read the whole method first. I catch pan sizes, chill times, and small timing notes before my hands are messy.
- Keep the heat honest. If my oven or burner runs hot, I check early instead of blaming the recipe later.
- Season or sweeten at the end. The final taste is clearer after the mixture has cooked, chilled, or rested.
- Use the stated rest time. A short rest often makes the difference between sloppy and sliceable.
Variations I have actually tried
- Swap in a small amount of citrus zest when I want the flavor brighter.
- Use toasted nuts for crunch, keeping the same total amount of mix-ins.
- Add a light pinch of espresso powder to chocolate versions for a deeper cocoa note.
- Finish with a simple glaze instead of frosting when I want a cleaner slice.
- Bake as minis when I need smaller portions, checking several minutes early.
What I serve it with
I usually serve Mini Conchas slightly warm or fully cooled, depending on how cleanly it needs to slice. Coffee, cold milk, or plain tea all work, and I keep any rich toppings modest so the main flavor still comes through.
Storing and reheating
I cool the batch completely, then cover it tightly. Most cookies and muffins keep at room temperature for a short window; custards, cream fillings, and pumpkin or dairy-heavy bakes go into the refrigerator. For freezing, I wrap portions well so they do not pick up freezer smells.
Frequently asked questions
Can I make it ahead?
Yes. I usually make it ahead when the schedule is tight, then store it as directed and refresh the texture gently before serving.
Can I double it?
Usually, yes. I keep the same ratios, use a larger bowl or pan, and add time only as needed instead of assuming it will be exactly double.
What if I am missing one ingredient?
I look at what that ingredient is doing first. If it adds structure, I avoid swapping casually; if it adds flavor, I use the closest pantry match.
Why did mine turn dry?
It was probably baked a little too long or measured with too much flour. I pull baked goods when the center is just set, then let carryover heat finish the job.
How long do leftovers keep?
Most batches keep several days when covered and chilled if the recipe needs refrigeration. I label the container because I forget by day three.
If you make this, leave a comment with the small change that worked in your kitchen; I always read those notes before I make the next batch.
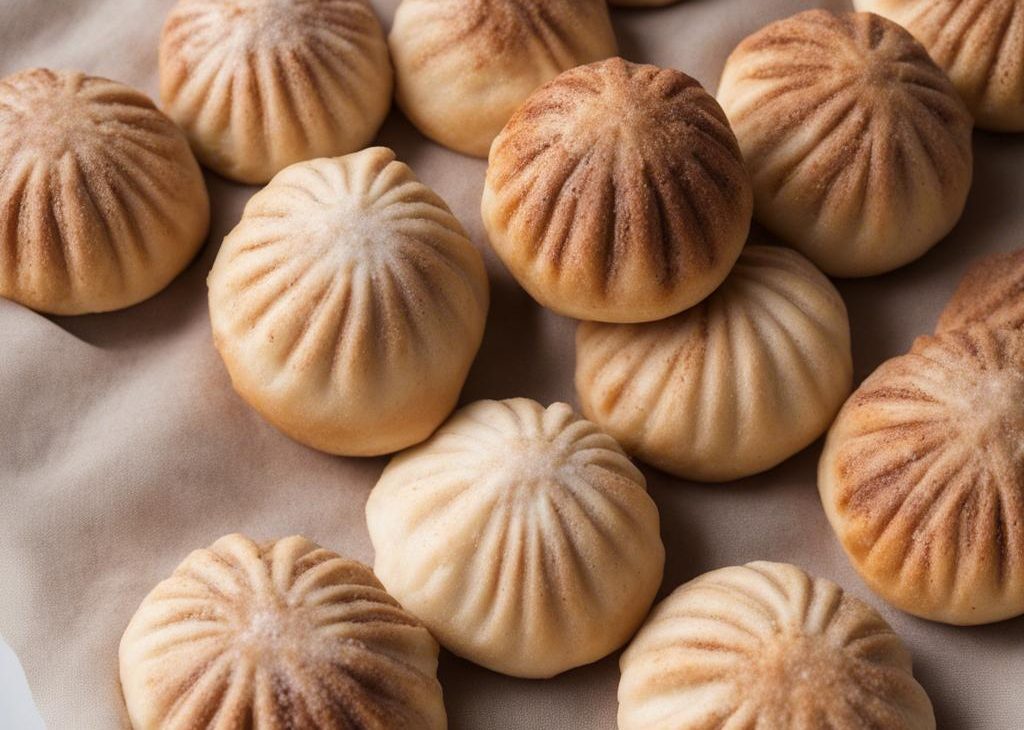
Mini Conchas
Description
This Mini Conchas uses 2 tablespoon Dry yeast, 1/2 cup butter, 4 tablespoon Warm water with clear cues I can follow in a real kitchen. I included tips, variations, storage notes, and FAQs for the questions that usually come up.
Ingredients You’ll Need
Instructions
- A medium bowl and incorporate the yeast with warm water. Let it rest for 5 minutes until you observe bubbles forming on the surface.
- Next I melted butter, sugar, evaporated milk, salt, cinnamon, vanilla and eggs into the mixture of yeast. Utilizing a whisk, blend all ingredients together until they are completely unified.
- Then I gradually add the flour and blend until a soft dough is formed. Depending on the kitchen's humidity, you may need to include extra water or flour for texture adjustment. Knead the dough for 8-10 minutes till it turns out smooth and flexible.
- After that I the dough with a moist towel and let it be stationary for 15 minutes.
- Whilst waiting, preheat the oven to 350°F (175°C). Grease a baking sheet with a generous amount of vegetable shortening as preparation.
- For storage After the dough is ready, roll it out on a slightly floured surface at 1/2 inch thickness. Cut into 2 inch circles and use your thumb to press in the center of each circle. Arrange them onto the preheated baking sheet and.
- For storage I whilst still warm, mix powdered sugar with cocoa powder to create a delightful glaze. Let them cool down entirely before serving.
Note
Measure first. I set every ingredient out before mixing so I do not discover a missing egg halfway through.
Watch the edges. The edges tell me more than the timer, especially with small bakes.
Cool before cutting. Warm baked goods tear easily, so I give them a short rest.
Use fresh leavening. Old baking powder or yeast makes the whole batch feel heavy.
Frequently Asked Questions
Yes. I usually make it ahead when the schedule is tight, then store it as directed and refresh the texture gently before serving.
Usually, yes. I keep the same ratios, use a larger bowl or pan, and add time only as needed instead of assuming it will be exactly double.
I look at what that ingredient is doing first. If it adds structure, I avoid swapping casually; if it adds flavor, I use the closest pantry match.
It was probably baked a little too long or measured with too much flour. I pull baked goods when the center is just set, then let carryover heat finish the job.
Most batches keep several days when covered and chilled if the recipe needs refrigeration. I label the container because I forget by day three.
You may also like...