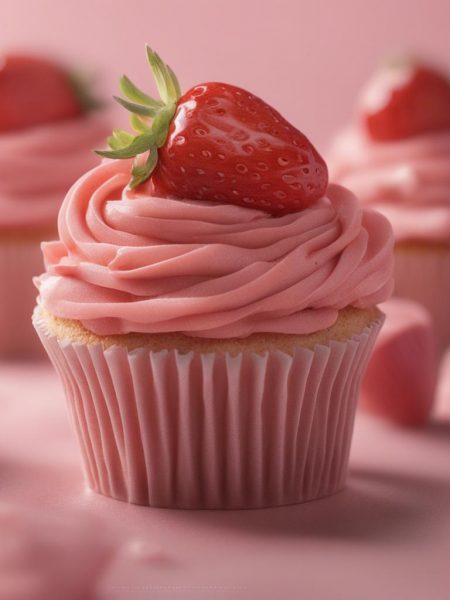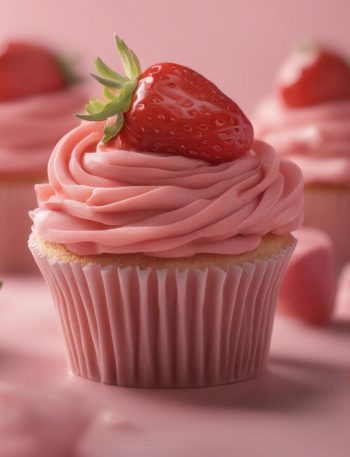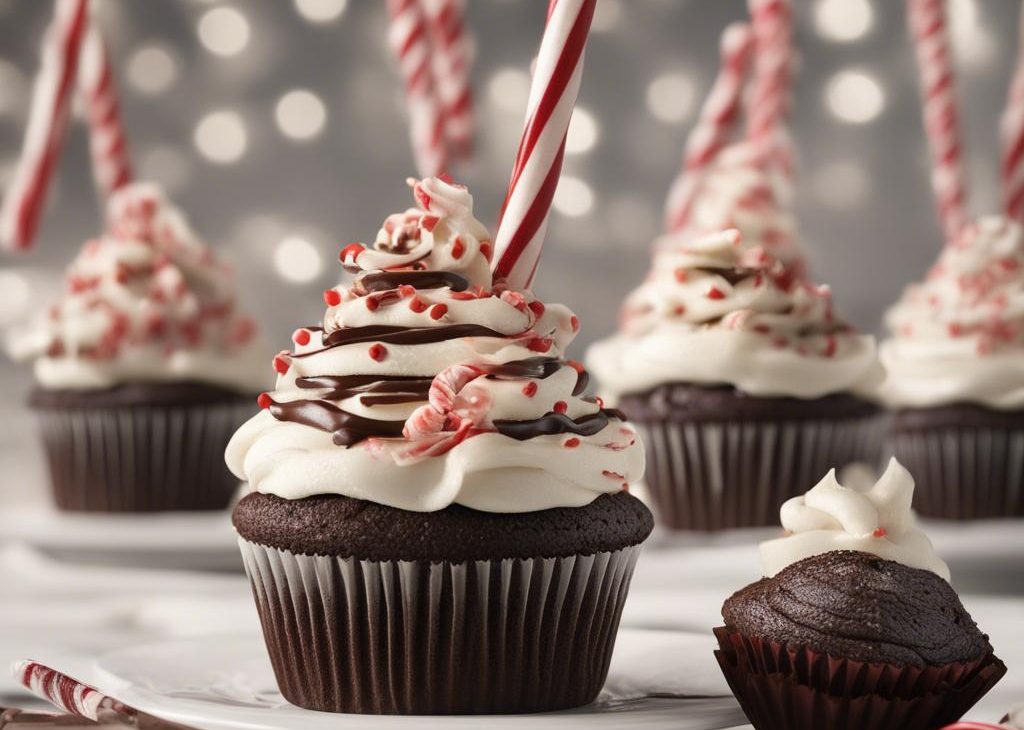

I keep a short list of sweets that feel worth the dishes, and Peppermint Mocha Cupcakes has earned a spot on it. The recipe is not complicated, but it rewards a little patience: measured ingredients, the right pan, and enough cooling time before anyone starts pulling at the edges.
The thing I like most is the contrast. There is richness from the main ingredients, a clean sweet edge, and enough structure that each cupcake holds together instead of turning messy in the hand. I have learned to trust the visual cues more than the clock, especially when chocolate or peanut butter is involved.
I wrote these notes the way I actually cook: what I set out first, where I slow down, and what I check before calling the batch done. It bakes at the temperature in the steps and takes about 18 minutes once the oven work starts, and the leftovers are easy to store if I keep air and heat away from them.
Why I keep coming back to this
- It tastes like a real homemade cupcake, not just sugar with a name attached.
- The steps are clear enough for a weeknight bake but still special enough for a cookie box or dessert plate.
- Most of the ingredients are pantry staples, and the few special ones do obvious work.
- The recipe gives me good make-ahead options because chilling and cooling are built into the flow.
- I can change the topping or garnish without rewriting the whole method.
- The texture improves when I let it rest, which makes serving less stressful.
What I use and why it matters
- unsalted butter, 1/2 cup (8 Tbsp; 113g).
- semi-sweet baking chocolate, 2 ounces.
- Tablespoon instant coffee*, 1 heaping.
- ingredient from source notes, 1/2 cup (41g).
- unsweetened cocoa powder, 3/4 cup (94g).
- all-purpose flour, 1/2 teaspoon. It gives the dough or crust structure; I spoon and level it so the finished batch does not turn dry.
- baking powder, 3/4 teaspoon. This controls the lift, so I measure it carefully instead of eyeballing.
- salt, 1/4 teaspoon.
- eggs, at room temperature, 2 large. It binds the mixture and adds enough richness that the crumb stays tender.
- granulated sugar, 1/2 cup (100g).
- packed light brown sugar, 1/4 cup (50g).
- pure vanilla extract, 1 teaspoon.
- peppermint extract, 1/2 teaspoon.
- buttermilk, 1/2 cup (120ml).
- unsalted butter, softened, 1 cup (16 Tbsp; 226g).
- confectioners’ sugar, 3-4 cups (360-480g).
- heavy cream, 1/4 cup (60ml).
- pure vanilla extract, 1 teaspoon.
- peppermint extract, 1/4 teaspoon.
- salt, to taste.
- optional garnish: ounces melted semi-sweet baking chocolate and crushed candy canes.
How I make it
Step 1 — Prep the oven and pan
I heat the oven to 350°F (177°C). Line a 12-count muffin pan with cupcake liners.
Step 2 — Microwave
Next I melt the butter and chocolate together in the microwave. Microwave in 30 second increments, stirring between each time.
Step 3 — Build the flavor
After that In a medium bowl, toss the cocoa powder, flour, baking soda, baking powder, and salt together until thoroughly combined.
Step 4 — Bake
Then I divide the batter between 12 liners in your cupcake pan. Bake for 18 minutes, or until a toothpick inserted in the center comes out clean.
Step 5 — Beat until smooth
Once the base is ready, I beat softened butter on medium speed with an electric or stand mixer.
Step 6 — Frost the cake
At this point I frost cooled cupcakes. There may be leftover frosting depending how much you use on each cupcake.
Step 7 — Store leftovers
To finish, I store leftovers in the refrigerator for up to 4-5 days.
Texture and timing cues I watch
For Peppermint Mocha Cupcakes, I pay attention to feel more than color alone. Dough should be manageable but not greasy; chocolate should look smooth, not broken; and baked edges should look set before the center looks completely firm. If I am unsure, I give the pan a short rest instead of adding a long extra bake, because carryover heat is real.
The cooling time matters as much as the active work. I have cut too early and regretted it: fillings drag, chocolate streaks, and soft cookies bend before they finish setting. A wire rack and a little patience fix more problems than another minute in the oven.
Tips from my kitchen
- Measure before mixing. I set every ingredient out first because several of these steps move quickly once chocolate, caramel, or warm cookies are involved.
- Respect the chill time. If the source says to chill, I do it; warm dough spreads and warm candy smears.
- Cool completely before frosting. Even slightly warm cupcakes can melt buttercream and make the topping slide.
- Watch the edges, not the middle. The center often looks soft when the batch is actually ready to come out.
Variations I have actually tried
- More peppermint: I add only an extra drop or two of extract; a full extra teaspoon can make the batch taste sharp.
- Dark chocolate: I swap in darker chocolate when I want the mint to feel less sweet.
- Smaller pieces: I make minis by watching the edges closely and checking a few minutes early.
- Holiday finish: I change only the topping colors, not the base recipe, so the texture stays reliable.
- Nut-free direction: When nuts are not central to the recipe, I use seeds or extra chocolate chips in the same volume.
Storing and serving
I store Peppermint Mocha Cupcakes in an airtight container once everything is fully cool or set. For the neatest texture, I separate layers with parchment. Room temperature is fine for sturdy cookies, but chocolate-coated or frosted pieces keep cleaner in the refrigerator. My usual window is several days, though the first two days have the freshest texture.
For serving, I like to bring chilled pieces out a few minutes early so the flavors wake up. If I am packing them for a tray, I choose the firmest pieces for the bottom layer and save the prettiest tops for last. It is a small detail, but it keeps the container from looking handled before it reaches the table.
Frequently asked questions
Can I make Peppermint Mocha Cupcakes ahead?
Yes. I usually make the base ahead and keep it covered as directed, then finish or serve when the texture is at its best. If the recipe includes chilling, I treat that time as part of the plan instead of trying to rush it.
Why did my batch spread or soften too much?
Most often the dough was too warm, the pan was hot from a previous batch, or the butter was softer than intended. I chill the mixture again for 10-15 minutes when it feels sticky or slumps before baking.
Can I freeze these?
For most cupcakes, yes. I freeze them in a single layer until firm, then move them to a freezer bag with parchment between layers. Frosted, dipped, or caramel-heavy versions keep a cleaner texture in the refrigerator instead.
Can I change the chocolate or candy?
Usually, as long as the amount stays the same and the pieces are chopped small enough to mix or melt evenly. I avoid oversized chunks because they make shaping harder and can create weak spots.
How do I know they are done?
I look for set edges and a center that still looks a little soft. Cookies and brownies keep cooking on the hot pan, while chilled candies firm up as they rest. Pulling them slightly early is often safer than waiting for a dry center.
If you make Peppermint Mocha Cupcakes, leave a comment with the variation you tried. I always like hearing what held up in another kitchen.
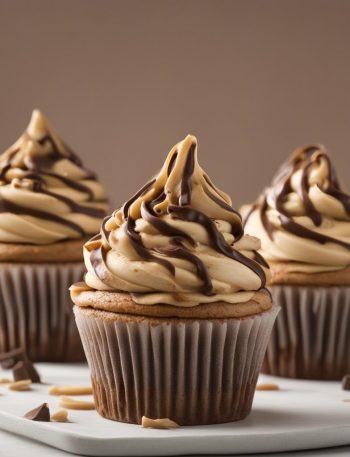
Peppermint Mocha Cupcakes
Description
Peppermint Mocha Cupcakes made with practical first-person notes, clear timing cues, and storage advice. I keep the method close to the source while explaining what each ingredient does and how I avoid the common texture problems.
Ingredients You’ll Need
Instructions
- I heat the oven to 350°F (177°C). Line a 12-count muffin pan with cupcake liners. I set that aside.
- Next I melt the butter and chocolate together in the microwave. Microwave in 30 second increments, stirring between each time. You may also melt the butter and chocolate over low heat on the stovetop. Stir until combined, then mix in the instant coffee. Set aside to slightly cool.
- After that In a medium bowl, toss the cocoa powder, flour, baking soda, baking powder, and salt together until thoroughly combined. I set that aside. In a large bowl, whisk the eggs, sugar, brown sugar, vanilla extract, and peppermint extract together until smooth. Add the cooled butter/chocolate and whisk until smooth. Add half of the flour mixture, then half of the buttermilk. Repeat until everything is added. Stir until *just* combined; do not overmix. The batter will be very thick like pudding.
- Then I divide the batter between 12 liners in your cupcake pan. Bake for 18 minutes, or until a toothpick inserted in the center comes out clean. Allow to cool completely before frosting.
- Once the base is ready, I beat softened butter on medium speed with an electric or stand mixer. Beat for about 3 minutes until smooth and creamy. Add confectioners' sugar, heavy cream, vanilla extract, and peppermint extract with the mixer running. Increase to high speed and beat for 3 full minutes (the longer you beat, the creamier the frosting!). Add more confectioners' sugar if frosting is too thin or more cream if frosting is too thick. Add salt if frosting is too sweet (I add about 1/8 teaspoon).
- At this point I frost cooled cupcakes. There may be leftover frosting depending how much you use on each cupcake. Drizzle with melted chocolate. Top with crushed candy canes right before serving.
- To finish, I store leftovers in the refrigerator for up to 4-5 days.
Nutrition Facts
Servings 12
- Amount Per Serving
- Calories 287kcal
- % Daily Value *
- Total Fat 26g40%
- Saturated Fat 16g80%
- Trans Fat 1.0g
- Cholesterol 67mg23%
- Sodium 89mg4%
- Potassium 108mg4%
- Total Carbohydrate 16g6%
- Dietary Fiber 2g8%
- Sugars 13g
- Protein 2g4%
- Calcium 47 mg
- Iron 0.8 mg
* Percent Daily Values are based on a 2,000 calorie diet. Your daily value may be higher or lower depending on your calorie needs.
Note
Measure before mixing. I set every ingredient out first because several of these steps move quickly once chocolate, caramel, or warm cookies are involved.
Respect the chill time. If the source says to chill, I do it; warm dough spreads and warm candy smears.
Cool completely before frosting. Even slightly warm cupcakes can melt buttercream and make the topping slide.
Watch the edges, not the middle. The center often looks soft when the batch is actually ready to come out.
Frequently Asked Questions
Yes. I usually make the base ahead and keep it covered as directed, then finish or serve when the texture is at its best. If the recipe includes chilling, I treat that time as part of the plan instead of trying to rush it.
Most often the dough was too warm, the pan was hot from a previous batch, or the butter was softer than intended. I chill the mixture again for 10-15 minutes when it feels sticky or slumps before baking.
For most cupcakes, yes. I freeze them in a single layer until firm, then move them to a freezer bag with parchment between layers. Frosted, dipped, or caramel-heavy versions keep a cleaner texture in the refrigerator instead.
Usually, as long as the amount stays the same and the pieces are chopped small enough to mix or melt evenly. I avoid oversized chunks because they make shaping harder and can create weak spots.
I look for set edges and a center that still looks a little soft. Cookies and brownies keep cooking on the hot pan, while chilled candies firm up as they rest. Pulling them slightly early is often safer than waiting for a dry center.
You may also like...