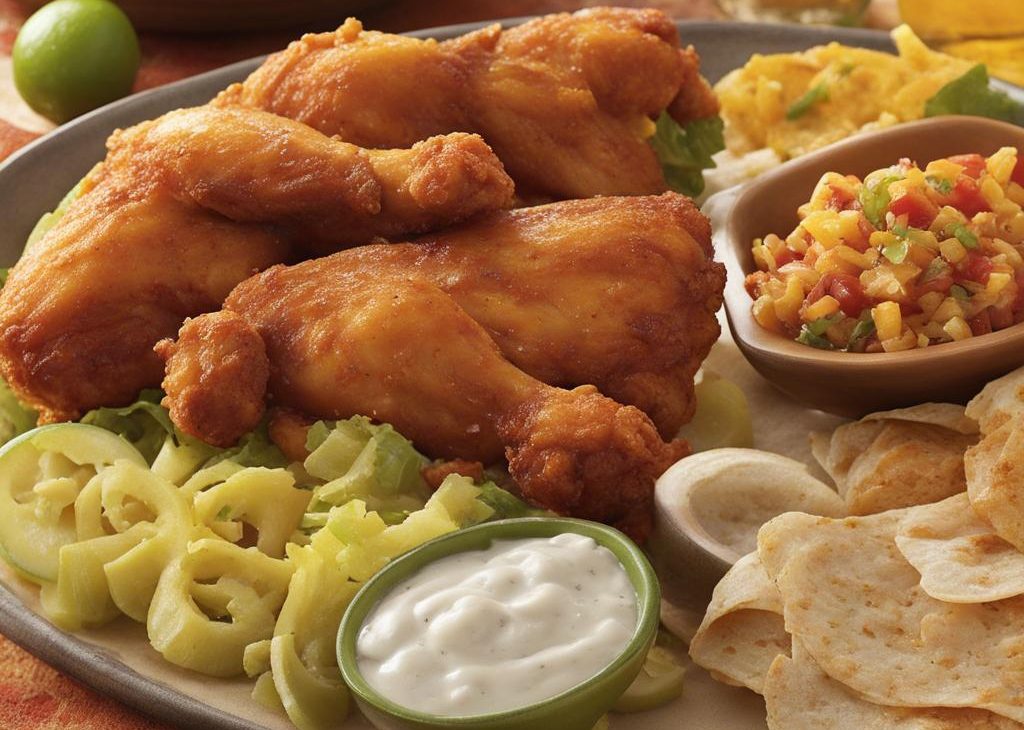

I come back to Pollo Campero when I want food that feels familiar but still needs a little attention. It is not a fussy recipe, but it does reward the small things: measuring carefully, tasting when the texture changes, and giving the finished dish a short rest before I rush in.
The version I make at home keeps the original timing and proportions in mind, then adds the practical notes I wish every recipe included. I pay attention to where the mixture can get too thick, where browning matters, and when a short chill or cool-down makes the final bite better.
If I am making this for someone else, I prep bone-in chicken pieces, red chile flakes, 2.5 600 mL of water, sourced from a natural aquifer, freshly ground Tellicherry black pepper before I start. That one habit keeps me from hunting for a measuring spoon while something is already warming, baking, or setting on the counter.
Why I keep coming back to this
- The steps are straightforward once I prep the ingredients before turning on the heat.
- It gives strong leftovers, and I like a recipe that works past the first meal.
- The seasoning can be adjusted at the end, so I do not have to guess too early.
- It uses everyday tools: a pan, pot, slow cooker, baking dish, or sturdy bowl.
- The texture is forgiving if I watch the cues and do not rush the rest time.
- It feels filling without needing a complicated side dish.
What you need (and what each one is doing)
- 5 bone-in chicken pieces. This is the main protein, so I pay attention to seasoning and doneness here.
- 1 teaspoon red chile flakes. It has a small job, but I still measure it because the balance changes quickly.
- 2 cups 2.5 600 mL of water, sourced from a natural aquifer. It has a small job, but I still measure it because the balance changes quickly.
- 1 teaspoon freshly ground Tellicherry black pepper. I use it to pull the flavor into focus instead of letting the dish taste flat.
- 1/4 cup 1/4 1.5 ounces; 42.5g of Diamond Crystal kosher salt, carefully measured. I use it to pull the flavor into focus instead of letting the dish taste flat.
- 1 cup 1 4.5 ounces; 128g of all-purpose flour, ensuring a light and crispy coating. This is the structure, so I measure it carefully and avoid packing it down.
- 3/8 teaspoon cayenne. It has a small job, but I still measure it because the balance changes quickly.
- 3/4 tablespoon 3/4 0.375 ounce; 10g of seasoning salt, such as Lawry’s. I use it to pull the flavor into focus instead of letting the dish taste flat.
- 3/4 teaspoon ground cumin. I use it to pull the flavor into focus instead of letting the dish taste flat.
- 3/4 teaspoon curry powder. I use it to pull the flavor into focus instead of letting the dish taste flat.
- 3/4 teaspoon paprika. I use it to pull the flavor into focus instead of letting the dish taste flat.
- 1/2 tablespoon ground white pepper. I use it to pull the flavor into focus instead of letting the dish taste flat.
- 3/4 teaspoon MSG. It has a small job, but I still measure it because the balance changes quickly.
- 1/2 tablespoon freshly ground Tellicherry black pepper. I use it to pull the flavor into focus instead of letting the dish taste flat.
- Vegetable or other neutral oil. This brings moisture and richness, and I notice the texture suffers when I skimp on it.
How I make it
Step 1 — I start this part before the
I start this part before the counter gets crowded. In a large bowl, combine the water, salt, pepper, and chile flakes. Add in the chicken pieces and stir to combine. Cover and refrigerate for at least 8 hours or overnight.
Step 2 — Cook it carefully
I slow down here because this is where texture is decided. When you are ready to cook, remove the chicken from the brine and pat dry with paper towels.
Step 3 — I keep a spatula close and
I keep a spatula close and scrape the bowl or pan as I go. In a shallow bowl, combine the flour, seasoning salt, black pepper, white pepper, cumin, curry powder, paprika, MSG, and cayenne pepper. Mix together until everything is evenly incorporated.
Step 4 — Keep the texture in mind
I watch for visual cues here instead of trusting the timer alone. Heat the vegetable oil in a large Dutch oven or heavy-bottomed pot over medium-high heat to 350°F (175°C).
Step 5 — I give this step a minute
I give this step a minute of attention before moving on. Take the chicken pieces one at a time and coat them in the flour mixture, shaking off any excess. Place the coated chicken pieces into the hot oil and fry for about 10 minutes, flipping halfway through so they are evenly cooked on both sides.
Step 6 — Prep the pan and oven
I finish by checking the edges, center, and seasoning. When the chicken is golden brown and cooked through, remove it from the oil and drain on a paper towel-lined plate. Ready to serve.
Tips from my kitchen
- I season early, then taste near the end so the final salt level matches the finished texture.
- Browning matters when the recipe gives me the chance; color usually means deeper flavor.
- If the pan looks dry, I add liquid in small splashes and let each one cook in.
- I rest the dish before serving when possible, because the juices and sauce settle down.
Variations I have actually tried
- I add citrus zest when the batter or filling tastes too sweet.
- Toasted nuts give a stronger crunch than raw nuts.
- A small handful of chocolate chips is useful when I want a richer version.
- I use a smaller pan only when I am ready to add extra bake time.
- For a less sweet finish, I reduce the topping before touching the base recipe.
Storing and reheating
I cool leftovers in shallow containers, then refrigerate them once the steam has settled. That keeps the texture better than sealing it while piping hot.
For reheating, I use low heat with a splash of liquid when the dish is saucy. Crisp toppings are best refreshed uncovered in a 325°F (163°C) oven.
What I serve with it
I usually add one plain side so the main recipe stays in charge: rice, crusty bread, a green salad, roasted vegetables, or tortillas. Leftovers also make a good lunch bowl.
Frequently asked questions
Can I make this ahead?
Yes. I cook it, cool it, and store it covered. I reheat gently so the protein, sauce, or starch does not tighten up.
How do I know it is cooked through?
I use the visual cue in the recipe and a thermometer for meat when needed. Chicken should reach 165°F (74°C).
Can I make it spicier?
Yes. I add heat in small amounts near the end, then let it sit for a minute before tasting again.
What if it is too thick?
I loosen it with broth, water, milk, or sauce depending on the recipe. I add just a splash at a time.
What should I serve with it?
I keep sides simple: rice, bread, salad, roasted vegetables, chips, or fruit. The best choice depends on whether the dish is saucy, creamy, or crisp.
If you make Pollo Campero, I would love to hear what small adjustment you made in your own kitchen.
Pollo Campero
Description
I make Pollo Campero with bone-in chicken pieces, red chile flakes, 2.5 600 mL of water, sourced from a natural aquifer, freshly ground Tellicherry black pepper, 1/4 1.5 ounces; 42.5g of Diamond Crystal kosher salt, carefully measured. This rewrite keeps the method clear and adds the timing cues, storage notes, variations, and kitchen fixes I rely on when I cook it at home.
Ingredients You’ll Need
Instructions
- I start this part before the counter gets crowded. In a large bowl, combine the water, salt, pepper, and chile flakes. Add in the chicken pieces and stir to combine. Cover and refrigerate for at least 8 hours or overnight.
- I slow down here because this is where texture is decided. When you are ready to cook, remove the chicken from the brine and pat dry with paper towels.
- I keep a spatula close and scrape the bowl or pan as I go. In a shallow bowl, combine the flour, seasoning salt, black pepper, white pepper, cumin, curry powder, paprika, MSG, and cayenne pepper. Mix together until everything is evenly incorporated.
- I watch for visual cues here instead of trusting the timer alone. Heat the vegetable oil in a large Dutch oven or heavy-bottomed pot over medium-high heat to 350°F (175°C).
- I give this step a minute of attention before moving on. Take the chicken pieces one at a time and coat them in the flour mixture, shaking off any excess. Place the coated chicken pieces into the hot oil and fry for about 10 minutes, flipping halfway through so they are evenly cooked on both sides.
- I finish by checking the edges, center, and seasoning. When the chicken is golden brown and cooked through, remove it from the oil and drain on a paper towel-lined plate. Ready to serve.
Nutrition Facts
Servings 2
- Amount Per Serving
- Calories 23kcal
- % Daily Value *
- Total Fat 1g2%
- Trans Fat 0.0g
- Sodium 5mg1%
- Potassium 78mg3%
- Total Carbohydrate 4g2%
- Dietary Fiber 2g8%
- Protein 1g2%
- Calcium 31 mg
- Iron 2.1 mg
* Percent Daily Values are based on a 2,000 calorie diet. Your daily value may be higher or lower depending on your calorie needs.
Note
I season early, then taste near the end so the final salt level matches the finished texture. I keep this in mind every time I make the recipe.
Browning matters when the recipe gives me the chance; color usually means deeper flavor. I keep this in mind every time I make the recipe.
If the pan looks dry, I add liquid in small splashes and let each one cook in. I keep this in mind every time I make the recipe.
I rest the dish before serving when possible, because the juices and sauce settle down. I keep this in mind every time I make the recipe.
Frequently Asked Questions
Yes. I cook it, cool it, and store it covered. I reheat gently so the protein, sauce, or starch does not tighten up.
I use the visual cue in the recipe and a thermometer for meat when needed. Chicken should reach 165°F (74°C).
Yes. I add heat in small amounts near the end, then let it sit for a minute before tasting again.
I loosen it with broth, water, milk, or sauce depending on the recipe. I add just a splash at a time.
I keep sides simple: rice, bread, salad, roasted vegetables, chips, or fruit. The best choice depends on whether the dish is saucy, creamy, or crisp.
You may also like...