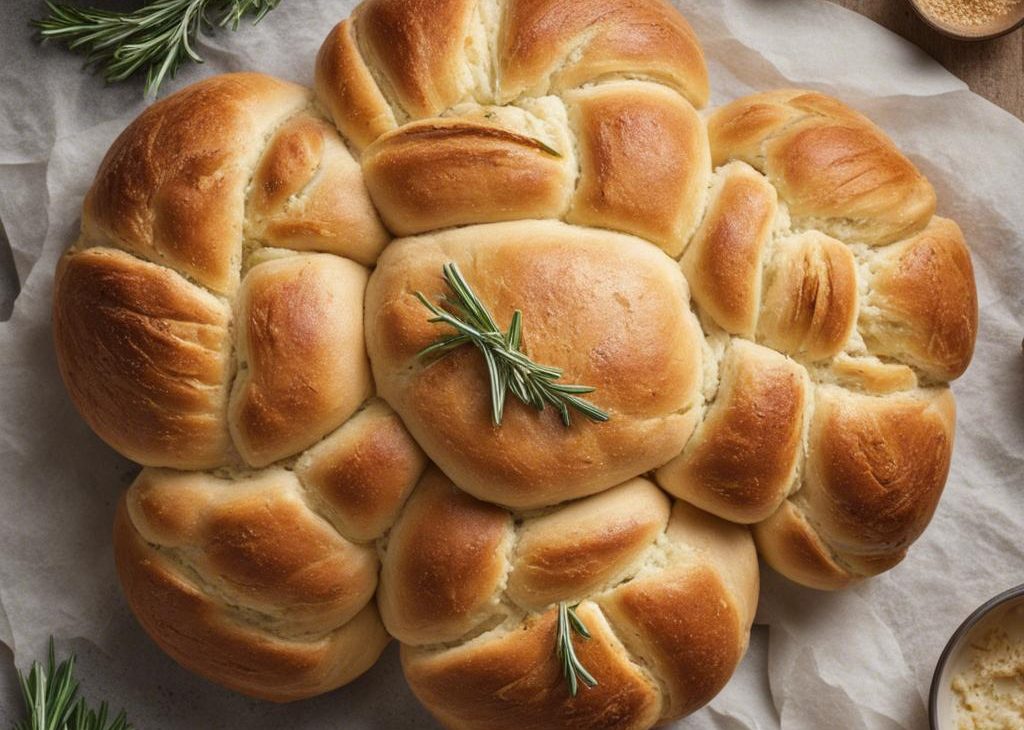

I make Rosemary Garlic Pull Apart Bread when I want something warm, shareable, and a little more satisfying than a plain side. Dough, cheese, vegetables, and layered fillings all need patience, but none of the steps are hard when I slow down and set them up in order.
With about 3 minutes of prep and 50 minutes of cooking, this is the recipe I start before the kitchen gets busy. I get the pan ready, measure the toppings, and give the dough or crust the time it needs instead of fighting it.
The small details matter here: a hot oven, an even layer, a rest before slicing, and enough seasoning in every part. I have served too many bready or soggy bakes to skip those details now.
Why I keep coming back to this
- I can do the prep in about 3 minutes, which makes the recipe realistic on an ordinary day.
- The ingredient list is straightforward once everything is measured and grouped by step.
- The leftovers hold up well when I store them properly instead of leaving them loosely covered.
- It is flexible enough for small swaps without losing the main character of the dish.
- The recipe gives clear texture cues, so I am not depending on the timer alone.
- It tastes better after a short rest, which gives me time to clean the counter before serving.
What you need and what each ingredient does
- 2 teaspoons Platinum Yeast from Red Star. I give it a little patience; rushing this ingredient is where the texture usually suffers.
- 1 Tablespoon granulated sugar. I count on it for sweetness, browning, and a softer bite.
- 3/4 cup whole milk, warmed (180ml).
- 3 Tablespoons unsalted butter, softened (43g).
- 1 large egg. I use it for structure; room temperature eggs blend much more cleanly for me.
- 2 and 1/3 cups all-purpose flour (291g). I measure it carefully because it decides whether the base is tender or heavy.
- 1 teaspoon salt.
- 1 teaspoon garlic powder.
- 1 Tablespoon finely chopped fresh rosemary (or 2 teaspoons dried). so the recipe moves calmly.
- 5 Tablespoons unsalted butter, softened (71g).
- 1 Tablespoon finely chopped fresh rosemary (or 2 teaspoons dried). so the recipe moves calmly.
- 1 Tablespoon finely chopped fresh parsley (or 2 teaspoons dried). so the recipe moves calmly.
- 2 garlic cloves, minced or 1/2 teaspoon garlic powder.
- 1/4 teaspoon salt.
- 3/4 cup shredded parmesan cheese (95g). so the recipe moves calmly. I grate it fresh from a block so it melts evenly without clumping.
- 1 Tablespoon unsalted butter, melted (14g).
- coarse or flaky sea salt for sprinkling.
How I make it
Step 1 — Combine the ingredients
I combine the ingredients in the order given, scraping the bowl and checking the edges so no dry pockets or streaks are hiding. I keep the listed timing in mind: 110°F (43°C), 5-10 minutes, 5-10 minutes.
Step 2 — Beat until smooth
I beat the mixture until it looks cohesive and lighter, stopping once to scrape the bowl because the bottom always holds a little unmixed butter or sugar. I keep the listed timing in mind: 3 minutes.
Step 3 — Combine the ingredients
I combine the ingredients in the order given, scraping the bowl and checking the edges so no dry pockets or streaks are hiding.
Step 4 — Assemble
I assemble the layers carefully and keep the edges tidy so the pieces slice or serve cleanly after cooking. I keep the listed timing in mind: 60-90 minutes.
Step 5 — Combine the ingredients
Step 6 — Finish and serve
I keep the listed timing in mind: 45 minutes.
Step 7 — Store
Heating the oven and preparing the pan or baking sheet so rosemary garlic pull apart bread can go straight in once assembled. I keep the listed timing in mind: 350°F (177°C).
Step 8 — Bake
I bake until the visual cues match the recipe, then I let carryover heat finish the center instead of pushing it too far. I keep the listed timing in mind: 50 minutes.
Step 9 — Chill
I give the mixture the chill or cooling time it needs before moving on; this is the step that keeps the final texture neat. I keep the listed timing in mind: 10 minutes.
Step 10 — Store leftovers
Serving while the texture is at its best, then I store leftovers tightly covered. I keep the listed timing in mind: 300°F (149°C), 2 days, 10-15 minutes.
Tips from my kitchen
- Tip 1: I preheat fully before baking because a lukewarm oven changes the texture.
- Tip 2: I keep toppings in a thin, even layer so the center does not turn soggy.
- Tip 3: I rest the finished bake before slicing; the filling needs a few minutes to settle.
- Tip 4: I reheat uncovered at first if I want the edges to crisp again.
Variations I have actually tried
- Variation 1: Use a different cheese if it melts well and tastes good with the filling.
- Variation 2: Add roasted vegetables in a thin layer for more color.
- Variation 3: Brush the crust or bread with garlic butter before serving.
- Variation 4: Sprinkle herbs after baking so they stay fragrant.
- Variation 5: Make smaller portions for appetizers and reduce the bake time slightly while watching the color.
Storing and reheating
I wrap leftovers tightly once cool and refrigerate them. To bring back the edges, I reheat in a 300°F (149°C) to 350°F (177°C) oven until warm instead of relying only on the microwave.
When I know leftovers are coming, I portion them before anyone starts picking at the pan. Smaller containers cool faster, reheat more evenly, and make the next meal feel less like an afterthought.
What I serve with it
I serve it warm, when the cheese, crust, or bread still has life in it. A crisp salad or pickled vegetables on the side balances the richness.
Frequently asked questions
Can I make this ahead?
Yes. I prep the components ahead and bake close to serving when I want the best texture.
Can I use store-bought dough or crust?
Yes. I do it when time is tight, but I still let it rest if it keeps shrinking or tearing.
How do I keep the bottom from getting soggy?
I use a hot oven, avoid piling on wet fillings, and bake until the bottom has real color.
Can I freeze leftovers?
Many baked leftovers freeze well once wrapped tightly. I reheat uncovered for a better edge.
How do I know it is done?
I look for browning, bubbling, and a set center rather than trusting the timer alone.
If you make Rosemary Garlic Pull Apart Bread, I would love to hear what you changed and what you would keep exactly the same next time.
Rosemary Garlic Pull Apart Bread
Description
I wrote this rosemary garlic pull apart bread rewrite the way I cook it: with the small timing cues, texture checks, and storage notes that matter once the recipe is in a real kitchen. It is practical, warm, and detailed enough to follow without guessing.
Ingredients You’ll Need
Instructions
- Step 1: I combine the ingredients in the order given, scraping the bowl and checking the edges so no dry pockets or streaks are hiding. I keep the listed timing in mind: 110°F (43°C), 5-10 minutes, 5-10 minutes.
- Step 2: I beat the mixture until it looks cohesive and lighter, stopping once to scrape the bowl because the bottom always holds a little unmixed butter or sugar. I keep the listed timing in mind: 3 minutes.
- Step 3: I combine the ingredients in the order given, scraping the bowl and checking the edges so no dry pockets or streaks are hiding.
- Step 4: I assemble the layers carefully and keep the edges tidy so the pieces slice or serve cleanly after cooking. I keep the listed timing in mind: 60-90 minutes.
- Step 5:.
- Step 6: I combine the ingredients in the order given, scraping the bowl and checking the edges so no dry pockets or streaks are hiding.
- Step 7: I combine the ingredients in the order given, scraping the bowl and checking the edges so no dry pockets or streaks are hiding.
- Step 8:.
- Step 9: I keep the listed timing in mind: 45 minutes.
- Step 10: Heating the oven and preparing the pan or baking sheet so rosemary garlic pull apart bread can go straight in once assembled. I keep the listed timing in mind: 350°F (177°C).
- Step 11: I bake until the visual cues match the recipe, then I let carryover heat finish the center instead of pushing it too far. I keep the listed timing in mind: 50 minutes.
- Step 12: I give the mixture the chill or cooling time it needs before moving on; this is the step that keeps the final texture neat. I keep the listed timing in mind: 10 minutes.
- Step 13: Serving while the texture is at its best, then I store leftovers tightly covered. I keep the listed timing in mind: 300°F (149°C), 2 days, 10-15 minutes.
Nutrition Facts
Servings 1
- Amount Per Serving
- Calories 1016kcal
- % Daily Value *
- Total Fat 80g124%
- Saturated Fat 49g246%
- Trans Fat 2.5g
- Cholesterol 447mg149%
- Sodium 3303mg138%
- Potassium 650mg19%
- Total Carbohydrate 32g11%
- Dietary Fiber 3g12%
- Sugars 23g
- Protein 45g90%
- Calcium 1214 mg
- Iron 4.0 mg
* Percent Daily Values are based on a 2,000 calorie diet. Your daily value may be higher or lower depending on your calorie needs.
Note
Timing. I preheat fully before baking because a lukewarm oven changes the texture.
Texture. I keep toppings in a thin, even layer so the center does not turn soggy.
Seasoning. I rest the finished bake before slicing; the filling needs a few minutes to settle.
Storage. I reheat uncovered at first if I want the edges to crisp again.
Frequently Asked Questions
Yes. I prep the components ahead and bake close to serving when I want the best texture.
Yes. I do it when time is tight, but I still let it rest if it keeps shrinking or tearing.
I use a hot oven, avoid piling on wet fillings, and bake until the bottom has real color.
Many baked leftovers freeze well once wrapped tightly. I reheat uncovered for a better edge.
I look for browning, bubbling, and a set center rather than trusting the timer alone.