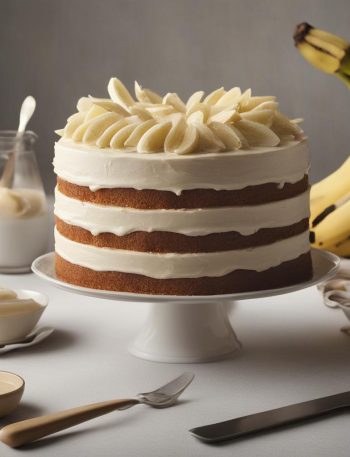
With its outstanding vanilla flavor, pillowy soft crumb, and creamy vanilla buttercream, this is truly the best vanilla cake I’ve ever had. And after 1 bite, I guarantee you’ll agree.
Out of all the cake recipes on my website, there’s a glaring absence. There’s white cake with a pristine soft crumb, vanilla naked cake with a flavorful tight crumb, and checkerboard cake with a whimsical design.
What about a classic vanilla layer cake draped in vanilla buttercream? I already have homemade vanilla cupcakes and a vanilla 6 inch cake covered and now in all its crowning glory (and after plenty recipe testing catastrophes), I present you with cake perfection:
This is the best vanilla cake I’ve ever had.
What Makes it the Best Vanilla Cake?
Let’s count the ways!
Not to mention its versatility: This vanilla cake batter is strong enough for shaped cakes, tiered cakes (see the slight variation in my homemade wedding cake recipe), and holds up beautifully under fondant. Use this batter for vanilla cupcakes, Bundt cake, or even piñata cake. It’s classy enough for a wedding celebration, but unassuming enough for a big family dinner.
Behind the Vanilla Cake Recipe
After years of cake successes and flops, I’m confident in this homemade vanilla cake. During my recipe testing, I combined my white cake recipe and naked cake recipe. These are two reader favorites and I knew they’d be the best starting point. At first there were too many eggs and I quickly learned sifting cake flour was NOT doing any favors.
You need the following power ingredients:
For more prominent vanilla flavor, use homemade vanilla extract. (What a fun DIY gift!) This vanilla cake batter is moderately thick and fits perfectly in 3 9-inch cake pans. We actually use the same exact batter to make snickerdoodle cake.
Do you know how to level a cake? Let me help. It’s really easy. You can use a fancy cake leveler, but I use a serrated knife. Carefully slice off the tippy top of the cooled cake layers, creating a flat surface. Leveling cakes doesn’t require a ruler, talent, or any mathematical equations. Instead, just use your eyes, hands, and a knife.
Leveling the cake layers promises a straight and sturdy layer cake.
How Much Frosting Between Cake Layers?
. The vanilla buttercream recipe below yields about 6 cups of frosting. I recommend you use about 1.5 heaping cups of buttercream between each cake layer and reserve the last 3 cups for outside the cake. If you are going to add a filling such as raspberry cake filling, you’ll use less frosting between the layers. You can use this detailed how to assemble and decorate a layer cake post as a guide!
Cake Decoration Inspiration: For a simple look, stick with vanilla buttercream, fresh berries, and mint sprigs. You can also decorate with chocolate buttercream (I recommend the same amount from this piñata cake), rainbow sprinkles, a chocolate ganache drip like on this chocolate chip cake, or even beautiful buttercream flowers.
Homemade Vanilla Cake Success Tips
Learn from my mistakes and bake the best cake on the 1st try!
Great read: Check out Tessa’s Top 10 Best Layer Cake Tips.
Finding the perfect vanilla cake recipe requires a celebration. Luckily we have cake!!!
The Best Vanilla Cake Recipe
Description
With its outstanding vanilla flavor, pillowy soft crumb, and creamy vanilla buttercream, this is truly the best vanilla cake I've ever had. Make sure you read through the recipe and recipe notes before beginning. This recipe yields approximately 8 cups of batter which is helpful if you need this batter for different cake pan sizes and conversions.
Ingredients You’ll Need
Instructions
- Preheat oven to 350°F (177°C). Grease three 9-inch cake pans, line with parchment paper rounds, then grease the parchment paper. Parchment paper helps the cakes seamlessly release from the pans..)
- Whisk the cake flour, salt, baking powder, and baking soda together. Set aside.
- Using a handheld or stand mixer fitted with a paddle or whisk attachment, beat the butter and sugar together on high speed until smooth and creamy, about 3 minutes. Scrape down the sides and up the bottom of the bowl with a silicone spatula as needed. Beat in the 3 eggs, 2 egg whites, and vanilla extract on high speed until combined, about 2 minutes. (Mixture will look curdled as a result of the egg liquid and solid butter combining.) Scrape down the sides and up the bottom of the bowl as needed. With the mixer on low speed, add the dry ingredients just until combined. With the mixer still running on low, pour in the buttermilk and mix just until combined. You may need to whisk it all by hand to make sure there are no lumps at the bottom of the bowl. The batter will be slightly thick.
- Pour batter evenly into cake pans. Weigh them to ensure accuracy, if desired. Bake for around 23-26 minutes or until the cakes are baked through. To test for doneness, insert a toothpick into the center of the cake. If it comes out clean, it’s done. Allow cakes to cool completely in the pans set on a wire cooling rack. The cakes must be completely cool before frosting and assembling.
- In a large bowl using a handheld mixer or stand mixer fitted with a whisk or paddle attachment, beat the butter on medium speed until creamy, about 2 minutes. Add confectioners’ sugar, milk, vanilla extract, and salt with the mixer running on low. Increase to high speed and beat for 2 minutes. Add more confectioners’ sugar if frosting is too thin, more milk if frosting is too thick, or an extra pinch of salt if frosting is too sweet.
- Using a large serrated knife, slice a thin layer off the tops of the cakes to create a flat surface. Discard (or crumble over ice cream!). Place 1 cake layer on your cake stand, cake turntable, or serving plate. Evenly cover the top with about 1 and 1/2 cups of frosting. Top with 2nd cake layer and evenly cover the top with about 1 and 1/2 cups of frosting. Top with the third cake layer. Spread the remaining frosting all over the top and sides. I use and recommend an icing spatula to apply the frosting.
- Refrigerate cake for at least 1 hour before slicing. This helps the cake hold its shape when cutting.
- Cover leftover cake tightly and store in the refrigerator for up to 5 days.
You may also like...