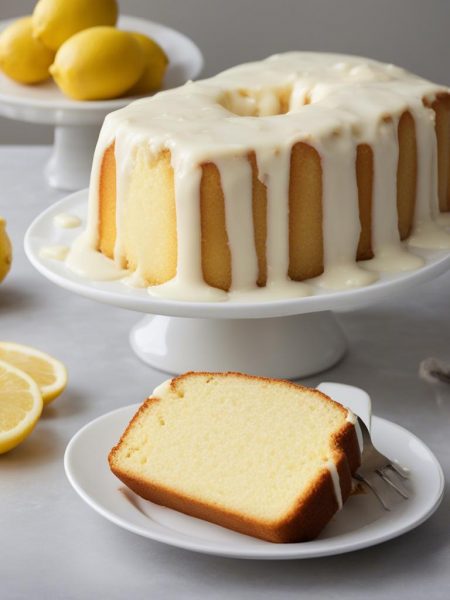
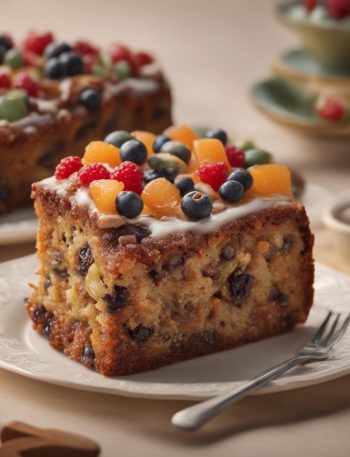
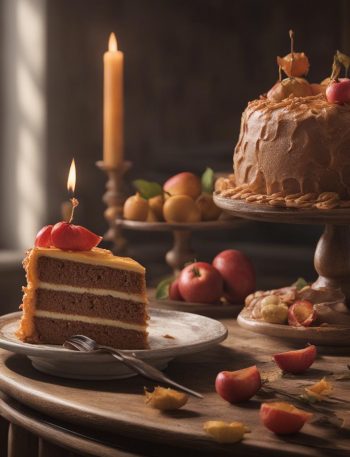
I make Vanilla Cake when I want a celebration cake that tastes like vanilla, not just sugar. It is the kind of recipe I reach for when I want food that feels familiar but still needs a little attention. The payoff is fluffy, buttery, and tender, with enough structure to stack cleanly, which is exactly why I keep it in my rotation.
The first time I worked through this version, I paid attention to the small moments: how the mixture looked before cooking, when the edges started to change, and how long it needed to rest. Those details are easy to skip, but they are usually what separate a decent batch from one I want to make again.
I kept the method straightforward and wrote the notes the way I use them in my own kitchen. If something can go wrong, I would rather say it plainly than pretend the clock fixes everything.
Why I keep coming back to this
- It gives me fluffy, buttery, and tender, with enough structure to stack cleanly without asking for fussy restaurant tricks.
- The ingredient list is clear, and I can tell what each piece is doing.
- The timing is practical enough for a real kitchen, including interruptions.
- It scales nicely for sharing or for leftovers, which matters more than people admit.
- I can serve it with fresh berries, coffee, or a scoop of strawberry ice cream and call the meal handled.
- The recipe has enough built-in cues that I do not have to guess the whole way through.
What you need (and what each one is doing)
- 3 2/3 cups cake flour (433g). This gives structure, so I measure it carefully.
- 1 teaspoon salt.
- 2 teaspoons baking powder.
- 3/4 teaspoon baking soda.
- 1 1/2 cups unsalted butter, softened (340g).
- 2 cups granulated sugar (400g).
- 3 large eggs + 2 additional egg whites, at room temperature. This binds and helps the recipe set.
- 1 Tablespoon pure vanilla extract.
- 1 1/2 cups buttermilk, at room temperature (360ml).
- 1 1/2 cups unsalted butter, softened (340g). This brings moisture, richness, or tenderness.
- 5 1/2 cups confectioners’ sugar (650g).
- 1/3 cup whole milk or heavy cream (80ml).
- 1 1/2 teaspoons pure vanilla extract.
- 1/8 teaspoon salt.
How I make it
Step 1 — Preheat oven to 350°
I preheat oven to 350°F (177°C). Grease three 9-inch cake pans, line with parchment paper rounds, then grease the parchment paper. Parchment paper helps the cakes seamlessly release from the pans.) I check the texture before moving on because the clock only gets me close.
Step 2 — Whisk together
I whisk the cake flour, salt, baking powder, and baking soda together. Set aside.
Step 3 — Beat the butter
Using a handheld or stand mixer fitted with a paddle or whisk attachment, beat the butter and sugar together on high speed until smooth and creamy, about 3 minutes. Scrape down the sides and up the bottom of the bowl with a silicone spatula as needed. Beat in the 3 eggs.
Step 4 — Bake
I pour batter evenly into cake pans. Weigh them to ensure accuracy, if desired. Bake for around 23-26 minutes or until the cakes are baked through. To test for doneness, insert a toothpick into the center of the cake. If it comes out clean, it’s done. Allow cakes to cool completely.
Step 5 — Add the confectioners’ sugar
In a large bowl using a handheld mixer or stand mixer fitted with a whisk or paddle attachment, beat the butter on medium speed until creamy, about 2 minutes. Add confectioners’ sugar, milk, vanilla extract, and salt with the mixer running on low. Increase to high speed and beat for 2.
Step 6 — Assemble
Using a large serrated knife, slice a thin layer off the tops of the cakes to create a flat surface. Discard (or crumble over ice cream!). Place 1 cake layer on the cake stand, cake turntable, or serving plate. Evenly cover the top with about 1 and 1/2 cups of frosting.
Step 7 — Chill
I refrigerate cake for at least 1 hour before slicing. This helps the cake hold its shape when cutting.
Step 8 — Store leftovers
I cover leftover cake tightly and store in the refrigerator for up to 5 days.
The small details I watch
With Vanilla Cake, I respect the resting and cooling steps. Hot food keeps cooking after it leaves the heat, and baked recipes keep setting as they cool. Serving too early is usually the easiest way to lose the texture I wanted.
I also taste where it makes sense. Salt, citrus, sweetness, and spice shift depending on brands and produce, so I adjust only after the base is ready to judge.
Tips from my kitchen
- Room-temperature ingredients matter for a smooth batter. Room-temperature ingredients matter for a smooth batter.
- I weigh the cake pans when I want even layers. I weigh the cake pans when I want even layers.
- Do not skip parchment rounds. Do not skip parchment rounds; they save the bottoms.
- A crumb coat makes the final frosting layer calmer. A crumb coat makes the final frosting layer calmer.
- Chill the cake before slicing so the layers stay put. Chill the cake before slicing so the layers stay put.
Variations I have actually tried
- Raspberry: Raspberry jam between the layers.
- Lemon: Lemon zest in the batter and frosting.
- Chocolate: Chocolate curls on the outside.
- Almond: Almond extract in place of a little vanilla.
- Two: Two thick layers instead of three, with a longer bake.
Storing and reheating
I store Vanilla Cake in the way that protects its main texture. If it is crisp or baked, I cool it first so trapped steam does not soften it. If it is creamy, saucy, or blended, I use a covered container and keep strong-smelling foods away from it.
For reheating, I use gentle heat and stop as soon as it is warm. For cold recipes, I stir or blend briefly before serving. Leftovers are always better when I portion them before the refrigerator turns one large container into a guessing game.
Frequently asked questions
Can I make Vanilla Cake ahead?
Yes. I usually make the parts that hold well ahead and keep final garnishes or toppings separate. For best texture, I follow the storage notes and refresh the Vanilla Cake gently before serving.
What is the most common mistake?
Rushing is the mistake I see most often. I slow down at the step where moisture, cooling, or browning matters because that is where the texture is usually decided.
Can I change the add-ins?
Yes, within reason. I keep the base quantities steady, then swap add-ins with similar moisture and size so the recipe still cooks or chills the way it should.
How do I know it is done?
I look for the visual cue in the method instead of relying only on the clock. With Vanilla Cake, the timing gets me close, but the center, edges, and aroma tell me when to stop.
How should I serve it?
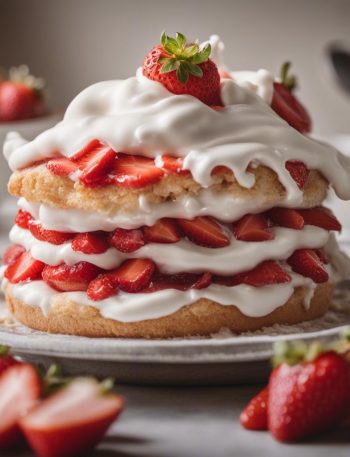
I like it with fresh berries, coffee, or a scoop of strawberry ice cream. I keep the serving simple because the recipe already has enough flavor on its own.
If you make this Vanilla Cake, leave a comment with the variation you tried. I always like hearing what worked in another real kitchen.
Vanilla Cake
Description
I make vanilla cake when I want a celebration cake that tastes like vanilla, not just sugar. The recipe gives me fluffy, buttery, and tender, with enough structure to stack cleanly, and the notes below cover the practical cues I watch in my own kitchen.
Ingredients You’ll Need
Instructions
- I preheat oven to 350°F (177°C). Grease three 9-inch cake pans, line with parchment paper rounds, then grease the parchment paper. Parchment paper helps the cakes seamlessly release from the pans.).
- I whisk the cake flour, salt, baking powder, and baking soda together. Set aside.
- Using a handheld or stand mixer fitted with a paddle or whisk attachment, beat the butter and sugar together on high speed until smooth and creamy, about 3 minutes. Scrape down the sides and up the bottom of the bowl with a silicone spatula as needed. Beat in the 3 eggs, 2 egg whites, and vanilla extract on high speed until combined, about 2 minutes. (Mixture will look curdled as a result of the egg liquid and solid butter combining.) Scrape down the sides and up the bottom of the bowl as needed. With the mixer on low speed, add the dry ingredients just until combined. With the mixer still running on low, pour in the buttermilk and mix just until combined. You may need to whisk it all by hand to make sure there are no lumps at the bottom of the bowl. The batter will be slightly thick.
- I pour batter evenly into cake pans. Weigh them to ensure accuracy, if desired. Bake for around 23-26 minutes or until the cakes are baked through. To test for doneness, insert a toothpick into the center of the cake. If it comes out clean, it's done. Allow cakes to cool completely in the pans set on a wire cooling rack. The cakes must be completely cool before frosting and assembling.
- In a large bowl using a handheld mixer or stand mixer fitted with a whisk or paddle attachment, beat the butter on medium speed until creamy, about 2 minutes. Add confectioners' sugar, milk, vanilla extract, and salt with the mixer running on low. Increase to high speed and beat for 2 minutes. Add more confectioners' sugar if frosting is too thin, more milk if frosting is too thick, or an extra pinch of salt if frosting is too sweet.
- Using a large serrated knife, slice a thin layer off the tops of the cakes to create a flat surface. Discard (or crumble over ice cream!). Place 1 cake layer on the cake stand, cake turntable, or serving plate. Evenly cover the top with about 1 and 1/2 cups of frosting. Top with 2nd cake layer and evenly cover the top with about 1 and 1/2 cups of frosting. Top with the third cake layer. Spread the remaining frosting all over the top and sides. I use and recommend an icing spatula to apply the frosting.
- I refrigerate cake for at least 1 hour before slicing. This helps the cake hold its shape when cutting.
- I cover leftover cake tightly and store in the refrigerator for up to 5 days.
Nutrition Facts
Servings 12
- Amount Per Serving
- Calories 851kcal
- % Daily Value *
- Total Fat 26g40%
- Saturated Fat 16g80%
- Trans Fat 1.0g
- Cholesterol 70mg24%
- Sodium 370mg16%
- Potassium 93mg3%
- Total Carbohydrate 154g52%
- Dietary Fiber 1g4%
- Sugars 127g
- Protein 4g8%
- Calcium 100 mg
- Iron 1.6 mg
* Percent Daily Values are based on a 2,000 calorie diet. Your daily value may be higher or lower depending on your calorie needs.
Note
Room-temperature ingredients matter for a smooth batter..
I weigh the cake pans when I want even layers..
Do not skip parchment rounds; they save the bottoms..
A crumb coat makes the final frosting layer calmer..
Frequently Asked Questions
Yes. I usually make the parts that hold well ahead and keep final garnishes or toppings separate. For best texture, I follow the storage notes and refresh the Vanilla Cake gently before serving.
Rushing is the mistake I see most often. I slow down at the step where moisture, cooling, or browning matters because that is where the texture is usually decided.
Yes, within reason. I keep the base quantities steady, then swap add-ins with similar moisture and size so the recipe still cooks or chills the way it should.
I look for the visual cue in the method instead of relying only on the clock. With Vanilla Cake, the timing gets me close, but the center, edges, and aroma tell me when to stop.
I like it with fresh berries, coffee, or a scoop of strawberry ice cream. I keep the serving simple because the recipe already has enough flavor on its own.
You may also like...