
This chewy, cheesy asiago-crusted skillet bread is packed with the savory flavors of asiago cheese, plus a hint of garlic and black pepper. Baking the dough in a skillet helps form a thick and extra crispy bottom crust. You’ll use an easy no-knead method to make this yeast bread, which produces a beautiful homemade loaf with minimal hands-on work.
This recipe is brought to you in partnership with Red Star Yeast.
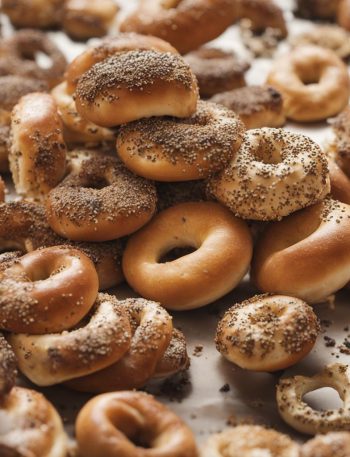
If you’ve ever had the pleasure of biting into an asiago bagel, you know how the salty, savory flavor of the asiago cheese mingles with the malty, yeasty flavor of the bagel in every chewy bite. And how the cheese sprinkled on top bakes in and forms a delicious crust on the exterior. (Are you drooling yet?!)
I wanted to replicate that wonderful flavor and chewy texture, but as a loaf of bread. This recipe nails it, and unlike homemade bagels, there’s NO kneading, individual shaping, or boiling steps involved.
Why You’ll Love This Asiago Cheese Bread
- No mixer, no complicated shaping, and no kneading required
- Short + simple list of ingredients
- Flavors of asiago cheese, garlic, and black pepper
- Ready the same day you start making it
- Tastes phenomenal with tomato soup or creamy cauliflower potato soup
- EASY: If you can stir ingredients together, you can make this bread!
Grab These Ingredients
Asiago cheese flavor: it’s an Italian alpine cow’s milk cheese, and the flavor ranges from mildly sweet and nutty to sharp and tangy, depending on how long it’s aged. A good substitute for the asiago in this bread recipe is freshly grated Parmesan, Pecorino-Romano, or white cheddar.
I use it in this savory sun-dried tomato quick bread, too.
I’ve found that some brands of asiago cheese can have a particularly… pungent aroma. But rest assured, that magically disappears during baking, and the baked bread will smell and taste absolutely delicious.
What is No-Knead Bread?
This no-knead method of making homemade bread is super popular among home bakers, and originally came from Jim Lahey of Sullivan Street Bakery in NYC. After using his method to make cranberry nut no-knead bread, many readers asked for more flavor variations. Since then, I’ve also published no-knead olive bread, super seeded oat bread, honey oat bread, and jalapeño cheddar bread.
I love making bread like this.
For today’s no-knead asiago bread, I made a few changes. Instead of letting the dough rest for 12–18 hours, we’re shortening that time to just 3 hours. We’re using a little more yeast (1 standard packet) to speed up the process. This is a bread you can start making the same day you plan to eat it and most of the “work” is completely hands off as the dough rises.
How to Make No-Knead Asiago-Crusted Skillet Bread
This process truly couldn’t be easier. Stir all the ingredients together by hand. Expect a very sticky dough:
Cover the bowl and let the dough rise for 3 hours. The dough will stretch to the sides of the bowl and have air bubbles on the surface:
Use a spatula to help remove the sticky dough from the bowl then use generously floured hands to shape the dough into a ball. Place it in an oven-safe skillet.
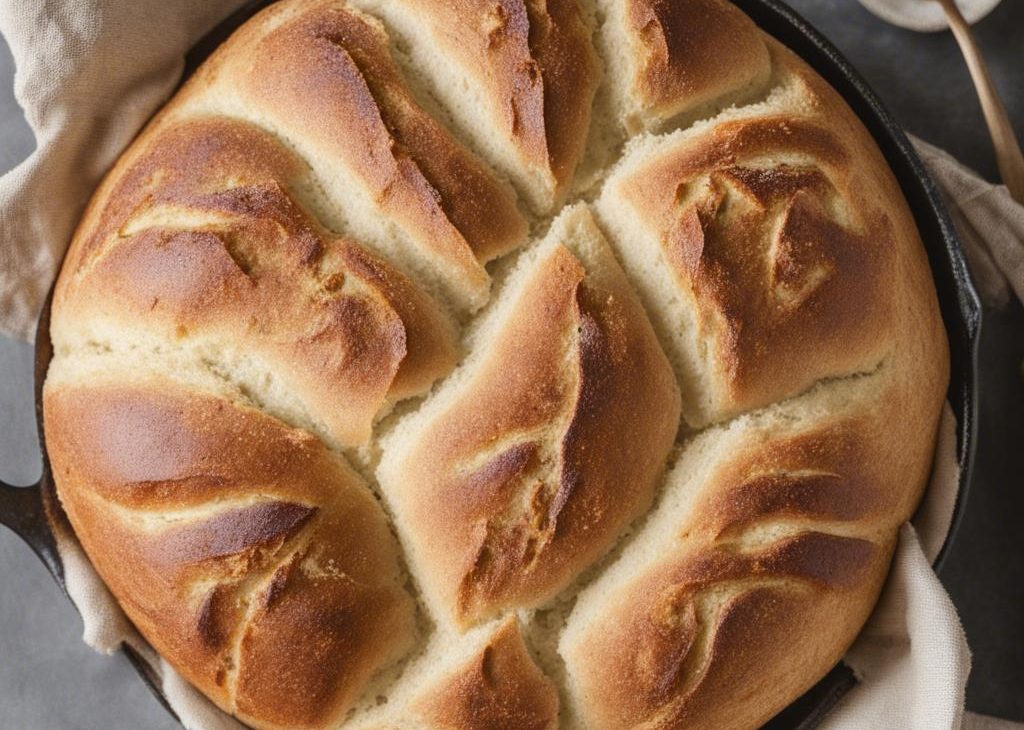
Let it rest for 30 minutes, and then score it with sharp knife or bread lame, top with more asiago cheese, and bake.
I love that this bread has a similar flavor to twisted cheese bread, but requires none of the complicated shaping.
Why Bake Bread in a Skillet?
Though I usually bake no-knead bread in a Dutch oven or on a baking sheet, I wanted the crust to be the main focus here. Baking the bread in a cast iron skillet helps develop a thick, extra crispy crust on the bottom.
If you need a recommendation, I own and love this cast-iron skillet. I have both the 10-inch and the 12-inch sizes and you can use either for this bread. They’re incredible quality for the price, and I use them to make all kinds of recipes, from skillet brownies to my Dutch baby pancake recipe, plus frittatas, skillet sea salt & herb rolls, honey cornbread, apple cider chicken, and more. Talk about a versatile pan to have in your kitchen!
Because of the sticky dough and cheese, this bread is flatter than most boules. But this just means a higher crust to interior ratio!
Keep this recipe on standby for when that craving for warm homemade cheese bread hits. Because you know when you start thinking about warm homemade cheese bread, you can’t stop thinking about it.
This asiago bread is simply perfect with a bowl of tomato soup and I love to dip it in homemade Italian dressing. Or serve it alongside:
- Frittata
- Bruschetta Chicken with Zucchini Noodles
- Maryland Crab Cakes
- Vegetarian Pumpkin Chili
- Minestrone Soup
- Creamy Chicken Noodle Soup
Asiago-Crusted Skillet Bread Recipe
Description
Homemade bakery-style bread has never been easier. This no-knead asiago-crusted bread is baked in a skillet and requires minimal hands-on work! If you’re new to working with yeast, reference my Baking with Yeast Guide for answers to common yeast FAQs.
Ingredients You’ll Need
Instructions
- *No need to grease the bowl, and do not use a mixer in this step because the dough is too sticky for a mixer.* In a large bowl, stir together the bread flour, salt, pepper, yeast, and garlic. Add 1 cup (100g) of the cheese and stir until combined. Make a well in the center of the flour mixture, and pour in the warm water. Using a silicone spatula or wooden spoon, mix to combine. The dough will be shaggy and pretty sticky. If it’s extremely wet, add another 2 Tablespoons of flour. Gently shape the dough into a ball in the center of the bowl. Cover the bowl tightly. Allow to rise for 3-3.5 hours at room temperature. See Make Ahead Instructions if you want to extend this time.
- Grease a 10- to 12-inch oven-safe skillet with oil, butter, or nonstick spray. Turn the dough out onto a generously floured work surface and, using floured hands, shape into a ball as best you can. Doesn’t have to be perfect. Place dough in the skillet, cover it, and let it rest for 30 minutes as the oven preheats.
- Preheat the oven to 425°F (218°C).
- Using a very sharp knife or bread lame (you could even use kitchen shears), gently score a slash or X into the surface of the dough, about 1/2 inch deep. (“Score” = shallow cut.) Top the bread with the remaining 1/4 cup (25g) asiago cheese, pressing it lightly into the surface so it sticks.
- Bake for 30–35 minutes, or until the bread is golden brown. How to test for doneness: Give the warm bread a light tap. If it sounds hollow, it’s done. For a more accurate test, the bread is done when an instant-read thermometer reads the center of the loaf as 195°F (90°C).
- Remove skillet from the oven, carefully remove the bread from the skillet, and allow to cool on a cooling rack for 20 minutes before slicing.
- Cover and store leftover bread at room temperature for up to 2-3 days or in the refrigerator for up to 1 week.
You may also like...