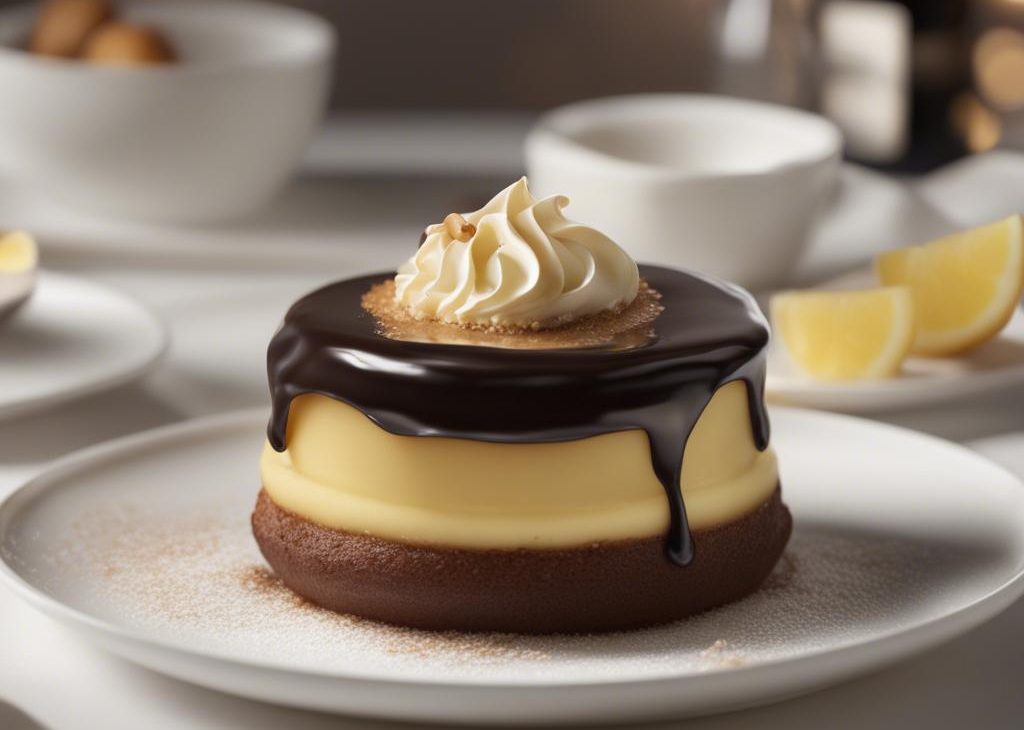
Allow us to present to you with Boston cream pie! This airy sponge cake is filled with rich pastry cream and topped with a shiny chocolate ganache glaze. It’s supremely decadent, satisfying, and melt-in-your-mouth delicious.
Our bookshelves are full of cookbooks, but we can say with 100% honesty that our go-tos are generally authored by America’s Test Kitchen. After all, America’s Test Kitchen and its knowledgeable test cooks, editors, and cookware specialists put the time and effort into perfecting recipes, a practice we value and respect.
Their cookbook The Perfect Cake boasts more than 240 kitchen-tested cake and cupcakes recipes ranging from a yellow sheet cake and tres leches cake to rainbow cake and bananas Foster cake. It’s the kind of cookbook that compels you to jump out of your seat, run to the kitchen, and grab the flour. So if you enjoy baking cakes, you need this cookbook.
One recipe in particular stole our hearts: Boston cream pie. We knew that if anyone could do this classic recipe justice—completely from-scratch—it’s ATK.
What is Boston Cream Pie?
The “pie” in Boston Cream Pie is a bit of a misnomer. This show-stopping dessert was originally dreamed up in the 1800s, back in the day when pies and cakes were both baked in pie plates, and names were used interchangeably. The cake features custard or pastry cream sandwiched between two rounds of buttery cake and is finished with chocolate glaze. It’s incredible.
Boston Cream Pie Recipe Details
- Texture: The sponge cake itself is light and springy, nicely offsetting the rich pastry cream and silky chocolate glaze.
- Flavor: We have buttery sponge cake, vanilla pastry cream, and deep chocolate flavors to satisfy taste buds.. Turns out, Boston cream pie isn’t terribly difficult if you break the recipe down into 3 parts: 1) pastry cream 2) sponge cake 3) chocolate glaze
- Time: Set aside 6 hours to complete this recipe, which includes a lot of waiting as the components bake, cool, etc. This dessert definitely requires some time to make, but you just can’t rush perfection.
Recipe Testing: What Works & What Doesn’t
Considerations when making the pastry cream. The recipe begins with a version of my homemade pastry cream. Made with life’s best ingredients (butter, egg yolks, vanilla extract, and sugar), this buttery sweet cake filling is everything you might imagine it to be. We often use it instead of peanut butter mousse when making these homemade eclairs, and we use a variation of it in mille-feuille.
The egg yolks must be gently cooked and tempered with warm half-and-half. And remember: you’ll need to whisk the pastry cream constantly as it cooks and thickens. Then, allow the vanilla pastry cream to cool completely before spreading it on the cake.
Here are a few key points to remember:
- Pastry cream will be thick right off the stove.
- For a smooth cream, strain to rid any lumps.
- Place plastic wrap on the surface when cooling.
If you want to save time on the day of serving, the pastry cream can be made in advance..
How to make sponge cake. Sponge cakes are known for their delicate and airy texture, thanks to (1) a high egg-to-flour ratio and (2) the air beaten into the eggs. America’s Test Kitchen employs the “hot milk sponge cake” method, which skips the egg separation and the meticulous folding. Instead, you whisk a warm butter + milk mixture into whipped eggs + sugar, then whisk in the cake’s dry ingredients. The warm milk keeps the butter melted, thus allowing it to mix seamlessly into the batter. And since we’re whisking together just 3 bowls of ingredients, this is an excellent recipe for sponge-cake beginners. We truly appreciate this simplified method, since this recipe does have a number of steps.
The sponge cake’s ingredients are pretty similar to the pastry cream’s ingredients. This is what we LOVE MOST about baking. It’s the same ingredients, just beaten, mixed, and cooked in different ways. Magic.
- Don’t make our mistake! By skipping over a few words in the recipe, we managed to ruin our sponge cakes… twice! That’s four 9-inch cakes completely destroyed. Line the cake pans with parchment paper. While you’re at it, grease the pans before and after they’ve been lined with parchment paper.. You may be tempted to grease the pans and skip the parchment paper, but the cakes WILL stick. See this Recipe Testing blog post for proof!
By the way, if you love sponge cakes, you’ll enjoy this impressive Vertical Cake.
Making the chocolate glaze. Rounding out our Boston cream pie is a veil of chocolate glaze, an extra glossy version of chocolate ganache. Made with 3 ingredients, this chocolate glaze is velvety and smooth—and if you set it aside for a few minutes before stirring, it’s also thick enough to cling to the sides of the cake. You’ll heat heavy cream and a bit of corn syrup together on the stove before pouring the mixture over finely chopped chocolate. Any dark, bittersweet, or semisweet chocolate can be used. The corn syrup adds sweetness, so avoid anything very sweet. The corn syrup also provides shine and sticking power to the glaze, and I highly recommend its addition. Honey should make a nice substitution, though I haven’t tried it myself.
Believe us, this cake is worth the effort.
Overview: How to Make Boston Cream Pie
You can find the full printable recipe towards the end of this post. We include the following summary so you can prepare yourself for all of the involved steps.

Boston Cream Pie Recipe
Description
Completely from-scratch with homemade pastry cream, buttery sponge cake, and shiny chocolate glaze, this classic Boston cream pie recipe is supremely decadent and satisfying.
Ingredients You’ll Need
Instructions
- .
- Heat half-and-half in a medium saucepan over medium heat until simmering. Meanwhile, whisk egg yolks, granulated sugar, and salt together in a bowl until smooth. Add flour and whisk until combined. Mixture will be thick. Whisk about 1/2 cup half-and-half into yolk mixture to temper, then slowly whisk tempered yolk mixture into half-and-half in the saucepan. Reduce heat to medium-low and continue to cook, whisking constantly, for 5 minutes as the mixture thickens. (America’s Test Kitchen instructs for 7-8 minutes, but mine began thickening quickly.)
- Increase heat to medium and cook, whisking vigorously, until bubbles burst on the surface, about 1 minute. Remove from heat and whisk in the butter and vanilla extract until combined. Pastry cream will be thick. Strain through a fine-mesh strainer set over a bowl. Press plastic wrap directly on surface of pastry cream and refrigerate until set, at least 2 hours and up to 24 hours.
- Preheat the oven to 325°F (163°C). Grease two round 9-inch cake pans, line with parchment paper rounds, then grease the parchment paper. Parchment paper helps the cakes seamlessly release from the pans..)
- Whisk flour, baking powder, and salt together in a small bowl. In the microwave or on the stove, heat milk and butter together until butter has melted. Stir in the vanilla extract. Cover loosely to keep warm. In a large bowl using a hand mixer or a stand mixer fitted with a whisk attachment, whip the eggs and granulated sugar together on high speed until light and creamy, about 4 minutes. Add hot milk mixture and whisk by hand until combined, then whisk in the dry ingredients. Batter will bubbly on top and somewhat thick, similar to pancake batter.
- Divide batter evenly between 2 pans. Bake until the tops of cakes are light brown and a toothpick inserted in the center comes out clean, about 20-22 minutes.
- Remove cakes from the oven and set on a wire rack. Allow to cool completely in the pan. As the cakes cool, check the pastry cream in the refrigerator. If it’s too thick, it won’t easily spread and could tear the cake. I remove pastry cream from the refrigerator about 20 minutes before assembling the cake.
- Once cakes are cool, run a thin knife around the edges to release them from the pans. Place bottom cake layer on your cake stand or serving plate. Spread pastry cream evenly on top. Place second cake layer on top and gently press down to adhere to the pastry cream. Refrigerate cake while preparing the chocolate glaze.
- Heat heavy cream and corn syrup in a small saucepan over medium heat until just simmering. As it heats up, place chocolate in a heat-proof glass bowl with a pouring spout (I use this 2-cup liquid measuring cup). Once simmering, remove cream from heat and pour over chocolate. Let sit, covered, for 5 minutes. Gently whisk until smooth.
- Pour glaze into the center of cake. Spread glaze to the edges of cake allowing it to gently drip down the sides. Refrigerate cake, uncovered, for at least 2 hours (and up to 24 hours) before slicing and serving. If chilling for longer than 2 hours, allow cake to come to room temperature before slicing and serving.
- Cover leftover cake tightly and store in the refrigerator for 5 days.

