
This is the drink I reach for when I want dessert in a glass but I am not in the mood to bake. It takes about ten minutes from cold milk to first sip, uses three ingredients I already have on the shelf, and it tastes like the inside of a peanut butter cup that learned to pour.
I started making it the first time I had a craving for chocolate at 9pm and decided I was not driving anywhere. The first version was too thin and barely chocolatey. The second version was too sweet. This one, the one I am sharing here, is the one I have made at least twenty times and the one my husband now requests by name.
Below I walk through exactly what I do, the small things I learned the hard way, and the swaps that actually work. If you want the short version: melt the chocolate gently, blend everything cold-ish, drink immediately.
Why I keep coming back to this drink
- Three pantry ingredients, no special equipment beyond a blender.
- Real melted chocolate, not cocoa powder syrup, so the flavor is closer to a chocolate bar than to a glass of chocolate milk.
- Peanut butter does most of the heavy lifting on creaminess, so I do not need to add ice cream to get a milkshake feel.
- Works cold over ice in summer and warm in a mug in winter from the same base recipe.
- Easy to dial sweet or barely-sweet by switching the chocolate (dark vs milk).
- Kid-approved at my house, and it is honestly less sugar than a bottled chocolate milk if you use dark chocolate.
The three ingredients (and what each one is doing)
- Chocolate chips, 1/4 cup. I usually use semi-sweet because that is what is in my pantry, but dark chocolate gives a more grown-up flavor and milk chocolate makes it taste like a chocolate milkshake. I have also used a chopped chocolate bar when I ran out of chips and it actually melts faster.
- Milk, 2 1/2 cups. Whole milk is what I default to because the fat carries the chocolate flavor. 2% works. Skim works but the drink will feel thinner. Oat milk is the dairy-free option I actually like for this — it has a natural sweetness that plays well with peanut butter. Almond milk works but tastes a little thin to me.
- Peanut butter, 6 tablespoons. Creamy is easier to blend in. Natural-style peanut butter (the kind you have to stir) works but give it an extra ten seconds in the blender. Crunchy works if you do not mind little bits — I actually like it that way for an ice-cold version.
How I make it, step by step
Step 1 — Melt the chocolate gently
Put 1/4 cup chocolate chips in a small saucepan over low heat. Stir constantly. The first few times I did this I walked away for thirty seconds and ended up with a grainy, seized mess. Stay with it — the chips look intact and then suddenly start collapsing. As soon as the chocolate is smooth, pull the pan off the heat and let it sit for about 5 minutes. If it is still hot when it hits the milk it can shock the peanut butter and you get little chocolate flecks instead of a smooth drink. Microwave method works too: 30 seconds, stir, 15 seconds, stir, 10 seconds, stir.
Step 2 — Blend everything together
Pour the slightly cooled chocolate, 2 1/2 cups milk, and 6 tablespoons peanut butter into a blender. Blend on medium for about 30 seconds, scraping down the sides once. The peanut butter wants to cling to the blades — a quick scrape sorts it out. You are looking for a uniform color with no streaks.
Step 3 — Serve straight away
Pour into 4 glasses, over ice if you want it really cold. Drink it within about an hour for the best texture; if it sits longer the peanut butter starts to settle. I write more on storing it below — yes, you can save it, but you will need to re-blend or shake hard.
Tips from my kitchen
- Do not skip cooling the chocolate. Hot chocolate plus cold milk separates. Warm chocolate plus cold milk blends smoothly. The 5 minute wait is non-negotiable for me.
- If your peanut butter is fridge-cold, let it come to room temp first. Cold peanut butter clumps and you end up with little brown pebbles in the drink.
- For the iced version, freeze the milk in an ice cube tray the night before. Blend the cubes in with everything else and you get an instant frozen drink.
- For the warm version, gently warm the milk in the same saucepan after the chocolate is melted, then whisk in the peanut butter off the heat. Skip the blender. Mug, blanket, done.
- Pinch of salt. If your peanut butter is unsalted, add a small pinch when you blend. It does not make the drink taste salty, it just makes the chocolate and peanut butter taste louder.
Variations I have actually tried
- Mocha version: Add a teaspoon of instant espresso powder to the chocolate while it melts. It tastes like a peanut butter latte.
- Banana milkshake version: Blend in 1 frozen banana. It becomes thick enough to eat with a spoon.
- Vegan: Use oat milk and dairy-free chocolate chips. I genuinely cannot tell this version apart from the dairy version.
- Almond butter swap: Works, tastes more delicate. Sunflower seed butter also works if you need a nut-free version, but the drink takes on a slightly green tinge after sitting — taste is fine, looks odd.
- Sweeter: Add 1 tablespoon maple syrup or honey to the blender. I only do this if I am using dark chocolate.
- Dessert glass-up: Pour over a scoop of vanilla ice cream and call it a peanut butter chocolate float.
Make-ahead and storage
This drink is best fresh — the chocolate stays suspended and the peanut butter stays creamy. That said, leftovers are fine. Pour into a jar with a tight lid and refrigerate up to 2 days. The chocolate will sink and the peanut butter will float; just shake vigorously or give it 10 seconds back in the blender before pouring.
For longer storage, freeze the mixture in an ice cube tray. The cubes are perfect dropped into a smoothie or blended into a milkshake later. I keep a tray in the freezer most of the time now, just for this.
What I serve it with
Honestly, by itself — it is rich enough to be the whole snack. If I am making it part of a dessert spread, I like it next to something with a clean flavor: shortbread cookies, fresh strawberries, or a piece of plain banana bread. The contrast keeps the chocolate-peanut-butter from getting too heavy on the palate.
Frequently asked questions
Can I make this without a blender?
Yes. Whisk the warm melted chocolate into the milk in a saucepan over low heat, then take it off the heat and whisk in the peanut butter until smooth. The texture will be a touch less velvety than the blender version but still very good.
Why did my drink turn out grainy?
Two usual culprits: the chocolate seized while melting (water got in, or it overheated), or the chocolate was still too hot when it hit the cold milk. Melt the chocolate slowly and let it rest 5 minutes off the heat. If it does seize, you can sometimes save it by whisking in a tablespoon of warm milk off the heat.
Is this kid-friendly?
Yes — my kids drink the same recipe I do, just in smaller cups. If yours are sensitive to dark chocolate, use milk chocolate chips and the drink turns into a peanut butter chocolate milkshake-style treat.
Can I use cocoa powder instead of melted chocolate?
You can, but I do not love the result. Cocoa powder makes a thinner drink that needs added sugar to balance the bitterness. Use 2 tablespoons unsweetened cocoa powder plus 2 tablespoons maple syrup or honey, and whisk it into warm milk so the cocoa actually dissolves. The melted-chocolate version is creamier and richer.
How long does it stay fresh in the fridge?
Up to 2 days in an airtight container. After that the texture starts to get gritty even with vigorous shaking, and the peanut butter starts to take on a slightly fermented note. Better to freeze leftovers if you cannot drink it by day 2.
If you make it, I would love to hear which version you tried — drop a comment and let me know whether you went mocha, banana, or stuck with the original.
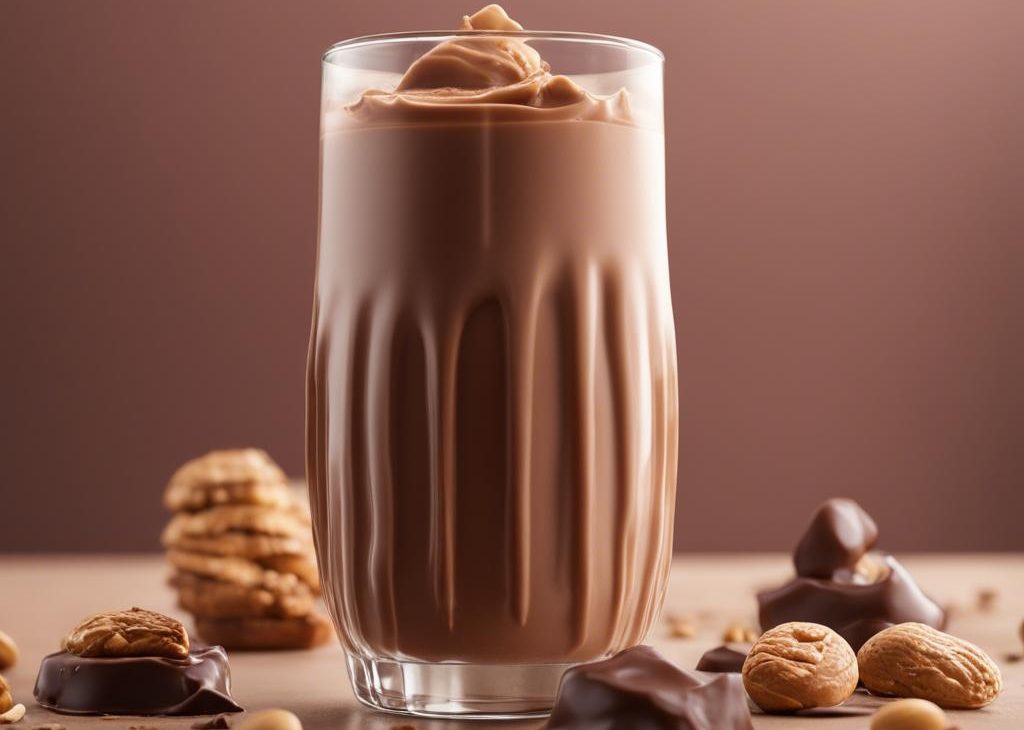
Chocolate Peanut Butter Milk
Description
A three-ingredient chocolate peanut butter milk I make in about 10 minutes when a craving hits. Real melted chocolate (not cocoa powder), creamy peanut butter, and milk — blended cold or served warm. Honest tips, real variations, no fluff.
Ingredients You’ll Need
Instructions
- Melt the chocolate chips in a small saucepan over low heat, stirring constantly until smooth. Remove from the heat and let cool for 5 minutes — this is the step that decides whether your drink is silky or grainy, so do not skip it.
- Pour the slightly cooled chocolate, milk, and peanut butter into a blender. Blend on medium for about 30 seconds, scraping down the sides once so the peanut butter does not just cling to the blades.
- Pour into 4 glasses, over ice if you want it really cold. Drink within an hour for best texture. Store leftovers in a sealed jar in the fridge up to 2 days and shake hard or re-blend before pouring.
Nutrition Facts
Servings 4
- Amount Per Serving
- Calories 320kcal
- % Daily Value *
- Total Fat 22g34%
- Saturated Fat 8g40%
- Cholesterol 20mg7%
- Sodium 120mg5%
- Potassium 320mg10%
- Total Carbohydrate 22g8%
- Dietary Fiber 2g8%
- Sugars 18g
- Protein 12g24%
- Calcium 180 mg
- Iron 1 mg
* Percent Daily Values are based on a 2,000 calorie diet. Your daily value may be higher or lower depending on your calorie needs.
Note
Cool the chocolate. The single most common reason this drink turns out grainy is pouring hot chocolate into cold milk. Five minutes off the heat solves it.
Room-temperature peanut butter. Fridge-cold peanut butter clumps in the blender. Pull it out 15 minutes before you start, or microwave the measured amount for 10 seconds.
Warm version: heat the milk gently in the same saucepan after the chocolate is melted, then whisk in the peanut butter off the heat. Skip the blender.
Frozen version: freeze the milk in an ice cube tray and blend the cubes in for an instant frozen drink.
Frequently Asked Questions
Yes. Whisk the warm melted chocolate into the milk over low heat in a saucepan, take it off the heat, and whisk in the peanut butter until smooth. Slightly less velvety than the blender version but still creamy.
Usually one of two things: the chocolate seized while melting (water got in or it overheated), or it was still too hot when it hit the cold milk. Melt slowly, let it rest 5 minutes off the heat, then blend.
You can, but it makes a thinner drink that needs added sweetener. Use 2 tablespoons unsweetened cocoa powder plus 2 tablespoons maple syrup or honey, whisked into warm milk. The melted-chocolate version is richer.
Yes — just use milk chocolate chips if your kids are sensitive to dark chocolate. Same recipe, gentler flavor.
Up to 2 days in an airtight container. Shake hard or re-blend before serving. For longer storage, freeze in an ice cube tray and use the cubes in smoothies.
You may also like...