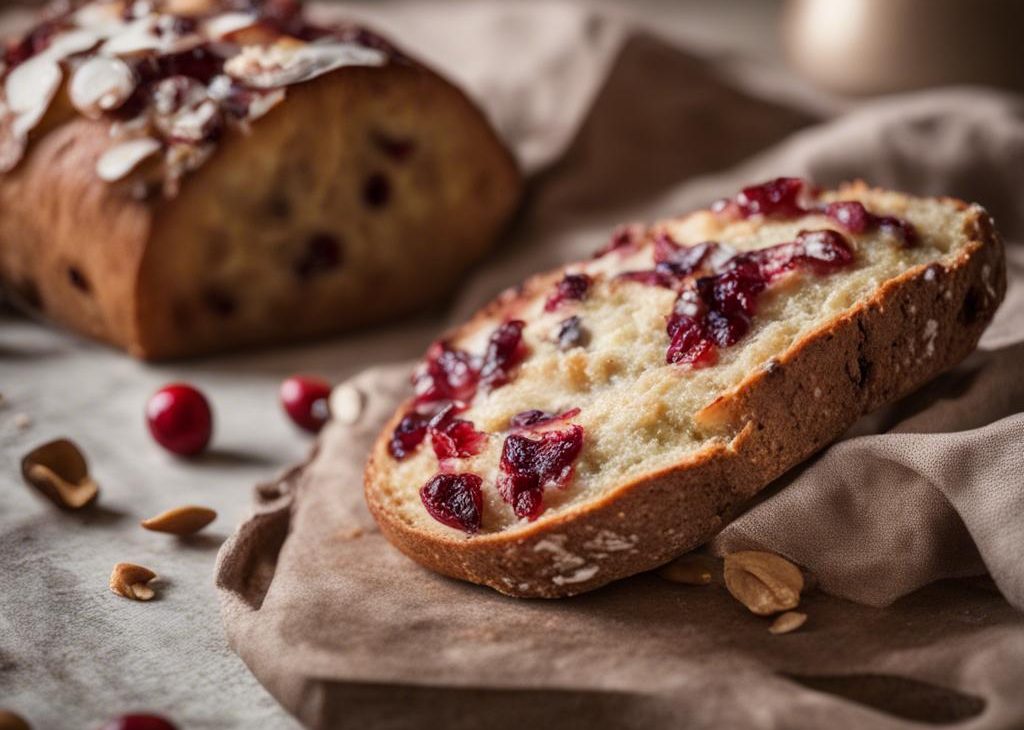

I make crusty cranberry nut no-knead bread when I want something that feels homemade without pretending the little details do not matter.
What keeps me coming back is how all-purpose flour, instant yeast, dried cranberries carry the flavor. I measure first, clear space, and then work through the steps without trying to rush the part that needs patience.
Why I keep coming back to this
- I can taste the main ingredients clearly.
- The steps give me visual checkpoints instead of guesswork.
- The leftovers still feel like something I meant to make.
- I can measure everything before I start and then work calmly.
- Small swaps work without changing the whole personality of the recipe.
- The smell while it cooks is the nudge that brings people into the kitchen.
What you need (and what each one is doing)
- 3 cups + 2 Tablespoons all-purpose flour (390g).This gives structure, so I spoon and level instead of packing it down.
- 2 teaspoons coarse sea salt.
- 1/2 teaspoon instant yeast.This is one of the structural ingredients, so I do not eyeball it.
- 3/4 cup dried cranberries (95g).
- 3/4 cup chopped walnuts or pecans (105g).
- 1 Tablespoon honey (21g).This sweetens and also helps with browning, chew, or body.
- 1 1/2 cups room-temperature water (360ml).
How I make it
Step 1 — Set up the pan and oven
I follow this part carefully: *No need to grease the bowl, and do not use a mixer in this step because the dough is too sticky for a mixer.* In a large bowl using a silicone spatula, stir the first 5 ingredients together. Mix the honey and water together, then pour on top. Mix to combine.) The dough will be very sticky; don’t be tempted to add more flour, you want a sticky dough. Gently shape into a ball as best you can.
Step 2 — Give it the time it needs
I follow this part carefully: Cover tightly. Set on the counter at room temperature (honestly any normal room temperature is fine) and allow to rise for 12-18 hours. The dough will double in size, stick to the sides of the bowl, and may have air bubbles on the surface.
Step 3 — Keep the sequence moving
I follow this part carefully: Turn the dough out onto a lightly floured work surface and, using lightly floured hands, shape into a ball as best you can. It doesn’t have to be perfect. Transfer the dough to a large piece of parchment paper. (Large enough to fit inside your pot and one that is safe for high heat. I use this parchment and it’s never been an issue.) Using a very sharp knife, kitchen shears, or a bread lame, gently score an X into the top. Place the ball of dough + parchment inside a bowl so the dough doesn’t spread out as it rests. Cover dough lightly with plastic wrap or a clean kitchen towel and let it rest for 30 minutes.
Step 4 — Keep the sequence moving
I follow this part carefully: During this rest, preheat the oven to 475°F (246°C). (Yes, very hot!) Place your Dutch oven (with the lid) or heavy-duty pot in the oven for 30 minutes so that it’s extremely hot before the dough is placed inside. After 30 minutes, remove the Dutch oven and carefully place the dough inside by lifting it up with the parchment paper and placing it all—the parchment paper included—inside the pot. Cover with the lid.
Step 5 — Cook to the visual cues
I follow this part carefully: Bake for 25 minutes with the lid on. Carefully remove the lid and continue baking for 8-10 more minutes until the bread is golden brown. How to test for doneness: Give the warm bread a light tap. If it sounds hollow, it’s done. For a more accurate test, the bread is done when an instant-read thermometer reads the center of the loaf as 195°F (90°C).
Step 6 — I follow this part carefully: Remove
I follow this part carefully: Remove pot from the oven, carefully remove the bread from the pot, and allow to cool on a wire rack for at least 20 minutes before slicing.
Step 7 — I follow this part carefully: Cover
I follow this part carefully: Cover and store leftover bread at room temperature for up to 1 week.
Tips from my kitchen
- Measure flour carefully.Packed flour makes the finished batch heavy.
- Use parchment when you can.I would rather lift cleanly than pry at corners.
- Cool before judging.Many baked goods finish setting after they leave the oven.
- Watch the edges.My oven shows doneness there before the center looks dramatic.
Variations I have actually tried
- Change only the garnish for the easiest variation.
- Use dark chocolate where semi-sweet is listed.
- Add citrus zest when vanilla is already in the batter.
- Swap similar nuts in the same amount.
- Serve rich pieces with barely sweetened cream or yogurt.
Storing and reheating
I cool crusty cranberry nut no-knead bread completely before covering it because trapped steam softens the top. Frosted, creamy, or mousse-filled pieces go in the refrigerator; plainer bakes can usually sit airtight at room temperature. For longer storage, I wrap individual portions so I can thaw only what I need.
What I serve it with
I like thick slices toasted with butter, jam, or honey.
Frequently asked questions
Can I make this ahead?
Yes. I prep the parts the recipe allows ahead, then finish the final cook or garnish close to serving.
How do I know it is done?
I use the listed cook time of 35 minutes as a guide, then trust the visual cues in the steps.
Can I change the main ingredient?
Usually, but I change one thing at a time so I know what affected the texture.
Why did mine turn out too soft?
Most often it needed more time, more cooling, or a little less crowding in the pan.
Can I freeze leftovers?
Most baked items freeze well wrapped tightly. Crisp or sauced dishes are better refrigerated and reheated uncovered.
If you make this crusty cranberry nut no-knead bread, leave a comment with what you changed or what you served with it — I like hearing the practical kitchen notes.
Crusty Cranberry Nut No-Knead Bread
Description
Crusty Cranberry Nut No-Knead Bread made with all-purpose flour, instant yeast, dried cranberries. I kept the source measurements and rewrote the method with practical notes for timing, storage, and variations.
Ingredients You’ll Need
Instructions
- *No need to grease the bowl, and do not use a mixer in this step because the dough is too sticky for a mixer.* In a large bowl using a silicone spatula, stir the first 5 ingredients together. Mix the honey and water together, then pour on top. Mix to combine.) The dough will be very sticky; don't be tempted to add more flour, you want a sticky dough. Gently shape into a ball as best you can.
- Cover tightly. Set on the counter at room temperature (honestly any normal room temperature is fine) and allow to rise for 12-18 hours. The dough will double in size, stick to the sides of the bowl, and may have air bubbles on the surface.
- Turn the dough out onto a lightly floured work surface and, using lightly floured hands, shape into a ball as best you can. It doesn't have to be perfect. Transfer the dough to a large piece of parchment paper. (Large enough to fit inside your pot and one that is safe for high heat. I use this parchment and it's never been an issue.) Using a very sharp knife, kitchen shears, or a bread lame, gently score an X into the top. Place the ball of dough + parchment inside a bowl so the dough doesn't spread out as it rests. Cover dough lightly with plastic wrap or a clean kitchen towel and let it rest for 30 minutes.
- During this rest, preheat the oven to 475°F (246°C). (Yes, very hot!) Place your Dutch oven (with the lid) or heavy-duty pot in the oven for 30 minutes so that it's extremely hot before the dough is placed inside. After 30 minutes, remove the Dutch oven and carefully place the dough inside by lifting it up with the parchment paper and placing it all—the parchment paper included—inside the pot. Cover with the lid.
- Bake for 25 minutes with the lid on. Carefully remove the lid and continue baking for 8-10 more minutes until the bread is golden brown. How to test for doneness: Give the warm bread a light tap. If it sounds hollow, it's done. For a more accurate test, the bread is done when an instant-read thermometer reads the center of the loaf as 195°F (90°C).
- Remove pot from the oven, carefully remove the bread from the pot, and allow to cool on a wire rack for at least 20 minutes before slicing.
- Cover and store leftover bread at room temperature for up to 1 week.
Nutrition Facts
Servings 1
- Amount Per Serving
- Calories 345kcal
- % Daily Value *
- Total Fat 1g2%
- Trans Fat 0.0g
- Sodium 6mg1%
- Potassium 68mg2%
- Total Carbohydrate 92g31%
- Dietary Fiber 6g24%
- Sugars 83g
- Protein 1g2%
- Calcium 10 mg
- Iron 0.8 mg
* Percent Daily Values are based on a 2,000 calorie diet. Your daily value may be higher or lower depending on your calorie needs.
Note
Measure flour carefully. Packed flour makes the finished batch heavy.
Use parchment when you can. I would rather lift cleanly than pry at corners.
Cool before judging. Many baked goods finish setting after they leave the oven.
Watch the edges. My oven shows doneness there before the center looks dramatic.
Frequently Asked Questions
Yes. I prep the parts the recipe allows ahead, then finish the final cook or garnish close to serving.
I use the listed cook time of 35 minutes as a guide, then trust the visual cues in the steps.
Usually, but I change one thing at a time so I know what affected the texture.
Most often it needed more time, more cooling, or a little less crowding in the pan.
Most baked items freeze well wrapped tightly. Crisp or sauced dishes are better refrigerated and reheated uncovered.
You may also like...