
Dr. Berg’s Keto Bread is the one I make when I want a dependable batch without fussing over extra dishes. My usual timing is 15 minutes of prep, 50 minutes of cooking, and 12 servings. That lets me cook by the clock at first, then finish by what I can see and smell.
The first batch taught me where this recipe needs attention. It is not difficult, but it does reward patience: scraping the bowl, watching the heat, and letting the finished breakfast settle before I serve it. Those little pauses make it taste deliberate instead of rushed.
I wrote the method below the way I actually use it, with the small signs I watch for along the way. I keep the measurements steady and focus on the small cues that make the batch come out the same way twice.
Why I keep coming back to this
- I can get the active work done in about 15 minutes, which matters on a normal day.
- The ingredient list stays practical; I do not need a specialty run before I start.
- The texture gives me clear signs as it cooks, so I am not guessing at the finish line.
- It holds up after resting, which is how I know the method is doing its job.
- Small changes work without rebuilding the whole recipe.
- The leftovers are still worth eating, not just tolerated.
What you need (and what each one is doing)
- 1 1 1/2 cups almond flour. I use it because it gives the base enough structure.
- 1/2 cup unsweetened almond milk. I use it because it adds moisture and softens the texture.
- 1/2 teaspoon sea salt. I use it because it makes the rest of the flavors clearer.
- 1/2 cup coconut oil. I use it because it keeps the crumb or sauce from tasting flat.
- 5 large. I use it because it rounds out the recipe. I keep it free-range eggs.
- ¾ cup finely ground flaxseed meal.
- 1/4 cup psyllium husk powder.
- 2 teaspoons baking powder. I use it because it handles the lift.
- 1 tablespoon apple cider vinegar.
How I make it
Step 1 — Prepare the pan
Preheat the oven to 350°F. Line a standard loaf pan with parchment paper and set aside.
Step 2 — Mix the dry ingredients
In a large bowl, mix together almond flour, coconut oil, almond milk, sea salt, flaxseed meal, psyllium husk powder, and baking powder until combined. In another bowl whisk eggs then add to the dry ingredients.
Step 3 — Bake
Add apple cider vinegar and mix until everything is well combined. Transfer the batter to the prepared loaf pan, spread it out evenly with a spatula or spoon, and bake for 40 minutes. I check a little early and trust the visual cues more than the timer, because my oven runs hot in the back corner.
Tips from my kitchen
- Do not overmix. Once the flour is in, I stop as soon as the batter looks even.
- Use the pan size listed. Changing the pan changes the timing more than it seems.
- Check early. I start checking a few minutes before the timer because ovens drift.
- Let it rest. The texture firms as it cools, so cutting too early gives a messy result.
- Write down swaps. If I change a milk, flour, or add-in, I note it so I can repeat the good batch.
Variations I have actually tried
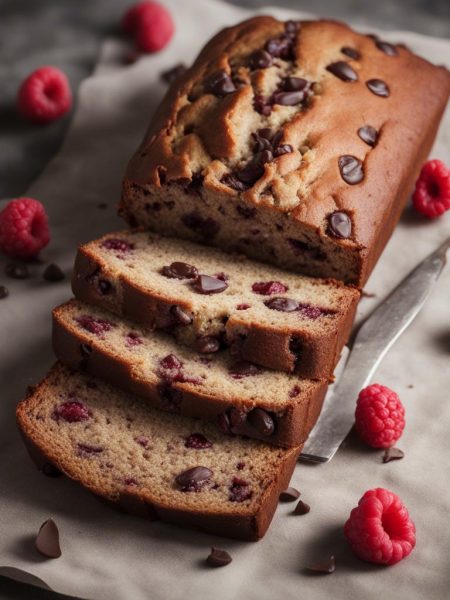
- Add. Add chocolate chips or chopped nuts if the batter can handle it.
- Use. Use a different milk with the same measurement.
- Swap. Swap in a warm spice blend for part of the cinnamon or vanilla.
- Make. Make smaller portions and start checking the oven early.
- Serve. Serve with yogurt or fruit to make it feel less sweet.
Storing and reheating
I let the pan or loaf cool before covering it. Most sweet bakes keep 2-3 days at room temperature if the kitchen is cool, or about 1 week in the refrigerator. I wrap individual portions before freezing so I can thaw only what I need.
What I serve with it
I keep the serving simple. For sweet recipes, I like coffee, milk, yogurt, fruit, or a not-too-sweet whipped cream. For savory recipes, I reach for something fresh or acidic on the side so the plate does not feel heavy. The goal is balance, not a crowded plate.
Frequently asked questions
Can I make this ahead?
Yes. I usually make it ahead when I can because the flavor settles after resting. Keep it covered, and if it is baked, cool it fully before storing so condensation does not soften the edges.
Does it need to cool before serving?
I give it at least a short rest. Hot sugar, starch, or sauce can seem loose at first, and a few minutes makes the serving cleaner.
How do I know it is done?
I start checking near the listed 50-minute cook time. The center should look set for baked dishes, and a tester should come out clean or with only a few moist crumbs.
Can I change the pan size?
I try not to unless I have to. A wider pan cooks faster and a deeper pan needs more time, so I watch the center and edges rather than trusting the timer alone.
Can I reduce the sugar?
Usually a small reduction works, but I avoid cutting it too much because sugar affects moisture and browning, not just sweetness.
How long do leftovers keep?
Most batches keep 3-5 days covered in the refrigerator, though cookies and some cakes can stay at room temperature if the kitchen is cool. I freeze extras when I know I will not finish them quickly.
If you make this Dr. Berg’s Keto Bread, leave a comment with what you changed. I always want to know which little swaps work in another kitchen.
The small checks that matter most
For Dr. Berg’s Keto Bread, I pay attention to smell, thickness, and how the mixture moves when I stir. Those signs tell me more than the clock by itself. If it smells sharp, I give it another minute. If it looks loose, I let it reduce gently. If it looks tight, I loosen it one spoonful at a time. I learned to make those changes slowly because big corrections at the end are harder to fix.
- I keep the heat one notch lower than my impatient side wants.
- I taste before serving because salt and sweetness change after cooking.
- I write down the pan or brand I used when a batch turns out especially well.
- I let the finished dish rest long enough that the texture stops shifting.
How I know the batch is on track
With Dr. Berg’s Keto Bread, I do not wait for one dramatic sign that everything is finished. I watch a few small things at the same time: the smell, the way the mixture moves, and whether the edges look more set than the center. That habit has saved me from both undercooking and overcooking more times than I can count.
I also taste or check texture before the final serving step whenever the recipe allows it. If it needs salt, sweetness, acid, or another minute of heat, I would rather find out while I can still fix it. That is the kind of practical note I wish more recipe cards included.
- I keep the original time in mind, but I start checking early.
- I scrape the corners of the bowl or pan because that is where unmixed bits hide.
- I let the finished food rest before judging the final texture.
- I write down the one change I made so I know whether to repeat it.
Dr. Berg’s Keto Bread
Description
Dr. Berg's Keto Bread is the version I make when I want a dependable homemade batch. It uses 1 1/2 cups almond flour, cup unsweetened almond milk, teaspoon sea salt, cup coconut oil, keeps the timing straightforward, and gives me clear cues for mixing, cooking, and resting.
Ingredients You’ll Need
Instructions
- Preheat the oven to 350°F. Line a standard loaf pan with parchment paper and set aside.
- In a large bowl, mix together almond flour, coconut oil, almond milk, sea salt, flaxseed meal, psyllium husk powder, and baking powder until combined. In another bowl whisk eggs then add to the dry ingredients.
- Add apple cider vinegar and mix until everything is well combined. Transfer the batter to the prepared loaf pan, spread it out evenly with a spatula or spoon, and bake for 40 minutes. I check a little early and trust the visual cues more than the timer, because my oven runs hot in the back corner.
Nutrition Facts
Servings 12
- Amount Per Serving
- Calories 83kcal
- % Daily Value *
- Total Fat 9g14%
- Saturated Fat 7g35%
- Trans Fat 0.0g
- Sodium 174mg8%
- Potassium 8mg1%
- Calcium 67 mg
- Iron 0.1 mg
* Percent Daily Values are based on a 2,000 calorie diet. Your daily value may be higher or lower depending on your calorie needs.
Note
Do not overmix. Once the flour is in, I stop as soon as the batter looks even.
Use the pan size listed. Changing the pan changes the timing more than it seems.
Check early. I start checking a few minutes before the timer because ovens drift.
Let it rest. The texture firms as it cools, so cutting too early gives a messy result.
Frequently Asked Questions
Yes. I usually make it ahead when I can because the flavor settles after resting. Keep it covered, and if it is baked, cool it fully before storing so condensation does not soften the edges.
I give it at least a short rest. Hot sugar, starch, or sauce can seem loose at first, and a few minutes makes the serving cleaner.
I start checking near the listed 50-minute cook time. The center should look set for baked dishes, and a tester should come out clean or with only a few moist crumbs.
I try not to unless I have to. A wider pan cooks faster and a deeper pan needs more time, so I watch the center and edges rather than trusting the timer alone.
Usually a small reduction works, but I avoid cutting it too much because sugar affects moisture and browning, not just sweetness.
You may also like...