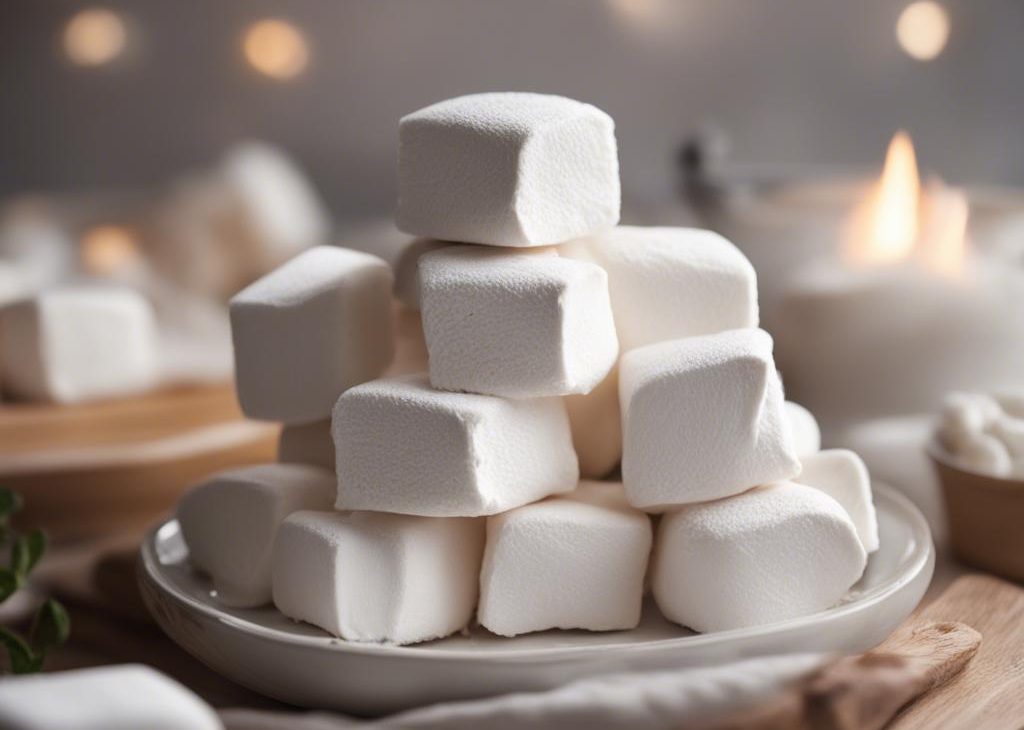
If ever there was a sweet treat that tastes tons/miles/years(!) better made from scratch vs. store-bought, it’s homemade marshmallows. With just the right amount of sweetness, a delicate kiss of vanilla flavor, and a pillow-soft texture you won’t find anywhere else, this recipe should come with a warning: one taste of these homemade marshmallows might ruin you for the store-bought kind forever!
Try my homemade marshmallow creme, aka meringue frosting, next!
Have you ever tried a homemade marshmallow before? If you have, you’ll know what I mean when I say there is just no comparison to the packaged kind. Sure, those are convenient for campfire s’mores, and work perfectly well for making rice krispie treats, but trust me on this: eating a homemade marshmallow is an experience on another level entirely. Today, you’re leveling up to Cloud 9… it’s soft and sweet here and you won’t want to leave.
. This is also a great recipe to add to your baking bucket list! Homemade marshmallows require several hours to set—ideally overnight—so this is a good make-ahead recipe.
Ingredients You Need & Why:
Step-by-Step: Making Marshmallows
You can find the full printable recipe below, but first I’ll walk you through some of the steps and answer some questions that may come up. Making homemade candy, like marshmallows, can be challenging, and I want to set you up for success.
Start by greasing a 9×13-inch glass or ceramic baking dish (I just use nonstick spray) and sifting together the confectioners’ sugar and cornstarch. Sprinkle a little of that mixture very lightly over the pan, then set the remainder aside. This is creating an ultra-nonstick environment for the marshmallows, which are, as you know, very sticky!
I do not recommend using a metal pan. Why? Because it can affect the flavor of the marshmallows. I’ve had marshmallows with a strange metallic aftertaste, and it is because of the pan.
Combine gelatin and water in the bowl of your stand mixer and let sit. Meanwhile, cook your sugar syrup on the stove. As it cooks, use a pastry brush moistened with water to brush down the sides of the pan, to prevent crystallization and the sugar from burning on the sides of the pan.
Success Tip: Homemade candy, including marshmallows, is very particular not only when it comes to ingredients, but also with regard to weather. Never cook candy on a humid day because it will absorb moisture from the air, which can result in too-soft consistency or texture. Cool, dry days are ideal.
Let the hot sugar syrup sit for a few minutes, and then pour it into the gelatin mixture. Gradually increase the mixer speed to high, and let the mixer run for 10–15 minutes, whipping the marshmallow until it’s white, thick, and shiny.
At the very end of mixing, add in the vanilla extract.
Pour/spoon the mixture into the prepared pan, and smooth the top with a spatula. Let the marshmallow sit, uncovered, at room temperature for at least 6 hours—ideally, overnight.
How Do I Neatly Cut Homemade Marshmallows?
After they’ve set, it’s time to cut the marshmallows. Lay a sheet of parchment paper on the counter or on a cutting board, and dust it with some of the remaining confectioners’ sugar/cornstarch mixture. Dust the top of the marshmallow with this mixture, too.
Use a knife to loosen the edges of the marshmallow from the pan, then invert the pan onto the prepared surface. Lift a corner of the pan and use your fingers to peel the marshmallow away from the pan.
Coat a sharp knife blade in the sugar/cornstarch, and slice the marshmallow into 1.5-inch squares, re-coating the knife as needed. I find that running the blade under hot water and wiping it dry with a towel helps make for clean cuts, too.
Roll the edges of the marshmallows in the sugar/cornstarch mixture, so the outside is no longer sticky. That’s it! You’re done.
Now, all you need is a batch of slow cooker hot chocolate, because these puffy pillows are ready to give everyone the sweetest of sweet dreams!
How to Store Homemade Marshmallows
Layer them between sheets of parchment or wax paper in an airtight container, and store at room temperature in a cool, dry place for up to 2 weeks. I do not recommend freezing homemade marshmallows, as they never really soften up after thawing.
Can I Use Homemade Marshmallows for…
- Toasting over a fire for s’mores? Yes!
- Rice Krispie Treats? Yes!
- Topping Sweet Potato Casserole? Yes, please! For that, you can skip the pecan topping. Place the marshmallows on top when there’s only 5 minutes of bake time left.
Homemade marshmallows also make a wonderful gift; wrap them up with some gourmet hot chocolate mix and a cute mug. Who wouldn’t want to receive that? P.S. If you’re in need of more gift-giving inspiration, check out my Holiday Gift Guide for Bakers, updated annually.

Homemade Marshmallows Recipe
Description
If ever there was a homemade sweet treat that tastes worlds away from the store-bought version, it's homemade marshmallows. These have just the right amount of sweetness, a delicate kiss of vanilla flavor, and a pillowy soft texture you won't find anywhere else. This is a great make-ahead recipe, as the marshmallows need to set for at least 6 hours, and last for 2 weeks. Avoid making these on a humid day, as the moisture in the air can prevent the marshmallows from setting properly.
Ingredients You’ll Need
Instructions
- Generously spray the bottom and sides of a 9×13-inch glass or ceramic baking pan with nonstick cooking spray. (I do not suggested a metal pan, as it can affect the taste of the marshmallows.) Sift the confectioners’ sugar and cornstarch together into a bowl and sprinkle some of it very lightly all around the pan, to dust it. Set the remaining sugar/cornstarch mixture aside.
- Place the gelatin and 1/2 cup water in the bowl of a stand mixer fitted with a whisk attachment. (Or, if using a handheld mixer, a regular large mixing bowl.) Whisk/beat on low speed for 1 minute to briefly combine. Allow to sit as you cook the sugar syrup—no need to cover.
- Place the remaining 1/2 cup water, the corn syrup, granulated sugar, and salt in a 3-quart heavy-duty saucepan over medium heat. Stir with a wooden spoon until the sugar has dissolved. Attach a candy thermometer to the side of the saucepan. Do not let it touch the bottom of the pan. As the sugar syrup begins cooking, brush down the sides of the pan with a water-moistened pastry brush to prevent the sugar from crystallizing.
- Without stirring, brushing down the sides of the pan as needed, cook the sugar syrup until it reaches soft ball stage (when it reaches 235–240°F (113–116°C) on a digital candy thermometer). Remove the pan from heat and let sit for 5 minutes.
- Turn the mixer on low speed and slowly pour the hot syrup into the gelatin mixture as the mixer runs. The syrup will be extremely hot, so use caution.
- Gradually increase the mixer speed until it reaches high. Whip the mixture for 10–15 minutes, or until it is white, thick, and shiny. If using a handheld mixer, this could take longer. During the last minute of whipping, add the vanilla extract.
- Pour/spoon the marshmallow into the prepared pan and smooth out the top with a silicone or offset spatula. Allow to sit, uncovered, at room temperature for at least 6 hours, and up to 48 hours.
- Once completely firm, you can cut the marshmallows. To do so, cover a large surface or cutting board with parchment paper. Liberally sprinkle the surface as well as the top of the marshmallow with some of the remaining cornstarch/sugar mixture. Using a sharp knife, loosen the edges of the marshmallow from the pan, and then invert the pan onto the prepared surface. Lift a corner of the pan and use your fingers to help peel the marshmallow away from the pan.
- Using a sharp knife, cut the marshmallow into 1.5-inch squares, coating the knife blade with some of the leftover cornstarch/sugar mixture as needed. I find running the blade under hot water and wiping it dry helps to make clean cuts as well. Roll the edges of the marshmallows in the cornstarch/sugar mixture, if desired, so they are no longer sticky.
- Store leftover marshmallows at room temperature in an airtight container, with parchment paper between layers, in a cool, dry place for up to 2 weeks.
Frequently Asked Questions
Yes, you can. But you'll need to use a different recipe, as subbing out gelatin is not a 1:1 swap. I know many have tried this vegan marshmallows recipe from Serious Eats with great success.
Yes! You'll add the vanilla at the end of the recipe, when you're whipping the cooked sugar syrup. Instead of vanilla, you can use another extract such as peppermint, coconut, lemon, maple, or almond. I would start with only 1/2 teaspoon of any of these, taste, and then whip in more if desired. If adding another flavor, you can leave out the vanilla, or reduce the amount down to 1 teaspoon. You could also add 1/4 to 1/2 teaspoon of cinnamon. Taste, and then add more if desired.
Yes, absolutely. Add a drop of gel food coloring when you add the extract. Pink marshmallows are always fun, and you can top them with sprinkles after spreading into the pan and before setting.

