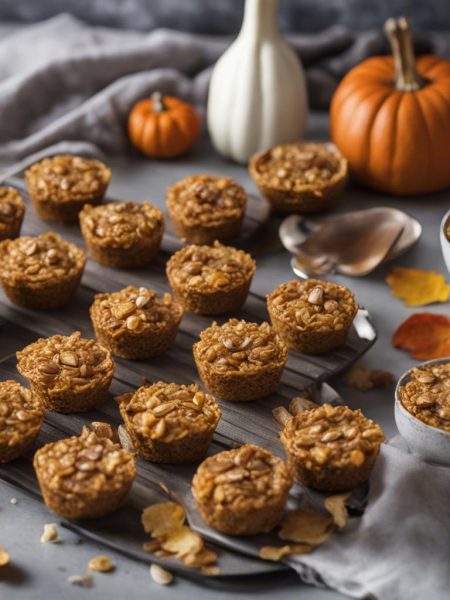

I keep Homemade pastry dough in my back pocket for the kind of day when I want food that feels homemade without turning the kitchen into a project. The first time I make a recipe like this, I pay attention to the small places where it can go sideways: heat that is too high, dough that is rushed, sauce that is not stirred, or a pan that is the wrong size.
I measure first, keep a spatula or whisk nearby, and taste when the recipe gives me a chance. If there is a waiting period, I use it instead of fighting it.
The flavor leans on 1/4 cup warm water, 2 and 1/4 teaspoons active dry or instant yeast, 1/2 cup whole milk, at room temperature. Nothing here needs fancy plating. I care more about the smell in the kitchen, the texture when I cut or spoon it, and whether leftovers are still worth opening the fridge for the next day.
Why I keep coming back to this
- I can make Homemade pastry dough with ordinary equipment and a little patience.
- The ingredient list is straightforward once everything is measured and lined up.
- It gives me clear visual cues, not just a timer to obey blindly.
- The leftovers are useful instead of feeling like a chore.
- I can adjust the finish without changing the base recipe.
- It tastes like something I cooked, not something I assembled in a hurry.
What I use and why each piece matters
- 1/4 cup warm water. 60ml. smoothly once I start. I use it at the temperature the recipe specifies—cold, warm, or boiling matters here.
- 2 and 1/4 teaspoons active dry or instant yeast. 1 standard packet. Fresh yeast matters; if it does not foam, I start over before wasting the rest.
- 1/2 cup whole milk, at room temperature. 120ml. This brings moisture and body; cold dairy behaves differently than room-temperature dairy.
- 1 large egg, at room temperature.
- 1/4 cup granulated sugar. 50g. This is the sweetness, but I still measure it so the recipe stays balanced.
- 1 teaspoon salt.
- 14 Tablespoons cold unsalted butter. 196g.
- 2 and 1/2 cups all-purpose flour. 313g. I spoon and level it because too much makes the dough heavy.
- 1 large egg, for egg wash.
- 2 Tablespoons milk, for egg wash. 30ml.
How I make it
Step 1 — Set up before heat or mixing
Reading the recipe once and measuring the ingredients. That sounds fussy, but it keeps me from hunting for milk, for egg wash while something is already cooking. If the recipe uses the oven, I preheat before I mix so the batter, dough, or sauce is not sitting around longer than needed.
Step 2 — Combine the ingredients
I combine the foundation ingredients first and scrape the bowl or pan more than once. For Homemade pastry dough, the early texture tells me a lot: smooth and glossy for sauces, shaggy for dough, evenly coated for baked mixtures, and fragrant for spice-heavy recipes.
Step 3 — Build the flavor
I do not crank the heat to hurry things along. Medium heat, a steady oven, or a patient rise gives me a better result than forcing it.
Step 4 — Cook
I check color, thickness, aroma, and resistance. A timer gets me close, but it does not know my pan or my oven. When I see the edges set, the sauce coat the spoon, or the dough look puffy, I know I am in the right window.
Step 5 — Finish, rest, and serve
I give Homemade pastry dough the rest time it needs before serving. That pause lets juices settle, crumbs firm, sauce thicken, or flavors round out. I would rather wait a few minutes than serve something that falls apart because I rushed it.
Tips from my kitchen
- Measure before starting. I set every ingredient on the counter first because several steps move faster than they look on paper.
- Trust the texture. If the mixture looks too loose, too stiff, or too pale, I pause and check before moving on.
- Use the pan size in the recipe. A deeper or wider pan changes timing more than most people expect.
- Let it rest when called for. A short rest can be the difference between messy and clean slices, scoops, or spoonfuls.
Variations I have actually tried
- Orange zest: I add a little zest to sweet dough when I want a brighter bakery smell.
- Nut filling: Finely chopped pecans or walnuts add crunch without changing the dough.
- Overnight rise: I shape, cover, and chill, then bring the pan toward room temperature before baking.
- Simple glaze: Confectioners sugar and milk make a quick finish when I do not want frosting.
- Whole grain note: I replace only a small portion of flour at first so the dough stays soft.
How I like to serve it
I serve Homemade pastry dough in the way that fits the day. If it is rich, I put something crisp or fresh beside it. If it is a sauce, I spoon it over a plain base so the flavor has room to show up. If it is a baked good, I cut the first piece only after it has had a short rest.
For company, I do as much as possible ahead and keep the final step simple. I would rather be calm at the counter than dramatic at the oven door. A warm plate, a clean knife, or a quick whisk right before serving does more than an overworked garnish.
Storing and reheating
I cool leftovers completely, then store them in a tight container. Sauces and dairy-heavy recipes go in the refrigerator. Baked goods get wrapped well so they do not dry out. If I freeze portions, I label the bag because mystery containers never help me on a busy night.
When reheating, I use gentle heat. A microwave works for many single portions, but I cover food loosely and stop to stir or check. For baked items, a low oven brings back a better texture. For sauces, I warm slowly and whisk before deciding whether they need a splash of liquid.
Frequently asked questions
Can I make the dough ahead?
Yes. I usually chill it after the first rise or after shaping, depending on the recipe. I keep it covered tightly so the surface does not dry out.
Why did my dough feel sticky?
A soft dough is normal, especially with enriched bread. I add flour one teaspoon at a time only if it is impossible to handle.
Can I knead by hand?
Yes. It takes more arm work, but I look for the same signs: smoother dough, a little elasticity, and a slow bounce when pressed.
How do I know it is baked through?
I look for even browning and a set center. For bread, the loaf or roll should feel light for its size and sound slightly hollow.
Can I freeze leftovers?
Yes. I wrap portions tightly once cool, freeze them, and thaw at room temperature or warm gently before serving.
If you make Homemade pastry dough, I would love to hear what small adjustment made it work best in your kitchen.
Homemade pastry dough
Description
I make homemade pastry dough with 1/4 cup warm water, 2 and 1/4 teaspoons active dry or instant yeast, 1/2 cup whole milk, at room temperature, keeping the original amounts and timing intact. The notes are written from the way I actually cook it: measure first, watch the texture, and store leftovers properly.
Ingredients You’ll Need
Instructions
- . (All answer many FAQs.) Do not use an electric mixer for this dough. It's best if the dough is folded together with a wooden spoon or silicone spatula since it is so sticky. There is very minimal mixing required.
- Whisk the warm water, yeast, and 1 Tablespoon (6g) of sugar together in a large bowl. Cover and allow to rest until foamy on top, about 5 minutes. If the surface doesn't have bubbles on top or look foamy after 15 minutes (it should if the yeast isn't expired), start over with a fresh packet of yeast. Whisk in remaining sugar, the milk, egg, and salt. Once these wet ingredients are mixed together, lightly cover and set the bowl aside as you work on the next step.
- Cut the cold butter into 1/4 inch slices and add to a food processor or blender. Top with 2 and 1/2 cups flour. Pulse the mixture 12-15 times, until butter is crumbled into pea-size bits. Using a food processor or blender is best for this dough. Keeping that in mind, if you don't have one, you can use a pastry cutter to work in the butter.
- Pour the flour mixture into the wet yeast mixture. Very gently fold everything together using a rubber spatula or wooden spoon. Fold just until the dry ingredients are moistened. The butter must remain in pieces and crumbles, which creates a flaky pastry. Turn the sticky dough out onto a large piece of plastic wrap, parchment paper, aluminum foil, or into any container you can tightly cover.
- Wrap the dough/cover up tightly and refrigerate for at least 4 hours and up to 48 hours.
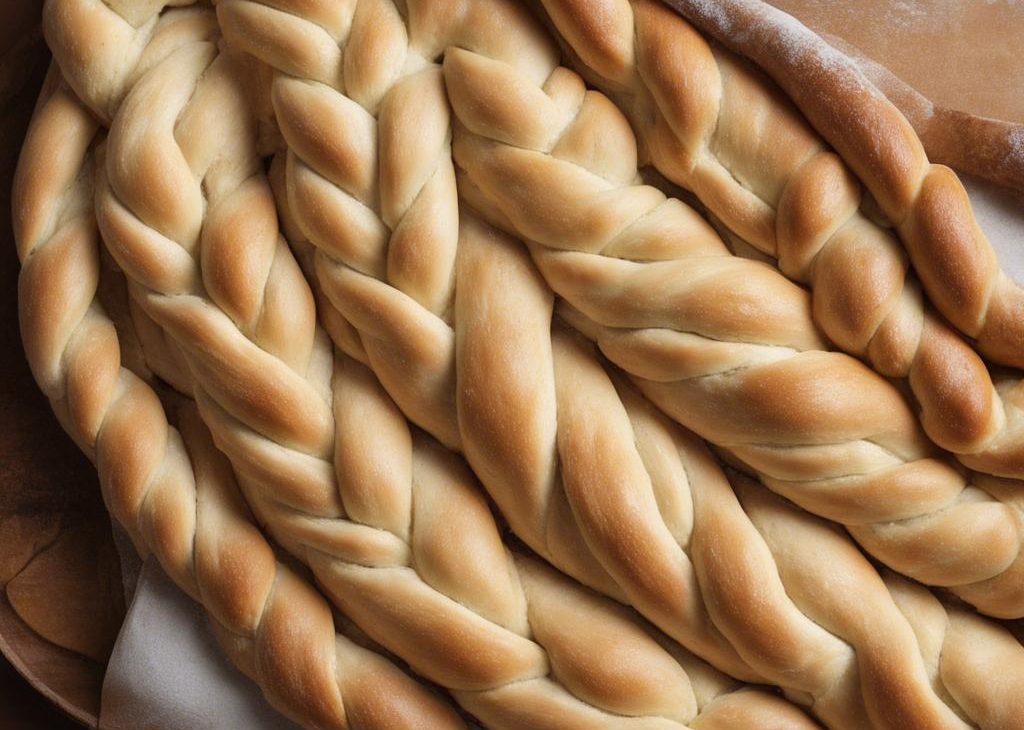
- Take the dough out of the refrigerator to begin the "rolling and folding" process. If the dough sat for more than 4 hours, it may have slightly puffed up and that's ok. (It will deflate as you shape it, which is also ok.) Very generously flour a work surface. The dough is very sticky, so make sure you have more flour nearby as you roll and fold. Using the palm of your hands, gently flatten the dough into a small square. Using a rolling pin, roll out into a 15x8-inch rectangle. When needed, flour the work surface and dough as you are rolling. Fold the dough into thirds as if it were a business letter.) Turn it clockwise and roll it out into a 15 inch long rectangle again. Then, fold into thirds again. Turn it clockwise. You'll repeat rolling and folding 1 more time for a total of 3 times.
- Wrap up/seal tightly and refrigerate for at least 1 hour and up to 24 hours. You can also freeze the dough at this point. See freezing instructions.
- Line two large baking sheets with parchment paper or silicone baking mats. Rimmed baking sheets are best because butter may leak from the dough as it bakes. If you don't have rimmed baking sheets, when it's time to preheat the oven, place another baking sheet on the oven rack below to catch any butter that may drip.
- Take the dough out of the refrigerator and cut it in half. Wrap 1 half up and keep refrigerated as you work with the first half. (You can freeze half of the dough at this point, use the freezing instructions below.).
- On a floured work surface, roll dough out into a 12x8-inch rectangle. You can roll out the dough on a lightly floured piece of parchment paper or lightly floured silicone baking mat instead because you will transfer the shaped dough to a lined baking sheet next.
- Using a sharp knife, cut off two corners of the dough (on one 8-inch side) and then two small triangles 3 inches apart from each other on the other end (the other 8-inch side). See visual below.
- Spread 1/2 of the filling (from raspberry pastry braid or blueberry cream cheese pastry braid) down the length of the center of the strip, which should be about 3 inches wide. Using a sharp knife, pastry wheel, or pizza cutter, cut 10 slanting strips (3/4 - 1 inch wide each) along both sides. Fold strips over filling, alternating each side to resemble a twist or a braid. Fold the bottom end up to seal the filling inside. Repeat with the second half of the dough and the rest of the filling. The braids may seem very narrow, but they puff up and out as they bake.
- Whisk the egg wash ingredients together. Brush all over the dough.
- I strongly recommend refrigerating the shaped braids before baking for at least 15 minutes and up to 1 hour before baking. The braids tend to leak more butter and/or lose more shape if they haven't chilled.
- Preheat oven to 400°F (204°C).
- Bake each braid for 18-22 minutes or until golden brown. Some butter may leak from the dough, that's completely normal and expected. Feel free to remove the baking sheets from the oven halfway through baking and brush the dough with any of the leaking butter, then place back in the oven to finish baking. (That's what I do!).
- Remove baked danish braids from the oven and cool for at least 5 minutes before cutting and serving.
Nutrition Facts
Servings 2
- Amount Per Serving
- Calories 848kcal
- % Daily Value *
- Total Fat 82g127%
- Saturated Fat 51g255%
- Trans Fat 3.3g
- Cholesterol 218mg73%
- Sodium 1000mg42%
- Potassium 123mg4%
- Total Carbohydrate 30g10%
- Dietary Fiber 1g4%
- Sugars 29g
- Protein 4g8%
- Calcium 109 mg
- Iron 0.5 mg
* Percent Daily Values are based on a 2,000 calorie diet. Your daily value may be higher or lower depending on your calorie needs.
Note
Measure first. I set everything out before I start so I am not searching mid-recipe.
Use visual cues. The clock matters, but texture and color tell me when it is really ready.
Cool before storing. Trapped steam makes leftovers soggy, so I wait before covering tightly.
Adjust gently. I change salt, sweetness, or heat in small amounts and taste as I go.
Frequently Asked Questions
Yes. I usually chill it after the first rise or after shaping, depending on the recipe. I keep it covered tightly so the surface does not dry out.
A soft dough is normal, especially with enriched bread. I add flour one teaspoon at a time only if it is impossible to handle.
Yes. It takes more arm work, but I look for the same signs: smoother dough, a little elasticity, and a slow bounce when pressed.
I look for even browning and a set center. For bread, the loaf or roll should feel light for its size and sound slightly hollow.
Yes. I wrap portions tightly once cool, freeze them, and thaw at room temperature or warm gently before serving.