
. Latticing pie dough is much easier than it looks!
Pies are my favorite dessert. Not only because they taste SO DARN GOOD, but because they’re very satisfying to make. From-scratch pies take careful precision and the end result tastes even sweeter because you know how much love and effort you put into it.
I receive a lot of questions about how to lattice pie crust, so I decided to condense all my tips and information on 1 single page. Hope you feel more *PIE CONFIDENT* after reading and watching!
Designing a pie crust is a form of art. There are so many different pie crust arrangements, but the classic lattice weaving is my favorite. The simple, yet stunning lattice design will never go out of style. Even though it’s a very common way to style pie dough, latticing pie crust seems pretty intimidating..
Trust me, it’s easier than it looks!
What is Lattice Pie Crust?
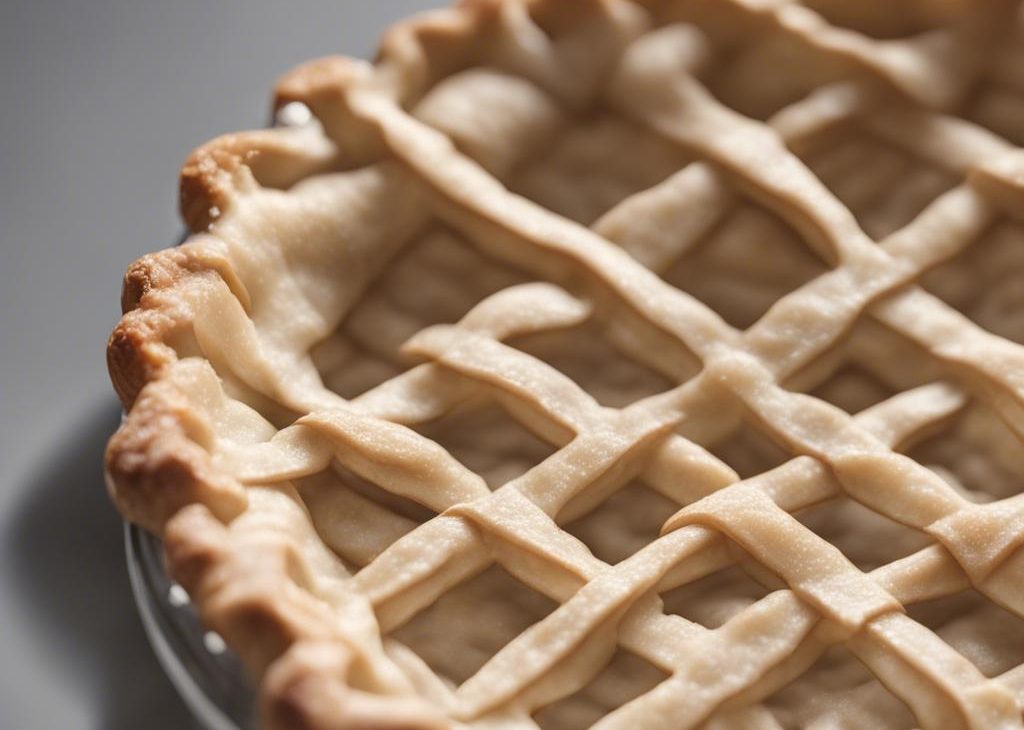
Lattice pie crust is weaved pie dough. Strips of dough lay on top of pie filling, layered over and under one another to create a basket weave appearance. Not only is latticing a beautiful way to decorate a pie, the holes between the strips allow steam to escape. Without these vents, the fruit pie filling could cause a mini explosion in your oven. It’s not pretty!!
Here’s What You Need:
I have a full list of the best pie baking tools, but for this lattice design here’s exactly what you will need:
- Quality pie crust
- Extra flour
- Rolling pin
- Ruler (or just eyeball it!)
- Pizza cutter or sharp knife
- Pastry brush for egg wash
Start with Quality Pie Dough
Lattice will not work unless you begin with quality pie dough. Don’t sabotage your efforts from the start. I recommend my favorite pie crust, which uses both butter and shortening for flavor and stability, or my all butter pie crust. Either are excellent choices for your lattice pie crust because they’re sturdy, yet bake up incredibly light and flaky.
How to Lattice Pie Crust
My “Thick Edge” Trick
After you create the lattice, you’ll have excess pie dough around the circumference of the pie. Feel free to trim a lot of the excess dough, but if you want enough dough for a pretty edge to flute or crimp, don’t trim it too much or at all. Instead, fold the strips back onto the pie and pinch together with the bottom pie crust..
You can also watch how I flute the edges using my thumb and index finger on one hand and my index finger knuckle on the other hand. Fluting pie dough seals the top and bottom crusts together with a lovely scallop design.
2 Final Success Tips
How to Lattice Pie Crust Recipe
Description
Follow this tutorial for a beautiful lattice pie crust topping..
Ingredients You’ll Need
Instructions
- . (Latticing is better seen than explained!)
- Prepare my pie crust recipe through step 5. Chill in the refrigerator overnight.
- After you roll out the bottom crust and fill your pie, it’s time to lattice. On a lightly floured surface with a floured rolling pin, roll out top pie crust into a 12-inch circle. It’s ok if it’s not a perfect circle, as long as it’s 12 inches in diameter.
- Cut dough into strips. To keep things simple, I recommend 12 1-inch strips.
- Lay 6 strips vertically and evenly spaced on top of the filled pie. Use the longer strips in the center of the pie and the shorter strips on the ends.
- Fold every other strip (3 in total) all the way back so they’re almost falling off of the pie. Lay one of the 6 unused strips perpendicular on top. Unfold the 3 vertical strips back so they lay over the perpendicular strip. You have 5 strips left.
- Fold the other 3 vertical strips back. Lay one of the 5 unused strips perpendicular on top. Unfold the 3 vertical strips back so they lay over the perpendicular strip. You’re now beginning to see the beautiful woven pattern!
- Repeat with last 4 strips, weaving the strips over and under one another.
- Fold the excess dough that lays over the edges of the pie back and pinch them with the bottom pie crust to seal. Crimp or flute the edges of the pie, then brush with egg wash and sprinkle with a little coarse sugar. This adds a lovely sparkle and crunch!
- Refrigerate unbaked pie for 20 minutes prior to baking. This is an often overlooked step, but cold dough is guaranteed to hold the lattice shape.
- Bake the pie as directed in your recipe. I recommend my apple pie.
You may also like...