
I keep coming back to pumpkin hand pies because it solves a real kitchen problem for me: I want food that tastes cared for without making the counter look like I hosted a cooking class.
The prep time is listed at 3 min, and the cook time is listed at 25 min. I still watch the visual cues more than the timer, especially when ovens, pans, and ingredient temperatures shift the final few minutes.
I taste as I go and pay attention to texture. That is usually where a recipe tells me what it needs next: more salt, more acid, a calmer simmer, or simply a few minutes to rest.
Why I keep this recipe in my rotation
- I get a cozy bakery smell without needing fussy decoration for pumpkin hand pies.
- The batter tells me a lot by texture, so I can catch problems before the pan goes in.
- It holds well after cooling, which matters when I bake ahead.
- The spice stays balanced; I do not want one loud note taking over.
- I can cut or portion it cleanly once I give it enough time to rest.
- Leftovers still taste intentional the next day.
What I use and why it matters
- All-Butter Pie Dough (what I used).
- 1 large egg beaten with 1 Tablespoon milk (egg wash).
- 1 1/4 cups pumpkin puree (282g).
- 1 large egg.
- 6 Tablespoons brown sugar (72g).
- 1 Tablespoon all-purpose flour.I use it for structure, body, and a clean bite instead of a loose mixture.
- 1 teaspoon pumpkin pie spice (store-bought or homemade pumpkin pie spice).I toast it briefly in the dry pan to wake up the oils before adding liquid.
- 1 teaspoon pure vanilla extract.
- pinch of salt.
- 1 cup confectioners sugar (120g).
- 3 Tablespoons milk (45ml).
- 1 Tablespoon maple syrup (15ml).
- 1/2 teaspoon maple extract or vanilla extract.
- pinch of salt.
How I make it
Step 1 — I prepare either pie crust recipe
I prepare either pie crust recipe through step 5. (Again, I use and recommend this all-butter pie dough.) The dough must chill for at least 2 hours in the refrigerator (or up to 5 days) before using.
Step 2 — Build the layers
I handle this part carefully: On a lightly floured work surface, roll out one of the discs of chilled dough (keep the other one in the refrigerator). Turn the dough about a quarter turn after every few rolls. At any sign of sticking, sprinkle some flour underneath, then keep rolling. Roll out until it’s about 1/8-1/4-inch thick. Place a bowl.
Step 3 — I handle this part carefully: Meanwhile
I handle this part carefully: Meanwhile, preheat oven to 400°F (204°C). Line two large baking sheets with parchment paper or silicone baking mats.
Step 4 — In a medium bowl, I whisk
In a medium bowl, I whisk together the pumpkin, egg, brown sugar, flour, pumpkin pie spice, vanilla extract, and salt until completely combined. (Makes about 1 and 1/2 cups of filling.).
Step 5 — I spoon and spread filling, about
I spoon and spread filling, about 1.5-2 Tablespoons per hand pie, onto one half of each crust circle, leaving a 1/4-inch border around the edges. Fold the bare half of the circle over top of the filling to make a half-moon shape. Press the fingers all around the edges to seal, then crimp the pie crust edges with a fork.
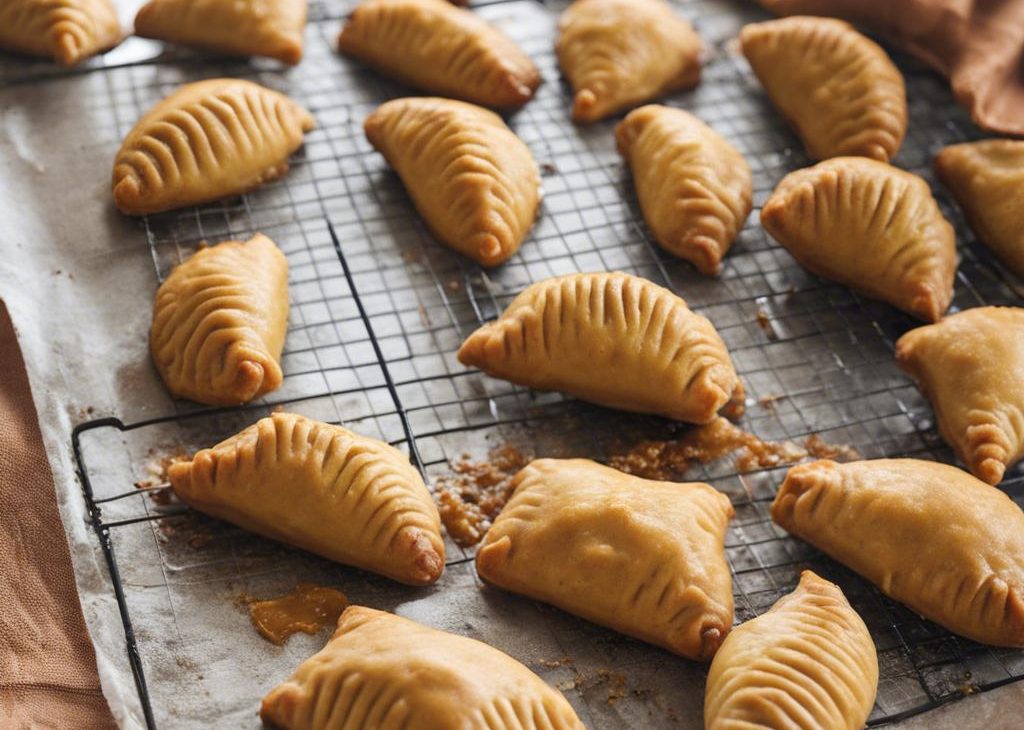
Step 6 — I bake for about 22-25 minutes
I bake for about 22-25 minutes or until they’re golden brown on top and around the edges. Halfway through baking, rotate the baking sheets from top to bottom/bottom to top. Remove from the oven and allow the hand pies to cool on the baking sheets for 5 minutes, then transfer to a cooling rack to cool until ready to handle.
Step 7 — In a medium bowl, I whisk
In a medium bowl, I whisk together the confectioners’ sugar, maple syrup, milk, maple or vanilla extract, and salt. When the hand pies are cool enough to handle, dip the tops of each into the icing. If the flaky layers of crust get stuck in the icing, switch to drizzling the icing on top instead of dipping. Place iced hand.
Step 8 — I cover leftovers and store
I cover leftovers and store at room temperature for up to 1 day or in the refrigerator for up to 5 days.
Tips from my kitchen
- Tip 1.I measure flour with a light hand; packing it into the cup makes the crumb heavy.
- Tip 2.I bring cold dairy or eggs closer to room temperature when the recipe has a creamy filling or smooth batter.
- Tip 3.I start checking a few minutes early because my oven runs hot in the back right corner.
- Tip 4.I let the pan cool longer than I think I need; warm sweets can look underdone when they are only fragile.
- Tip 5.I use parchment when lifting or slicing matters more than a browned edge.
Variations I have actually tried
- Variation 1:I add toasted pecans or walnuts when I want a little crunch.
- Variation 2:I fold in mini chocolate chips for a sweeter batch.
- Variation 3:I use maple icing instead of plain vanilla when pumpkin is the main flavor.
- Variation 4:I add orange zest when the batter tastes a little too heavy.
- Variation 5:I make smaller portions and start checking several minutes early.
Storing, reheating, and serving
I let the finished bake cool completely before covering it. Most slices or portions keep at room temperature for a short stretch if they are unfrosted, but I refrigerate anything with cream cheese, custard, or a soft dairy filling. For reheating, I use short bursts so the edges do not dry out.
For serving, I keep pumpkin hand pies simple. I would rather add one good side or topping than bury the main flavor. If I am packing leftovers, I portion them first so nobody has to wrestle with a cold pan or container later.
Frequently asked questions
Can I make this ahead?
Yes. I usually bake pumpkin hand pies the day before if I need clean slices or a calmer morning. I cool it fully, cover it well, and wait on glaze or frosting if that finish could get sticky.
How do I know when it is done?
I look for set edges and a center that springs back or gives only slightly. A toothpick with a few moist crumbs is better than one coated in wet batter.
Can I freeze it?
Most baked portions freeze well once cooled. I wrap individual pieces tightly, freeze up to 2 months, and thaw in the refrigerator.
Why did mine turn out dry?
Dryness usually comes from too much flour, over-baking, or slicing while very hot. I check early and measure carefully.
Can I reduce the sugar?
I reduce sugar cautiously because it affects moisture and browning. Dropping a few tablespoons is usually fine; cutting much more can make the texture tougher.
If you make pumpkin hand pies, I would love to hear what you changed and what you kept exactly the same.
Pumpkin Hand Pies
Description
This is my practical rewrite of pumpkin hand pies, with ingredient roles, timing cues, storage notes, and variations I would want beside me in the kitchen. I kept the method clear and first-person so the recipe reads like a cook talking through the pan, not a thin summary.
Ingredients You’ll Need
Instructions
- I prepare either pie crust recipe through step 5. (Again, I use and recommend this all-butter pie dough.) The dough must chill for at least 2 hours in the refrigerator (or up to 5 days) before using.
- I handle this part carefully: On a lightly floured work surface, roll out one of the discs of chilled dough (keep the other one in the refrigerator). Turn the dough about a quarter turn after every few rolls. At any sign of sticking, sprinkle some flour underneath, then keep rolling. Roll out until it's about 1/8-1/4-inch thick. Place a bowl that's about 5 inches in diameter upside down on the pie dough. (If you don't have a bowl this size, cut a 5-inch circle from a piece of paper and use that as the guide.) Using a sharp knife, cut around the outside of the bowl. You should now have a 5-inch circle of pie crust. Repeat; re-rolling scraps as needed. Place cut circles on a plate/baking sheet in the refrigerator to keep cold. The colder the shaped dough, the easier it is to work with. Repeat with 2nd disc of pie dough and refrigerate all cut circles for at least 15 minutes before filling the hand pies. You should have about 12-16 circles in total.
- I handle this part carefully: Meanwhile, preheat oven to 400°F (204°C). Line two large baking sheets with parchment paper or silicone baking mats.
- In a medium bowl, I whisk together the pumpkin, egg, brown sugar, flour, pumpkin pie spice, vanilla extract, and salt until completely combined. (Makes about 1 and 1/2 cups of filling.).
- I spoon and spread filling, about 1.5-2 Tablespoons per hand pie, onto one half of each crust circle, leaving a 1/4-inch border around the edges. Fold the bare half of the circle over top of the filling to make a half-moon shape. Press the fingers all around the edges to seal, then crimp the pie crust edges with a fork. Place the hand pies on the prepared baking sheets. Lightly brush the tops of the pies with egg wash. Using a sharp knife, cut 2-3 slits in the tops, to vent steam. At this point the hand pies can be baked, but if they don't feel cool to the touch anymore, refrigerate for at least 15 minutes and up to 1 hour before baking. The colder they are going into the oven, the better they'll hold their shape. (After 15 minutes, they may begin to leak a little pumpkin liquid out of the sides. That's completely normal and fine. Blot it with a paper towel before baking.).
- I bake for about 22-25 minutes or until they're golden brown on top and around the edges. Halfway through baking, rotate the baking sheets from top to bottom/bottom to top. Remove from the oven and allow the hand pies to cool on the baking sheets for 5 minutes, then transfer to a cooling rack to cool until ready to handle.
- In a medium bowl, I whisk together the confectioners' sugar, maple syrup, milk, maple or vanilla extract, and salt. When the hand pies are cool enough to handle, dip the tops of each into the icing. If the flaky layers of crust get stuck in the icing, switch to drizzling the icing on top instead of dipping. Place iced hand pies on a cooling rack set over a baking sheet or piece of parchment paper to catch drips. The icing will set in about 1 hour, but you can certainly enjoy the hand pies before that! Serve warm or at room temperature.
- I cover leftovers and store at room temperature for up to 1 day or in the refrigerator for up to 5 days.
Nutrition Facts
Servings 12
- Amount Per Serving
- Calories 49kcal
- % Daily Value *
- Total Fat 1g2%
- Trans Fat 0.0g
- Cholesterol 21mg8%
- Sodium 12mg1%
- Potassium 84mg3%
- Total Carbohydrate 10g4%
- Dietary Fiber 1g4%
- Sugars 8g
- Protein 1g2%
- Calcium 21 mg
- Iron 0.6 mg
* Percent Daily Values are based on a 2,000 calorie diet. Your daily value may be higher or lower depending on your calorie needs.
Note
Kitchen note 1. I measure flour with a light hand; packing it into the cup makes the crumb heavy.
Kitchen note 2. I bring cold dairy or eggs closer to room temperature when the recipe has a creamy filling or smooth batter.
Kitchen note 3. I start checking a few minutes early because my oven runs hot in the back right corner.
Kitchen note 4. I let the pan cool longer than I think I need; warm sweets can look underdone when they are only fragile.
Frequently Asked Questions
Yes. I usually bake pumpkin hand pies the day before if I need clean slices or a calmer morning. I cool it fully, cover it well, and wait on glaze or frosting if that finish could get sticky.
I look for set edges and a center that springs back or gives only slightly. A toothpick with a few moist crumbs is better than one coated in wet batter.
Most baked portions freeze well once cooled. I wrap individual pieces tightly, freeze up to 2 months, and thaw in the refrigerator.
Dryness usually comes from too much flour, over-baking, or slicing while very hot. I check early and measure carefully.
I reduce sugar cautiously because it affects moisture and browning. Dropping a few tablespoons is usually fine; cutting much more can make the texture tougher.
You may also like...