
Quick and Easy Honey Pear Tart is one of those recipes I like to make when I want something familiar but not careless. I want the flavor to be clear, the texture to make sense, and the instructions to leave room for the small judgment calls that happen in a real kitchen.
I have learned to treat quick and easy honey pear tart as a recipe of cues, not just minutes. The timer matters, but the better signs are the smell, the way the edges look, the thickness of the mixture, and whether the center has settled.
The version below keeps the original measurements intact and adds the notes I wish I had beside me the first time: where I slow down, what I watch, and how I store the leftovers without losing the best texture.
Why I keep coming back to this
- I can make it without a complicated setup, which matters on a normal week.
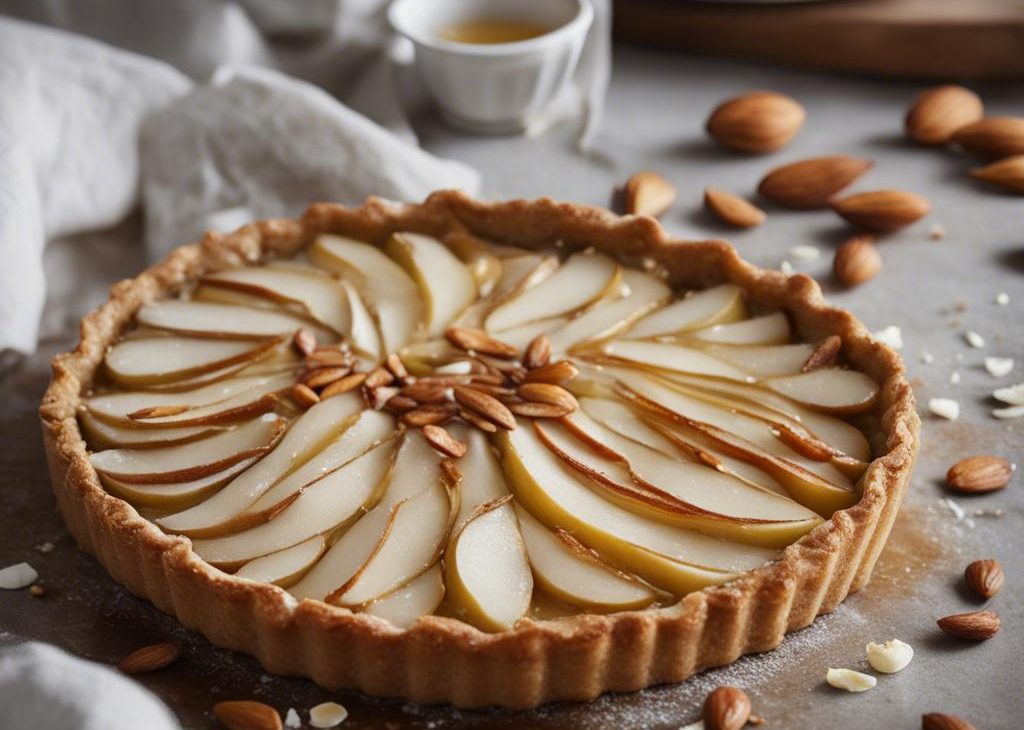
- The main flavors – frozen puff pastry, thawed, goat cheese, large pears, thinly sliced – come through clearly instead of getting buried.
- The method gives me clear stopping points, so I am not guessing the whole time.
- It works for sharing, but I also like it as a practical make-ahead recipe.
- The leftovers hold up better than I expected when stored the right way.
- Small changes are easy once the base recipe is working.
What you need and what each ingredient is doing
- 1 package frozen puff pastry, thawed.2 sheets
- 1 wash: egg wash.Eggs bind the mixture and help it set; room temperature eggs blend more smoothly for me.
- 8 ounces goat cheese.This is the creamy backbone, so I use it cold or warm depending on the sauce or filling.
- 2 large large pears, thinly sliced.This adds the fresh flavor; I handle it gently so the color and juice stay where I want them.
- 2 Tablespoons coarse sugar.or brown sugar!
- 1/4 cup sliced almonds.Nuts and seeds add crunch; I smell them as they toast because they can go from golden to bitter fast.
- as needed sea salt.A small amount keeps the sweet or rich flavors from tasting flat.
- as needed honey.
How I make it
Step 1 — Preheat oven to 375the oven
I start here because the rest of the recipe moves better when this part is organized: Preheat oven to 375°F (191°C). Line a 12×17-inch baking sheet with parchment paper or a silicone baking mat.
Step 2 — Unroll the pastry sheets
For this stage, I focus on even texture rather than rushing: Unroll the pastry sheets on a floured work surface. Place the edge of one over the other and use a rolling pin to adhere them together. Roll the whole thing out into a 10×14-inch rectangle. Fold over the edges and crimp down with a fork. Crimping is much easier the colder the pastry is, so place into the refrigerator to chill if needed. Review.
Step 3 — Brush the entire pastry edges
This is the point where I slow down and watch the visual cues: Brush the entire pastry, edges included, with egg wash. Top with goat cheese.
Step 4 — Toss the pear slices
I keep the tools close and work steadily through this part: Toss the pear slices and coarse sugar together. Line the pears on top of the pastry. Sprinkle with almonds and sea salt.
Step 5 — Bake for 35 40 minutes
At this stage, I check the edges, aroma, and texture before moving on: Bake for 35-40 minutes until the edges are golden brown. Remove from the oven, place on a wire rack, and allow to cool for 10 minutes. Drizzle with honey before slicing and serving.
Tips from my kitchen
- Measure first.I set out the ingredients for Quick and Easy Honey Pear Tart before I turn on heat or preheat the oven.
- Use the visual cue.Timers help, but I trust browning, bubbling, thickening, or set centers more than the clock alone.
- Do not rush cooling.Warm food is fragile; I give it a short rest so slices, scoops, or spoonfuls hold together better.
- Season at the end.For sauces, soups, and fillings, I taste once more after resting because salt and spice settle in.
Variations I have actually tried
- A warmer spice note.I add a little extra cinnamon or pumpkin pie spice when the recipe already leans cozy.
- A nut-free direction.I leave out nuts or seeds and use extra fruit, cereal, or chocolate where the texture still needs something.
- A brighter finish.I add lemon or lime zest when the dish tastes rich and needs a clean edge.
- A less-sweet batch.I reduce the garnish or drizzle first, because changing the main sugar can change the structure.
- A make-ahead version.I prep the dry ingredients or filling components separately, then assemble when I am ready to cook.
How I plan the timing
I read through the full method before I start quick and easy honey pear tart, especially if chilling, cooling, or resting is tucked into the instructions. That small habit keeps me from promising food at one time and serving it much later.
If I am making this for guests, I handle the measuring and chopping early. Then the active cooking feels calm, and I can pay attention to the part that matters most: pulling it off the heat or out of the oven at the right moment.
What I serve with it
I usually keep the sides simple so quick and easy honey pear tart stays the main thing. For sweet recipes, I like coffee, tea, fruit, or something salty nearby. For savory recipes, I add a crisp salad, warm tortillas, chips, rice, or lemon wedges depending on the direction of the dish.
I also think about contrast. Creamy food needs crunch, spiced food likes something cool, and rich chocolate or butter-heavy bakes are better with a small bright note on the plate.
Storing and reheating
I let quick and easy honey pear tart cool before I cover it, unless the recipe is a drink or a sauce that needs chilling right away. Trapped steam can make crisp edges soft, and uncovered refrigeration can dry out the surface.
For reheating, I use gentle heat and stop as soon as it is warm. Baked goods do well with a short oven refresh, creamy sauces need low heat and stirring, and rice or soup usually wants a splash of liquid to loosen back up.
Frequently asked questions
Can I make Quick and Easy Honey Pear Tart ahead?
Yes. I usually prepare the parts that hold well, then finish or reheat close to serving. The texture is best when I store it tightly covered and keep garnishes separate until the end.
Can I freeze it?
For baked goods, I freeze portions once fully cool. For sauces and drinks, I prefer the refrigerator because thawing can change the texture. If I do freeze it, I thaw overnight in the fridge.
What is the biggest mistake to avoid?
Rushing the texture cue. I look for the specific sign in the method – a set center, smooth sauce, tender seafood, or fragrant edges – before I call it done.
Can I change the sweetness?
A little, yes. I adjust toppings, drizzles, or garnishes first. When sugar is part of the batter or candy base, I keep the listed amount because it affects structure.
How do I keep leftovers from drying out?
I cool them fully, cover tightly, and reheat gently. A splash of milk, broth, or water helps when the recipe is creamy, saucy, or rice-based.
If you make Quick and Easy Honey Pear Tart, I would love to hear what little adjustment made it work best in your kitchen.
Quick and Easy Honey Pear Tart
Description
I make Quick and Easy Honey Pear Tart with frozen puff pastry, thawed, goat cheese, large pears, thinly sliced, clear timing cues, practical storage notes, and swaps I have actually used.
Ingredients You’ll Need
Instructions
- I preheat oven to 375°F (191°C). Line a 12x17-inch baking sheet with parchment paper or a silicone baking mat.
- I unroll the pastry sheets on a floured work surface. Place the edge of one over the other and use a rolling pin to adhere them together. Roll the whole thing out into a 10x14-inch rectangle. Fold over the edges and crimp down with a fork. Crimping is much easier the colder the pastry is, so place into the refrigerator to chill if needed. Review my how to crimp and flute pie crust tutorial if you.
- I brush the entire pastry, edges included, with egg wash. Top with goat cheese.
- I toss the pear slices and coarse sugar together. Line the pears on top of the pastry. Sprinkle with almonds and sea salt.
- I bake for 35-40 minutes until the edges are golden brown. Remove from the oven, place on a wire rack, and allow to cool for 10 minutes. Drizzle with honey before slicing and serving.
Nutrition Facts
Servings 12
- Amount Per Serving
- Calories 69kcal
- % Daily Value *
- Total Fat 6g10%
- Saturated Fat 4g20%
- Trans Fat 0.1g
- Cholesterol 15mg5%
- Sodium 78mg4%
- Potassium 30mg1%
- Protein 4g8%
- Calcium 26 mg
- Iron 0.4 mg
* Percent Daily Values are based on a 2,000 calorie diet. Your daily value may be higher or lower depending on your calorie needs.
Note
Measure first. I set everything out before starting so I do not miss a small ingredient.
Trust the cue. I use the listed time as a guide, then check color, texture, and aroma.
Cool before storing. A short rest keeps steam from making the finished recipe soggy.
Adjust gently. I change toppings and garnishes before changing structural ingredients like sugar, flour, eggs, or cheese.
Frequently Asked Questions
Yes. I usually prepare the parts that hold well, then finish or reheat close to serving. The texture is best when I store it tightly covered and keep garnishes separate until the end.
For baked goods, I freeze portions once fully cool. For sauces and drinks, I prefer the refrigerator because thawing can change the texture. If I do freeze it, I thaw overnight in the fridge.
Rushing the texture cue. I look for the specific sign in the method - a set center, smooth sauce, tender seafood, or fragrant edges - before I call it done.
A little, yes. I adjust toppings, drizzles, or garnishes first. When sugar is part of the batter or candy base, I keep the listed amount because it affects structure.
I cool them fully, cover tightly, and reheat gently. A splash of milk, broth, or water helps when the recipe is creamy, saucy, or rice-based.
You may also like...