
Soft & Thick Peanut Butter Cookies is the kind of recipe I pull out when I want a dependable result without pretending the kitchen is a studio set. I like food that gives clear signs as it cooks: edges that set, sauce that thickens, dough that changes from shaggy to smooth, or a blender that finally stops rattling over chunks of ice.
I keep the process close to the way I actually cook at home. I care about the small moments: when to stop mixing, what the center should look like, how long to cool it, and what I do when a batch looks a little different from the last one.
For these cookies, I keep the flavor direct and the method honest. If there is a wait time, I say why it matters. If a step is easy to rush, I point it out. That is usually the difference between food that is fine and food I want to make again.
Why I keep coming back to this
- The dough is forgiving if I measure carefully and respect the chill time.
- The edges set before the centers dry out, which is the texture I want.
- It keeps well enough for lunch boxes and late-night kitchen visits.
- Most ingredients are pantry staples I already keep around.
- I can make the dough ahead and bake when the oven is free.
What you need and what each ingredient is doing
- 1 and 1/3 cups all-purpose flour (170g). I rely on it for structure, and I measure it lightly so the crumb does not turn heavy.
- 1/2 teaspoon baking soda. This is the lift, so I check that it is fresh before I start.
- 1/4 teaspoon salt. I add it even to sweets because it keeps the flavors from tasting flat.
- 1/2 cup unsalted butter, softened (8 Tbsp; 113g).
- 1/2 cup packed brown sugar (100g).
- 1/4 cup granulated sugar (50g).
- 1 large egg, at room temperature. It binds the mixture and gives the finished texture a little lift.
- 3/4 cup creamy peanut butter (about 185g).
- 1 teaspoon pure vanilla extract. A small amount rounds out the sweet flavors without making the batch taste perfumed.
How I make it
Step 1 — Whisk the dry ingredients
Whisk the flour, baking soda, and salt together in a medium bowl. Set aside.
Step 2 — Beat until smooth
Using a hand mixer or a stand mixer fitted with paddle attachment, beat the butter for 1 minute on high speed until creamy. Switch to medium-high speed and beat in the brown sugar and 1/4 cup (50g) granulated sugar until completely creamed and smooth, about 2 minutes. Add the egg and beat until combined, about 1 minute. Scrape down the sides and bottom.
Step 3 — Chill the dough
Add the dry ingredients to the wet ingredients and beat on low speed until combined. The dough will be very creamy and soft. Cover and chill the cookie dough in the refrigerator for at least 1-2 hours, and up to 3 days.
Step 4 — Set up the pan and oven
Preheat oven to 350°F (177°C). Line large baking sheets with parchment paper or silicone baking mats.
Step 5 — Shape the cookies
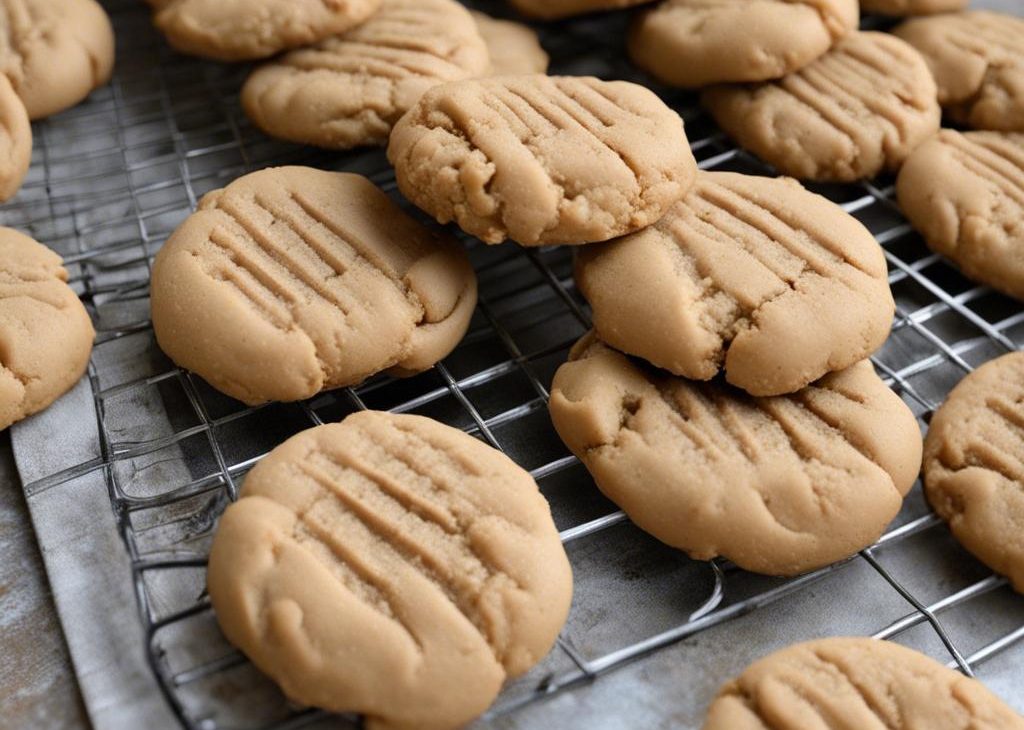
Place remaining 1/2 cup (100g) of sugar into a bowl. Roll chilled cookie dough into balls, about 1 scant Tablespoon (5/8 ounce or 18g) of dough each. Roll each ball in the sugar and arrange on baking sheets about 2 inches apart. Use a fork to make a criss-cross indent on top of each. To prevent the cookies from over-spreading, after indenting the cookies,.
Step 6 — Bake and check the center
Bake for 11-12 minutes or until the edges appear set and are very lightly browned. The centers will still look very soft.
Step 7 — Cool, finish, and store
Allow cookies to cool on the baking sheet for 5 minutes. After 5 minutes, transfer to a wire rack to cool completely.
Step 8 — Store leftovers
Cookies stay fresh covered at room temperature for up to 1 week.
Tips from my kitchen
- I measure before I start; the calm counter keeps me from missing the small ingredients.
- I trust the visual cues more than the timer when my oven or pan is acting different.
- I let the finished food cool or rest before judging the texture. Heat can make it seem softer than it really is.
- I pull cookies when the centers still look a little soft because they keep setting on the tray.
- If the dough feels greasy or loose, I chill it instead of adding extra flour.
Variations I have actually tried
- Press a few chopped peanuts on top before baking for more crunch.
- Use crunchy peanut butter if you like little bits in the cookie.
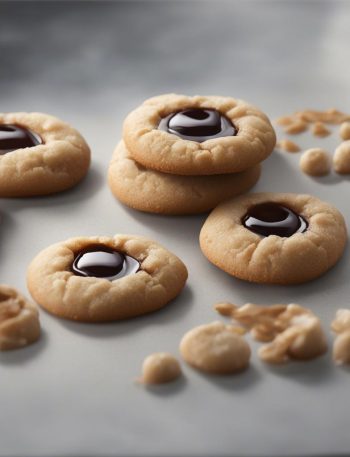
- Add mini chocolate chips when I want a peanut-butter-cup direction.
- Roll the dough in sugar before baking for a lightly crisp edge.
- Finish with a tiny sprinkle of flaky salt while warm.
Storing, reheating, and making ahead
I cool the batch completely before storing it. Cookies and bars keep best in an airtight container with parchment between layers. For longer storage, I freeze individual portions and thaw only what I need. If the texture softens, a few minutes uncovered at room temperature usually brings the edges back.
How I like to serve it
I serve these after they have cooled enough to show their real texture. For a tray, I mix small and larger pieces so people can take what they actually want.
Frequently asked questions
Can I make the dough ahead?
Yes. I usually chill it tightly covered, then bake from cold. If it is very firm, I let it sit on the counter just long enough to scoop.
Why did my batch spread?
The usual reasons are warm dough, soft butter, or a hot baking sheet. I cool the pan between batches and chill the dough if it looks shiny.
Can I freeze them?
Yes. I freeze baked pieces in a sealed container with parchment between layers, or freeze shaped dough and bake a few at a time.
How do I know they are done?
I look for set edges and centers that still look a little soft. They finish setting as they cool, so I avoid waiting until the middle looks dry.
Can I cut back the sugar?
A small reduction is fine, but a large one changes spread, browning, and chew. I start with two tablespoons less before making a bigger change.
If you make Soft & Thick Peanut Butter Cookies, leave a comment with the change you tried or the cue that helped most. I read those notes because they make the next batch better.
Soft & Thick Peanut Butter Cookies
Description
This is my practical rewrite for Soft & Thick Peanut Butter Cookies, built around all-purpose flour, baking soda, salt, unsalted butter, softened. I keep the method clear, call out the texture cues I watch for, and include storage notes so the leftovers are not an afterthought.
Ingredients You’ll Need
Instructions
- Whisk the flour, baking soda, and salt together in a medium bowl. Set aside.
- Using a hand mixer or a stand mixer fitted with paddle attachment, beat the butter for 1 minute on high speed until creamy. Switch to medium-high speed and beat in the brown sugar and 1/4 cup (50g) granulated sugar until completely creamed and smooth, about 2 minutes. Add the egg and beat until combined, about 1 minute. Scrape down the sides and bottom of the bowl as needed. Add the peanut butter and vanilla extract and beat.
- Add the dry ingredients to the wet ingredients and beat on low speed until combined. The dough will be very creamy and soft. Cover and chill the cookie dough in the refrigerator for at least 1-2 hours, and up to 3 days.
- Preheat oven to 350°F (177°C). Line large baking sheets with parchment paper or silicone baking mats.
- Place remaining 1/2 cup (100g) of sugar into a bowl. Roll chilled cookie dough into balls, about 1 scant Tablespoon (5/8 ounce or 18g) of dough each. Roll each ball in the sugar and arrange on baking sheets about 2 inches apart. Use a fork to make a criss-cross indent on top of each. To prevent the cookies from over-spreading, after indenting the cookies, use your fingers to reshape into a thicker disc (since indenting the.
- Bake for 11-12 minutes or until the edges appear set and are very lightly browned. The centers will still look very soft.
- Allow cookies to cool on the baking sheet for 5 minutes. After 5 minutes, transfer to a wire rack to cool completely.
- Cookies stay fresh covered at room temperature for up to 1 week.
Nutrition Facts
Servings 32
- Amount Per Serving
- Calories 98kcal
- % Daily Value *
- Total Fat 6g10%
- Saturated Fat 2g10%
- Trans Fat 0.1g
- Cholesterol 8mg3%
- Sodium 38mg2%
- Potassium 46mg2%
- Total Carbohydrate 10g4%
- Dietary Fiber 1g4%
- Sugars 5g
- Protein 2g4%
- Calcium 4 mg
- Iron 0.4 mg
* Percent Daily Values are based on a 2,000 calorie diet. Your daily value may be higher or lower depending on your calorie needs.
Note
I measure before I start; the calm counter keeps me from missing the small ingredients.
I trust the visual cues more than the timer when my oven or pan is acting different.
I let the finished food cool or rest before judging the texture. Heat can make it seem softer than it really is.
I pull cookies when the centers still look a little soft because they keep setting on the tray.
Frequently Asked Questions
Yes. I usually chill it tightly covered, then bake from cold. If it is very firm, I let it sit on the counter just long enough to scoop.
The usual reasons are warm dough, soft butter, or a hot baking sheet. I cool the pan between batches and chill the dough if it looks shiny.
Yes. I freeze baked pieces in a sealed container with parchment between layers, or freeze shaped dough and bake a few at a time.
I look for set edges and centers that still look a little soft. They finish setting as they cool, so I avoid waiting until the middle looks dry.
A small reduction is fine, but a large one changes spread, browning, and chew. I start with two tablespoons less before making a bigger change.
You may also like...