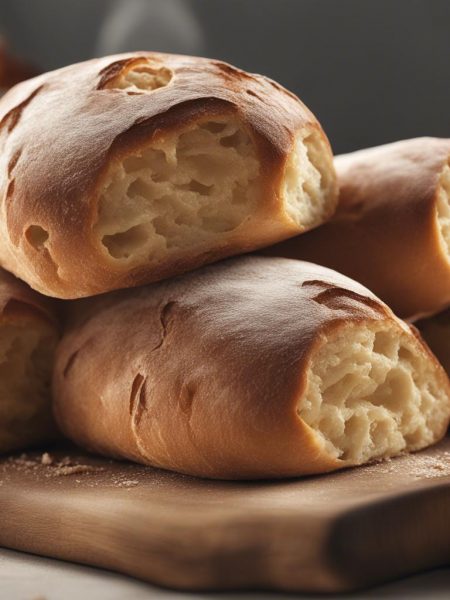

I make Gingerbread House when I want a baking project that feels special but still gives me clear cues along the way.
I have learned to trust the texture more than the clock. A timer gets me close, but the surface, edges, and smell tell me when to stop.
This rewrite keeps the original amounts and temperature cues, then adds the practical kitchen notes I wish every recipe included.
Why I keep coming back to this
- I can prep the ingredients before I start, which keeps gingerbread house from feeling chaotic.
- The recipe has clear visual cues, so I am not relying only on a timer.
- It is flexible enough for small swaps without losing the main character of the dish.
- The leftovers hold up better when I cool and store them the right way.
- The ingredient list is familiar, but the finished flavor still feels worth the effort.
- I can tell when something is off early, which makes the recipe easier to rescue.
What you need (and what each one is doing)
- 3 cups all-purpose flour (375g).stays organized. It gives the recipe its structure; I spoon it into the cup rather than scooping to avoid packing.
- 1/4 teaspoon baking soda.stays organized. It provides the lift that keeps things from turning dense.
- 2 teaspoons ground ginger.stays organized.
- 2 teaspoons ground cinnamon.stays organized. It adds warmth that complements the sweetness without overpowering.
- 1/2 teaspoon ground allspice.stays organized. I toast it briefly in the dry pan to wake up the oils before adding liquid.
- 1/4 teaspoon salt.stays organized.
- 6 Tablespoons unsalted butter, softened (85g).stays organized.
- 3/4 cup packed light or dark brown sugar (150g).stays organized.
- 1 large egg, at room temperature.stays organized. It binds the wet and dry ingredients and adds a slight richness.
- 1/2 cup unsulphured molasses (120ml).stays organized.
- 1 Tablespoon water (15ml).stays organized. I use it at the temperature the recipe specifies—cold, warm, or boiling matters here.
- royal icing (the “glue”).stays organized.
- assorted candies (see post for suggestions).stays organized.
- 1/2 cup vegetable shortening (95g).stays organized.
- 1/2 cup unsalted butter, softened (8 Tbsp; 113g).stays organized.
- 4 cups confectioners’ sugar (480g).stays organized.
- 2 Tablespoons milk (30ml).stays organized. It adds moisture and a subtle richness that water cannot replace.
- 1/4 teaspoon pure vanilla extract.stays organized. It rounds out the sweetness so the recipe does not taste one-dimensional.
- 1/8 teaspoon salt.stays organized.
How I make it
Step 1 — . Set aside for step 6
. Set aside for step 6. Whisk the flour, baking soda, ginger, cinnamon, allspice, and salt together in a large bowl. Set aside. In a large bowl using a handheld mixer or stand mixer fitted with a paddle attachment, beat the butter and brown sugar together on medium speed until completely smooth and creamy, about 2 minutes. Beat in the egg,. I pause here and look at the mixture instead of rushing to the next bowl.
Step 2 — Prep the pan and heat
Divide cookie dough in half, flatten into discs (about 4-5 inches in diameter), and wrap each tightly in plastic wrap. Chill in the refrigerator for 2 hours or up to 3 days. Preheat oven to 350°F (177°C). Line 2-3 large baking sheets with parchment paper or silicone baking mats. Remove each disc from the refrigerator and roll each out in between two pieces of parchment paper.. Parchment is best. Roll out to about 1/4 inch thick. You want thick pieces for ythe gingerbread house. Lightly flthe.
Step 3 — Prep the pan and heat
Carefully arrange gingerbread house shapes onto prepared baking sheets, about 3 inches apart.. Bake house pieces for about 18-20 minutes or until edges are lightly browned. Bake chimney pieces for about 12-13 minutes or until edges are lightly browned. Remove from the oven and allow shapes to cool completely on. Select a base for ythe gingerbread house. I used a wooden cake server.. Start with two pieces: the front of the house and 1 side. Using a squeeze bottle, run a thick line of royal icing on one long edge and one short.
Step 4 — Prep the pan and heat
The roof pieces will be placed on top of the house base. Run a thick line of royal icing on the inside edges of one of the roof pieces and adhere it to the base. Hold in place for a few minutes. Repeat with 2nd roof. The chimney is optional, but it’s a lot of fun. I recommend putting together the chimney separately, then adhering to the roof. It’s easiest to glue the chimney pieces together upside-down. Use thick lines of royal. Before decorating, the icing on the entire house must completely set. Allow the entire house to set at room temperature for at least 3 hours, preferably 4-6 hours or even overnight before decorating. Cover and store.
Step 5 — Mix with a light hand
Buttercream can be prepared up to 1 day in advance—cover tightly and store in the refrigerator overnight. Bring to room temperature before piping/decorating. With a handheld or stand mixer fitted with a paddle. Use buttercream, leftover royal icing, and candies for decorating. See my candy suggestions in the blog post above. I only used 1 piping tip for the entire house: Ateco piping tip #32.. Makes a lovely design. Don’t forget to chow down on ythe beautiful creation if you’re in the mood for eating it. Use ythe best judgment here, obviously the food will taste old after a few days!
My timing notes
I set out every bowl, pan, and measuring spoon before I begin. That sounds fussy, but it keeps me from discovering a missing whisk or cold ingredient halfway through.
When a recipe gives a range, I start checking at the early end. My oven runs a little hot on the back left corner, so I rotate pans when browning looks uneven.
I also build in cooling time even when the source rest time is blank. Hot food is still cooking from carryover heat, and a short pause usually gives cleaner slices, steadier frosting, or a better first bite.
Tips from my kitchen
- Read the recipe once before starting.I catch most mistakes before they happen when I know which steps move quickly.
- Use the pan size listed.Changing the pan changes timing, browning, and the way the center sets.
- Stop mixing as soon as the texture looks even.Overmixing is the fastest way I know to make baked goods tough or sauces loose.
- Start checking early.I set the timer for the low end of the range and let color, aroma, and texture make the final call.
- Let it rest before serving.A few quiet minutes make slices cleaner and flavors calmer.
Variations I have actually tried
- Extra citrus:I add a little orange zest to the batter or frosting when I want the spices to taste brighter.
- Chocolate edge:A handful of mini chocolate chips works well when the dough or batter can support them.
- Less spice:I reduce cloves or allspice first, because those are the flavors that can take over.
- Make-ahead:I chill the dough or baked pieces as directed and finish the glaze or frosting the day I serve.
- Crunchy top:Coarse sugar gives the surface a bakery-style bite without changing the recipe underneath.
Storing and reheating
I cool the batch fully before covering it. Most baked leftovers keep well for a few days at room temperature if unfrosted, while frosted or dairy-heavy pieces go into the refrigerator.
Frequently asked questions
Can I make gingerbread house ahead?
Yes, but I choose the make-ahead point based on texture. For baked recipes I often prep components ahead, then bake or finish the day I serve. For drinks and sauces, I keep the base cold and stir or blend again before serving.
How do I know when it is done?
The recipe should look finished before I pull it.
Can I change the sweetness?
I make small changes first. I adjust glaze, toppings, honey, or serving sauce before changing the main batter or dough, because sugar often affects browning and moisture.
What should I do if the texture looks wrong?
I stop and fix the smallest thing. A splash of liquid helps a stiff batter or blender jar; a spoonful of flour or a few extra minutes of chilling helps a sticky dough.
Can I freeze it?
Many baked versions freeze well once completely cool. I wrap individual portions tightly, label them, and thaw in the refrigerator or at room temperature before reheating gently.
If you make gingerbread house, I would love to hear what you changed and what you kept exactly the same.
Gingerbread House
Description
Gingerbread House is written the way I make it in my own kitchen: exact source amounts, clear timing, and the texture cues I check before serving. I included practical swaps, storage notes, and the small fixes that help the recipe behave.
Ingredients You’ll Need
Instructions
- . Set aside for step 6.
- Whisk the flour, baking soda, ginger, cinnamon, allspice, and salt together in a large bowl. Set aside.
- In a large bowl using a handheld mixer or stand mixer fitted with a paddle attachment, beat the butter and brown sugar together on medium speed until completely smooth and creamy, about 2 minutes. Beat in the egg, molasses, and water on high speed. Scrape down the sides and up the bottom of the bowl and beat again as needed to combine. On low speed, slowly mix the dry ingredients into the wet ingredients until combined. Cookie dough will be very thick.
- Divide cookie dough in half, flatten into discs (about 4-5 inches in diameter), and wrap each tightly in plastic wrap. Chill in the refrigerator for 2 hours or up to 3 days.
- Preheat oven to 350°F (177°C). Line 2-3 large baking sheets with parchment paper or silicone baking mats.
- Remove each disc from the refrigerator and roll each out in between two pieces of parchment paper.. Parchment is best. Roll out to about 1/4 inch thick. You want thick pieces for ythe gingerbread house. Lightly flthe the underside of gingerbread house template shapes. (The dough is sticky and the paper may stick to it otherwise.) Using a pizza cutter or small knife, carefully cut the dough into the gingerbread house template shapes. You will need TWO of each shape. Re-roll dough scraps so you have enough dough for the whole house. Use any extra dough to create fun shapes using cookie cutters. I made a few gingerbread stars!
- Carefully arrange gingerbread house shapes onto prepared baking sheets, about 3 inches apart..
- Bake house pieces for about 18-20 minutes or until edges are lightly browned. Bake chimney pieces for about 12-13 minutes or until edges are lightly browned. Remove from the oven and allow shapes to cool completely on the baking sheets or on the counter. A flat surface is KEY for cooling—the gingerbread house edges very slightly curl up otherwise. Cooled gingerbread house pieces can be made up to 1 week in advance, cover tightly and store at room temperature or in the refrigerator. They can also be frozen for up to 3 months, thaw at room temperature before using.
- Select a base for ythe gingerbread house. I used a wooden cake server.. Start with two pieces: the front of the house and 1 side. Using a squeeze bottle, run a thick line of royal icing on one long edge and one short edge of the side of the house piece. Stick it to ythe base. Use whatever you have around the house to help it stand up.. You can also prop it up with soda cans, a tall cup, water bottle, etc. Run a line of royal icing along the bottom of the front of the house piece. Stick it to ythe base, adhering it to the side of the house piece. Hold the two in place for a few minutes until the icing is partially set, propping them up as necessary. Repeat with the 2nd side of the house piece and back of the house piece. Pipe royal icing inside any seams, inside and outside of the house, to fill any voids. Don’t be afraid to go heavy on the royal icing “glue”—when it dries, it looks like snow! Allow it to set at room temperature for at least 1 hthe before adding the roof pieces.
- The roof pieces will be placed on top of the house base. Run a thick line of royal icing on the inside edges of one of the roof pieces and adhere it to the base. Hold in place for a few minutes. Repeat with 2nd roof piece. Run a thick line of royal icing where the two roof pieces meet at the top of the house. Hold in place for a few minutes.
- The chimney is optional, but it’s a lot of fun. I recommend putting together the chimney separately, then adhering to the roof. It’s easiest to glue the chimney pieces together upside-down. Use thick lines of royal icing to assemble the chimney in the same way you put together the base of the house. (Except you’re not adhering it to a base because it’s going on the roof!) Allow icing to set by propping it up as necessary. Once set, adhere onto the roof. The chimney may not fit to the exact angle of the roof because both puffed up or lost some shape during baking and cooling, so use as much royal icing as necessary and you can cover any bare spots with buttercream during decoration.
- Before decorating, the icing on the entire house must completely set. Allow the entire house to set at room temperature for at least 3 hours, preferably 4-6 hours or even overnight before decorating. Cover and store leftover royal icing at room temperature or in the refrigerator during this time. It will be the glue for adhering candies to the house.
- Buttercream can be prepared up to 1 day in advance—cover tightly and store in the refrigerator overnight. Bring to room temperature before piping/decorating. With a handheld or stand mixer fitted with a paddle attachment, beat the shortening and butter together on medium speed until creamy, about 2 minutes. Add confectioners’ sugar, milk, and vanilla extract. Beat on low speed for 30 seconds, then increase to high speed and beat for 3 full minutes. Frosting will be very thick, which is what you want. If much too thick, add another splash of milk. Add a pinch of salt if frosting is too sweet. (I add 1/8 teaspoon salt.).
- Use buttercream, leftover royal icing, and candies for decorating. See my candy suggestions in the blog post above. I only used 1 piping tip for the entire house: Ateco piping tip #32.. Makes a lovely design.
- Don’t forget to chow down on ythe beautiful creation if you’re in the mood for eating it. Use ythe best judgment here, obviously the food will taste old after a few days!
Nutrition Facts
Servings 1
- Amount Per Serving
- Calories 2032kcal
- % Daily Value *
- Total Fat 73g113%
- Saturated Fat 44g221%
- Trans Fat 2.8g
- Cholesterol 183mg61%
- Sodium 848mg36%
- Potassium 582mg17%
- Total Carbohydrate 299g100%
- Dietary Fiber 16g64%
- Sugars 3g
- Protein 40g80%
- Calcium 230 mg
- Iron 19.0 mg
* Percent Daily Values are based on a 2,000 calorie diet. Your daily value may be higher or lower depending on your calorie needs.
Note
Read the recipe once before starting. I catch most mistakes before they happen when I know which steps move quickly.
Use the pan size listed. Changing the pan changes timing, browning, and the way the center sets.
Stop mixing as soon as the texture looks even. Overmixing is the fastest way I know to make baked goods tough or sauces loose.
Start checking early. I set the timer for the low end of the range and let color, aroma, and texture make the final call.
Frequently Asked Questions
Yes, but I choose the make-ahead point based on texture. For baked recipes I often prep components ahead, then bake or finish the day I serve. For drinks and sauces, I keep the base cold and stir or blend again before serving.
The recipe should look finished before I pull it.
I make small changes first. I adjust glaze, toppings, honey, or serving sauce before changing the main batter or dough, because sugar often affects browning and moisture.
I stop and fix the smallest thing. A splash of liquid helps a stiff batter or blender jar; a spoonful of flour or a few extra minutes of chilling helps a sticky dough.
Many baked versions freeze well once completely cool. I wrap individual portions tightly, label them, and thaw in the refrigerator or at room temperature before reheating gently.