
I keep homemade soft multigrain bread in my back pocket for the kind of day when I want food that feels homemade without turning the kitchen into a project. The first time I make a recipe like this, I pay attention to the small places where it can go sideways: heat that is too high, dough that is rushed, sauce that is not stirred, or a pan that is the wrong size.
I measure first, keep a spatula or whisk nearby, and taste when the recipe gives me a chance. If there is a waiting period, I use it instead of fighting it.
The flavor leans on 1/2 cup multigrain hot cereal mix, 1 and 3/4 cups boiling water, 2 and 1/4 teaspoons instant or active dry yeast. Nothing here needs fancy plating. I care more about the smell in the kitchen, the texture when I cut or spoon it, and whether leftovers are still worth opening the fridge for the next day.
Why I keep coming back to this
- I can make homemade soft multigrain bread with ordinary equipment and a little patience.
- The ingredient list is straightforward once everything is measured and lined up.
- It gives me clear visual cues, not just a timer to obey blindly.
- The leftovers are useful instead of feeling like a chore.
- I can adjust the finish without changing the base recipe.
- It tastes like something I cooked, not something I assembled in a hurry.
What I use and why each piece matters
- 1/2 cup multigrain hot cereal mix.60g.
- 1 and 3/4 cups boiling water.410ml. It carries flavor and gives the finished texture a softer bite.
- 2 and 1/4 teaspoons instant or active dry yeast.7g. Fresh yeast matters; if it does not foam, I start over before wasting the rest.
- 3 Tablespoons packed brown sugar.37g. This is the sweetness, but I still measure it so the recipe stays balanced.
- 3 Tablespoons unsalted butter, softened.43g.
- 1 and 1/2 teaspoons salt.
- 3 and 1/3 cups bread flour.433g. I spoon and level it because too much makes the dough heavy.
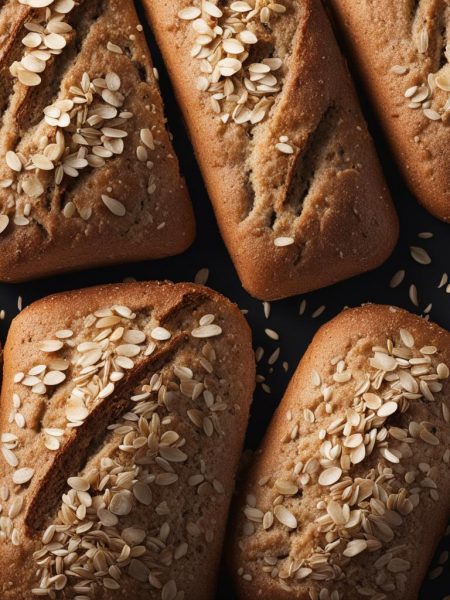
- 1/2 cup optional old-fashioned oats.60g, for topping.
How I make it
Step 1 — Set up before heat or mixing
I start by reading the recipe once and measuring the ingredients. That sounds fussy, but it keeps me from hunting for optional old-fashioned oats while something is already cooking. If the recipe uses the oven, I preheat before I mix so the batter, dough, or sauce is not sitting around longer than needed.
Step 2 — Build the base
I combine the foundation ingredients first and scrape the bowl or pan more than once. For homemade soft multigrain bread, the early texture tells me a lot: smooth and glossy for sauces, shaggy for dough, evenly coated for baked mixtures, and fragrant for spice-heavy recipes.
Step 3 — Cook it at the right pace
I do not crank the heat to hurry things along. Medium heat, a steady oven, or a patient rise gives me a better result than forcing it.
Step 4 — Watch the real doneness cues
I check color, thickness, aroma, and resistance. A timer gets me close, but it does not know my pan or my oven. When I see the edges set, the sauce coat the spoon, or the dough look puffy, I know I am in the right window.
Step 5 — Finish, rest, and serve
I give homemade soft multigrain bread the rest time it needs before serving. That pause lets juices settle, crumbs firm, sauce thicken, or flavors round out. I would rather wait a few minutes than serve something that falls apart because I rushed it.
Tips from my kitchen
- Measure before starting.I set every ingredient on the counter first because several steps move faster than they look on paper.
- Trust the texture.If the mixture looks too loose, too stiff, or too pale, I pause and check before moving on.
- Use the pan size in the recipe.A deeper or wider pan changes timing more than most people expect.
- Let it rest when called for.A short rest can be the difference between messy and clean slices, scoops, or spoonfuls.
Variations I have actually tried
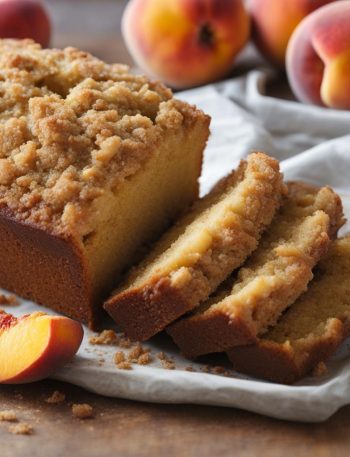
- Orange zest:I add a little zest to sweet dough when I want a brighter bakery smell.
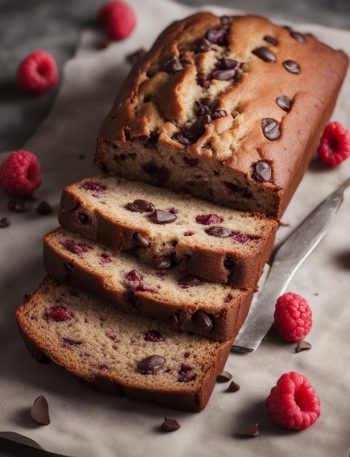
- Nut filling:Finely chopped pecans or walnuts add crunch without changing the dough.
- Overnight rise:I shape, cover, and chill, then bring the pan toward room temperature before baking.
- Simple glaze:Confectioners sugar and milk make a quick finish when I do not want frosting.
- Whole grain note:I replace only a small portion of flour at first so the dough stays soft.
How I like to serve it
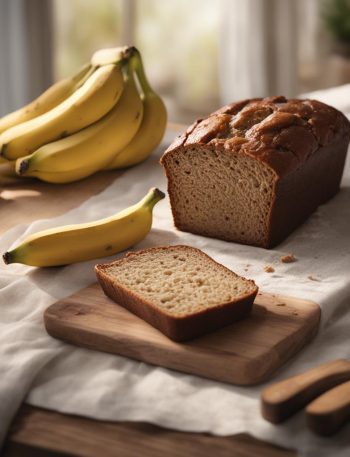
I serve homemade soft multigrain bread in the way that fits the day. If it is rich, I put something crisp or fresh beside it. If it is a sauce, I spoon it over a plain base so the flavor has room to show up. If it is a baked good, I cut the first piece only after it has had a short rest.
For company, I do as much as possible ahead and keep the final step simple. I would rather be calm at the counter than dramatic at the oven door. A warm plate, a clean knife, or a quick whisk right before serving does more than an overworked garnish.
Storing and reheating
I cool leftovers completely, then store them in a tight container. Sauces and dairy-heavy recipes go in the refrigerator. Baked goods get wrapped well so they do not dry out. If I freeze portions, I label the bag because mystery containers never help me on a busy night.
When reheating, I use gentle heat. A microwave works for many single portions, but I cover food loosely and stop to stir or check. For baked items, a low oven brings back a better texture. For sauces, I warm slowly and whisk before deciding whether they need a splash of liquid.
Frequently asked questions
Can I make the dough ahead?
Yes. I usually chill it after the first rise or after shaping, depending on the recipe. I keep it covered tightly so the surface does not dry out.
Why did my dough feel sticky?
A soft dough is normal, especially with enriched bread. I add flour one teaspoon at a time only if it is impossible to handle.
Can I knead by hand?
Yes. It takes more arm work, but I look for the same signs: smoother dough, a little elasticity, and a slow bounce when pressed.
How do I know it is baked through?
I look for even browning and a set center. For bread, the loaf or roll should feel light for its size and sound slightly hollow.
Can I freeze leftovers?
Yes. I wrap portions tightly once cool, freeze them, and thaw at room temperature or warm gently before serving.
If you make homemade soft multigrain bread, I would love to hear what small adjustment made it work best in your kitchen.
Homemade soft multigrain bread
Description
I make homemade soft multigrain bread with 1/2 cup multigrain hot cereal mix, 1 and 3/4 cups boiling water, 2 and 1/4 teaspoons instant or active dry yeast, keeping the original amounts and timing intact. The notes are written from the way I actually cook it: measure first, watch the texture, and store leftovers properly.
Ingredients You’ll Need
Instructions
- Place cereal mix in a large heatproof bowl (you can also use the bowl of your stand mixer). Pour boiling water on top. Let the mixture cool until a digital thermometer reads about 110°F (43°C). This usually takes 20 minutes. Pay attention to the temperature because if it's too hot, it will kill the yeast. If it became too cool, however, it's not a problem—the dough may just take a few extra minutes to rise.
- Whisk the yeast, sugar, and all of the warm water/cereal mixture in the bowl of your stand mixer fitted with a dough hook or paddle attachment. Cover and allow to sit for 5-10 minutes or until foamy and bubbly on the surface.
- Add the butter, salt, and 1 cup (about 130g) flour. Beat on low speed for 30 seconds, scrape down the sides of the bowl with a silicone spatula, then add another cup of flour. Beat on medium speed until relatively incorporated (there may still be chunks of butter). Add all of the remaining flour and the seeds/nuts (if using), then beat on medium speed until the dough comes together and pulls away from the sides of the bowl, about 2 minutes. If it seems too sticky, add more flour, 1 Tablespoon at a time until it begins to pull away from the sides of the bowl. If you do not own a mixer, you can mix this dough with a large wooden spoon or silicone spatula. It will take a bit of arm muscle!
- Keep the dough in the mixer and beat for an additional 3-5 full minutes, or knead by hand on a lightly floured surface for 3-5 full minutes..) If the dough becomes too sticky during the kneading process, sprinkle 1 teaspoon of flour at a time on the dough or on the work surface/in the bowl to make a soft, slightly tacky dough. Do not add more flour than you need because you do not want a dry dough. After kneading, the dough should still feel a little soft. Poke it with your finger—if it slowly bounces back, the dough is ready to rise. You can also do a "windowpane test" to see if the dough has been kneaded long enough: tear off a small (roughly golfball-size) piece of dough and gently stretch it out until it's thin enough for light to pass through it. Hold it up to a window or light. Does light pass through the stretched dough without the dough tearing first? If so, the dough has been kneaded long enough and is ready to rise. If not, keep kneading until it passes the windowpane test.
- Lightly grease a large bowl with olive oil or nonstick spray. Place the dough in the bowl, turning it to coat all sides in the oil. Cover the bowl with aluminum foil, plastic wrap, or a clean kitchen towel. Allow the dough to rise in a relatively warm environment for 1-2 hours or until double in size. (I always let it rise on the counter. Takes about 2 hours. For a tiny reduction in rise time, see my answer to Where Should Dough Rise? in my Baking with Yeast Guide.).
- When the dough is ready, punch it down to release the air. Lightly flour a work surface, your hands, and a rolling pin. Roll the dough out into a large rectangle, about 8x15 inches. It does not have to be reliable- in fact, it will probably be rounded on the edges. That's ok! Roll it up into an 8 inch log and place in the prepared loaf pan.
- Cover shaped loaf with aluminum foil, plastic wrap, or a clean kitchen towel. Allow to rise until it's about 1-2 inches above the top of the loaf pan, about 1 hour..).
- Adjust oven rack to a lower position and preheat oven to 350°F (177°C). (It's best to bake the bread towards the bottom of the oven so the top doesn't burn.).
- Bake for 35-40 minutes- if you notice the top browning too quickly during bake time, loosely tent the pan with aluminum foil. How to test for doneness- give the loaf a light tap. If it sounds hollow, it's done. For a more accurate test, the bread is done when an instant read thermometer reads the center of the loaf as 195°F-200°F (90°C-93°C).
- Remove from the oven and allow bread to cool for a few minutes before slicing and serving. Feel free to let it cool completely before slicing, too.
- Cover leftover bread tightly and store at room temperature for 2-3 days or in the refrigerator for up to 10 days.
Nutrition Facts
Servings 1
- Amount Per Serving
- Calories 301kcal
- % Daily Value *
- Total Fat 34g53%
- Saturated Fat 21g105%
- Trans Fat 1.4g
- Cholesterol 90mg30%
- Sodium 5mg1%
- Potassium 10mg1%
- Calcium 10 mg
- Iron 0.0 mg
* Percent Daily Values are based on a 2,000 calorie diet. Your daily value may be higher or lower depending on your calorie needs.
Note
Measure first. I set everything out before I start so I am not searching mid-recipe.
Use visual cues. The clock matters, but texture and color tell me when it is really ready.
Cool before storing. Trapped steam makes leftovers soggy, so I wait before covering tightly.
Adjust gently. I change salt, sweetness, or heat in small amounts and taste as I go.
Frequently Asked Questions
Yes. I usually chill it after the first rise or after shaping, depending on the recipe. I keep it covered tightly so the surface does not dry out.
A soft dough is normal, especially with enriched bread. I add flour one teaspoon at a time only if it is impossible to handle.
Yes. It takes more arm work, but I look for the same signs: smoother dough, a little elasticity, and a slow bounce when pressed.
I look for even browning and a set center. For bread, the loaf or roll should feel light for its size and sound slightly hollow.
Yes. I wrap portions tightly once cool, freeze them, and thaw at room temperature or warm gently before serving.
You may also like...